Flutter | 自定义一个 Stepper 步骤组件
起因
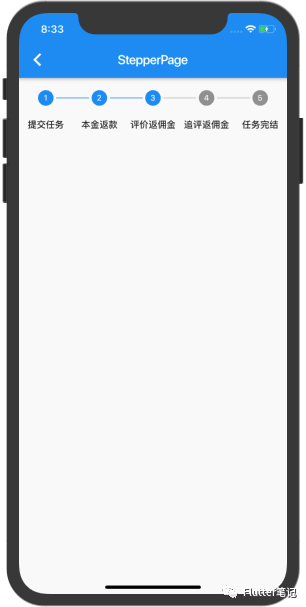
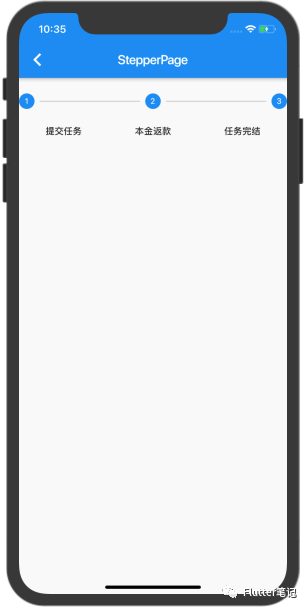
前段时间群里的一个小伙伴问了这样一个 UI:
因为当时了解过 Material 组件库里有一个 Stepper 控件,是类似的效果,我就和他说,可以魔改一下 Stepper,感觉应该不难,然后他回过来了一个这个表情:
emmmm,没自己做过就说简单,确实有点「云程序员」。
那既然如此,没办法,只能把他拎到河边烤了,哦不对,只能自己写一个了。
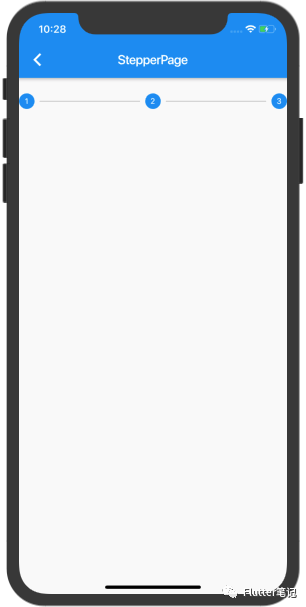
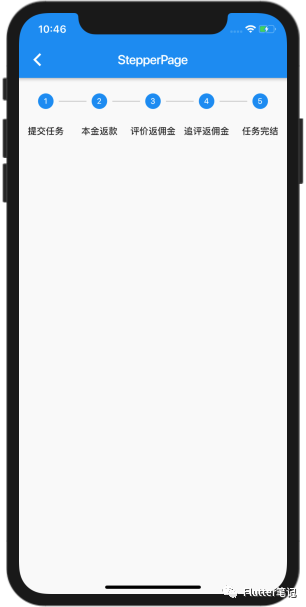
实现效果如下:
经过
那下面就来说说编写该控件的经过,
首先我们应该了解一下原生 Stepper 是个什么样子,并且分析一下源码。
了解原生 Stepper
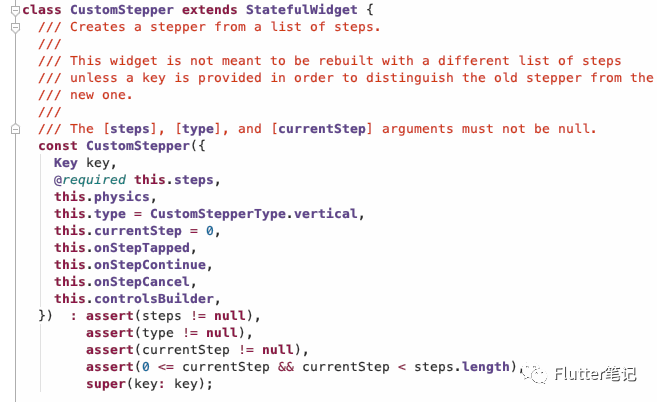
还是老样子,看一下构造方法:
const Stepper({
  Key key,
  @required this.steps,
  this.physics,
  this.type = StepperType.vertical,
  this.currentStep = 0,
  this.onStepTapped,
  this.onStepContinue,
  this.onStepCancel,
  this.controlsBuilder,
}) : assert(steps != null),
assert(type != null),
assert(currentStep != null),
assert(0 <= currentStep && currentStep < steps.length),
super(key: key);
1.steps:类型为 List<Step>,每一步的对象
2.type:默认为竖向排列,我们这里需要改为 StepperType.horizontal 变成横向
3.currentStep:当前到了哪一步
4.controlsBuilder:控制的UI,默认是有「下一步」和 「取消」,我们这里没有用,可以设置为一个空的 Container
剩下没说的就可以见名知意,关于 onStepTapped 这种就是点击的回调,对于我们今天自定义 Stepper 也没用,也就不多说了。
了解了构造方法,我们就可以写一个 Demo 出来看一下:
Widget _buildStepper(){
  return Stepper(
    currentStep: 2,
    type: StepperType.horizontal,
    steps: ['提交任务', '本金返款', '评价返佣金', '追评返佣金', '任务完结']
    .map(
      (s) => Step(title: Text(s), content: Container(), isActive: true),
    )
    .toList(),
    controlsBuilder: (BuildContext context,
                      {VoidCallback onStepContinue, VoidCallback onStepCancel}) {
      return Container();
    },
  );
}
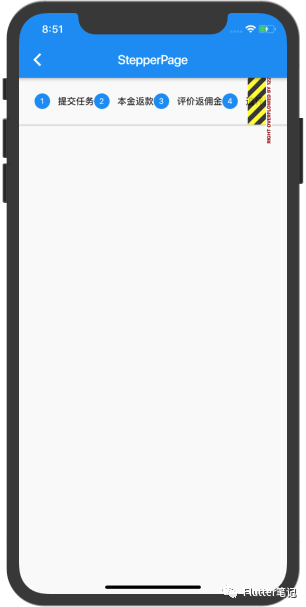
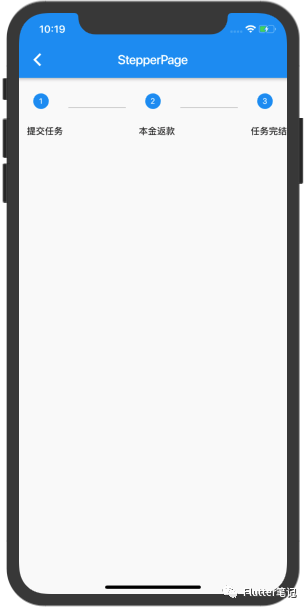
设定 type 为 StepperType.horizontal,看下效果:
23333,还溢出了,不用管,下面来看看源码,该控件是怎么做出来的。
源码分析原生 Stepper
直接点进源码,发现是一个 StatefulWidget,那就话不多说,直接找到相对应 State 里的 build 方法:
@override
Widget build(BuildContext context) {
  // .........
  assert(widget.type != null);
  switch (widget.type) {
    case StepperType.vertical:
      return _buildVertical();
    case StepperType.horizontal:
      return _buildHorizontal();
  }
  return null;
}
前面「一大堆断言」就省略了,可以看到是判断了 type,那我们这里用的是 StepperType.horizontal,就可以直接去看 _buildHorizontal() 方法了。
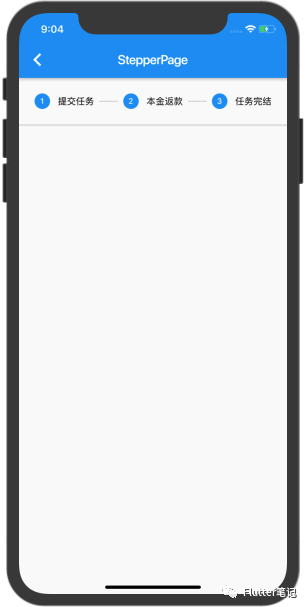
先不看代码,把前面定义 Stepper 的代码改一下,改成三个:
这样代码对照着图片来看,就很容易看得懂。
先看 return 了什么:
return Column(
  children: <Widget>[
    Material(
      elevation: 2.0,
      child: Container(
        margin: const EdgeInsets.symmetric(horizontal: 24.0),
        child: Row(
          children: children,
        ),
      ),
    ),
    Expanded(
      child: ListView(
        padding: const EdgeInsets.all(24.0),
        children: <Widget>[
          AnimatedSize(
            curve: Curves.fastOutSlowIn,
            duration: kThemeAnimationDuration,
            vsync: this,
            child: widget.steps[widget.currentStep].content,
          ),
          _buildVerticalControls(),
        ],
      ),
    ),
  ],
);
返回了一个 Column :
1.上面是一个 Row:这个就是看到的步骤的文字和 icon。
2.下面是一个 ListView:这个是上面说到的 control,在后续我们自定义Stepper 是没用的,不用管。
那我们就主要看一下 children:
final List<Widget> children = <Widget>[];

for (int i = 0; i < widget.steps.length; i += 1) {
  children.add(
    InkResponse(
      onTap: widget.steps[i].state != StepState.disabled ? () {
        if (widget.onStepTapped != null)
          widget.onStepTapped(i);
      } : null,
      child: Row(
        children: <Widget>[
          Container(
            height: 72.0,
            child: Center(
              child: _buildIcon(i),
            ),
          ),
          Container(
            margin: const EdgeInsetsDirectional.only(start: 12.0),
            child: _buildHeaderText(i),
          ),
        ],
      ),
    ),
  );

  if (!_isLast(i)) {
    children.add(
      Expanded(
        child: Container(
          margin: const EdgeInsets.symmetric(horizontal: 8.0),
          height: 1.0,
          color: Colors.grey.shade400,
        ),
      ),
    );
  }
}
也是简单讲一下:
1.循环 widget.steps2.先添加一个 Row,Row 里面是一个 _buildIcon 和一个 _buildHeaderText3.最后判断当前 index 是否是最后一个,如果不是的话加一根横线 Container
这样就组成了我们上面看到的图,这样也就把源码简单的分析了一遍了。
魔改源码达到效果
还是先把改好的效果图放上来,对应着看
1. copy 源码
先把源码 copy 出来,然后换个名字:「CustomStepper」:
2. 去除无用的东西
刚才说 Controls 是没用的,那我们找到他并删掉:
return Column(
  children: <Widget>[
    Material(
      elevation: 2.0,
      child: Container(
        margin: const EdgeInsets.symmetric(horizontal: 24.0),
        child: Row(
          children: children,
        ),
      ),
    ),
    Expanded(
      child: ListView(
        padding: const EdgeInsets.all(24.0),
        children: <Widget>[
          AnimatedSize(
            curve: Curves.fastOutSlowIn,
            duration: kThemeAnimationDuration,
            vsync: this,
            child: widget.steps[widget.currentStep].content,
          ),
          _buildVerticalControls(),
        ],
      ),
    ),
  ],
);
本来是返回一个 Column,上面是我们看到的UI,下面是 Controls ,这里看看都有哪些是无用的:
1.Controls:这个是一点用都没有,并且使用了 Expanded 来占据下面所有的位置,这样的话不仅没用,而且还乱布局
2.一个阴影设置为了 2.0,这个也没什么用
3.通过 Container 设置了边距,这个也没用,一会再说
把他们全部删掉:
return Material(
  child: Row(
    children: children,
  ),
);
3. 把文字放 icon 下面
我们看更改后和更改前的页面,最不舒服的就是文字在 icon 的后面,那先拿他开刀。
上面分析源码的时候看过这样的代码:
Row(
  children: <Widget>[
    Container(
      height: 72.0,
      child: Center(
        child: _buildIcon(i),
      ),
    ),
    Container(
      margin: const EdgeInsetsDirectional.only(start: 12.0),
      child: _buildHeaderText(i),
    ),
  ],
),
从这就能发现 icon 和 text 是连着的,那先把 Row 改成 Column试试,
这里需要注意一点,Column 默认是占据最大空间,所以要设置这个属性:mainAxisSize: MainAxisSize.min,
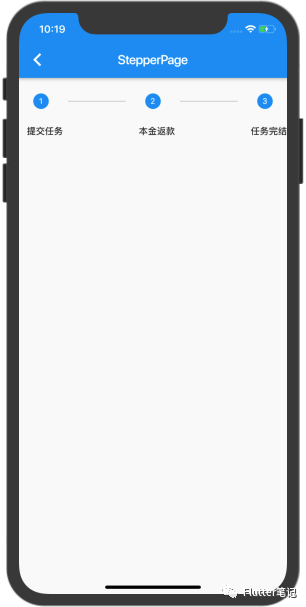
效果如下:
可以发现位置确实是变化了,但是这个线的位置好像不太对,不是在 icon 的中间。
4. 更改线的位置
刚才我们也说了,这个线就是一个 Container,定义如下:
if (!_isLast(i)) {
  children.add(
    Expanded(
      child: Container(
        margin: const EdgeInsets.symmetric(horizontal: 8.0),
        height: 1.0,
        color: Colors.grey.shade400,
      ),
    ),
  );
}
我们想要的效果是线和 icon 的中间对齐,那可以看上面的代码,icon 外面是套了一层 Container,并且设置了 height = 72.0。
那好,我们从这里下手,把线也用 Container 包起来:
if (!_isLast(i)) {
  children.add(
    Expanded(
      child: Container(
        height: 72.0,
        child: Center(
          child: Container(
            margin: const EdgeInsets.symmetric(horizontal: 8.0),
            height: 1.0,
            color: Colors.grey.shade400,
          ),
        ),
      ),
    ),
  );
}
效果如下:
发现效果并没有改,
那是因为 Row 的 crossAxisAlignment 值默认为:CrossAxisAlignment.center,
我们需要把它改为:CrossAxisAlignment.start,
效果如下:
线的位置是正确了,但是和我们的效果图还有差距,
问题就是线和 icon 没有连上。
5. 把线和 icon 连上
我们翻一下刚才的代码,可以简单的发现问题所在:
1.首先 children 添加了一个 Column,Column 里面是 icon 和 text 2.然后添加的线
问题就出在这里,如果 Column 里下面的字越多,那么线就越短,因为是在 Column 后面添加的线,
那就只能先把下面的文字拿掉,让 icon 和 线连起来:
6. 把文字放上去
线和 icon 连起来了,那现在就要把文字放上去,如何平分屏幕:
textChildren.add(Expanded(
  child: Center(
    child: _buildHeaderText(i),
  ),
));
定义一个 textChildren,在循环的时候添加一个 Expanded & Center,这样就保证了平分,并且文字在中间:
7. icon 和文字对齐
文字添加好了之后,就显示出来 icon 的问题,那么如何把 icon 和文字对齐?
首先确定好思路:给第一个 icon 和最后一个 icon 设置边距。
边距的公式为:
屏幕宽度 / steps.length / 2 - icon.width / 2
解释一下就是:
- 用屏幕的宽度 除以 steps 的数量得到等分的宽度,
- 然后用这个宽度除以 2 得到一半的宽度
- 然后用一半的宽度 减去 icon 宽度的一半
这样就得到了应该设置的边距。
公式了解了,下面就该获取值,
屏幕宽度很好获得:MediaQuery.of(context).size.width,
icon 的宽度通过查看源码也能发现:_kStepSize,
那下面就可以写代码了:
Widget child;

if(i == 0){
  child = Container(
    margin: EdgeInsets.only(left: MediaQuery.of(context).size.width / widget.steps.length / 2 - _kStepSize / 2),
    child: _buildIcon(i),
  );
} else if (_isLast(i)){
  child = Container(
    margin: EdgeInsets.only(right: MediaQuery.of(context).size.width / widget.steps.length / 2 - _kStepSize / 2),
    child: _buildIcon(i),
  );
}else{
  child = _buildIcon(i);
}
1.首先判断是不是第一个或者最后一个 2.如果是的话,则分别设置左右边距 3.如果不是,则默认就好
这时候我们再把中间两个步骤加上,效果如下:
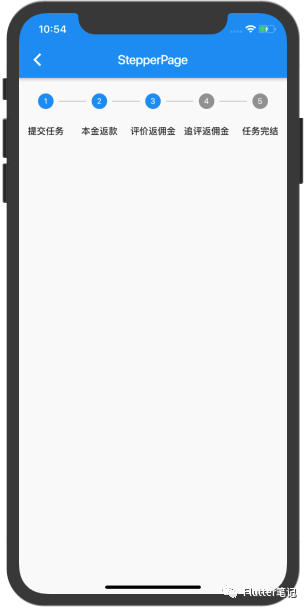
8. 当前步骤的问题
我们使用该控件最主要的点在于可以设置当前是在第几步,
通过 currentStep 来控制,那我们现在无论设置与否都没有效果,这是为何?
通过查找 _buildIcon 的源码,一路追踪,找到如下代码:
Color _circleColor(int index) {
  final ThemeData themeData = Theme.of(context);
  if (!_isDark()) {
    return widget.steps[index].isActive ? themeData.primaryColor : Colors.black38;
  } else {
    return widget.steps[index].isActive ? themeData.accentColor : themeData.backgroundColor;
  }
}
可以看到这里只是判断了 widget.steps[index].isActive,并没有判断 currentStep,
这就很不合理,给他加上:
Color _circleColor(int index) {
  final ThemeData themeData = Theme.of(context);
  if (!_isDark()) {
    return widget.steps[index].isActive && index <= widget.currentStep
      ? themeData.primaryColor
      : Colors.black38;
  } else {
    return widget.steps[index].isActive
      ? themeData.accentColor
      : themeData.backgroundColor;
  }
}
判断了一下当前的 index 是否小于等于 widget.currentStep,效果如下:
icon的颜色没问题了,线的颜色还有问题,
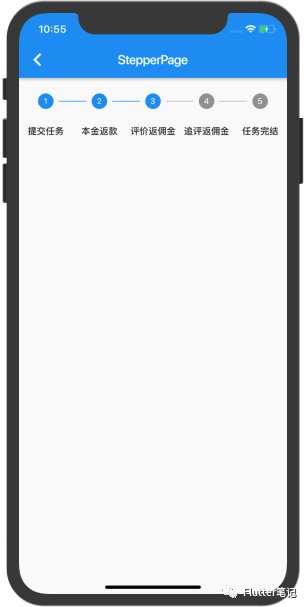
同样的解决方案,判断一下 index,最终效果如下:
总结
其实看文章写了这么多,但是只要思路清晰,简单魔改一下源码就可以轻松达到我们想要的效果,
不得不说:魔改一时爽,一直魔改一直爽!
这个效果从头到实现也就一个小时的时间,
这一个小时不光了解了该控件是如何实现的,还认识了很多其他的控件。

