Flutter 源码系列:DropdownButton 源码浅析
作为源码浅析系列的文章,我想说一下:
我发现很多人对于各种 widget 的使用不是很理解,经常会在群里问一些比较简单的问题,例如 TextField 如何监听确认按钮。
而关于Flutter 中控件的使用及实现方式,其实只要耐下心来好好的看一下它的构造函数和源码,都能看得懂。
而且我打算这个系列也不会讲的很深,也就是围绕这两点:1、构造函数 2、实现方式。
DropdownButton 构造函数及简单使用
其实关于 DropdownButton 的构造函数和简单使用我在上一篇文章中已经有过讲解,
如有不懂怎么用的,可以看这篇文章:Flutter DropdownButton简单使用及魔改源码。
下面重点说一下 DropdownButton 是如何实现的。
DropdownButton 的实现
我们需要带着如下几个问题去看源码:
1.DropdownButton 是用什么来实现的? 2.在点击 DropdownButton 的时候发生了什么? 3.为什么每次弹出的位置都是我上次选择item的位置?
带着如上问题,我们开始。
DropdownButton 是用什么实现的?
我们在上一篇文章中已经了解到,DropdownButton 是一个 statefulWidget,那我们想要了解他是如何实现的,就直接跳转到他的 _DropdownButtonState 类中。
二话不说,直接找到 build(BuildContext context) 方法。
Return 了什么
先看看 return 了个什么:
return Semantics(
  button: true,
  child: GestureDetector(
    onTap: _enabled ? _handleTap : null,
    behavior: HitTestBehavior.opaque,
    child: result,
  ),
);
可以看到返回了一个 Semantics,这个控件简单来说就是用于视障人士的,对于我们正常APP来说可用可不用,如果是特殊的APP,那么建议使用。
然后下面 child 返回了一个手势:
1.onTap:判断是否可用,如果可用则走 handleTap 方法,如果不可用就算了。
2.behavior:设置在命中的时候如何工作:HitTestBehavior.opaque 为不透明的可以被选中
3.child:返回了 result
Result 是什么
不看点击方法,先来找到 result:
Widget result = DefaultTextStyle(
  style: _textStyle,
  child: Container(
    padding: padding.resolve(Directionality.of(context)),
    height: widget.isDense ? _denseButtonHeight : null,
    child: Row(
      mainAxisAlignment: MainAxisAlignment.spaceBetween,
      mainAxisSize: MainAxisSize.min,
      children: <Widget>[
        widget.isExpanded ? Expanded(child: innerItemsWidget) : innerItemsWidget,
        IconTheme(
          data: IconThemeData(
            color: _iconColor,
            size: widget.iconSize,
          ),
          child: widget.icon ?? defaultIcon,
        ),
      ],
    ),
  ),
);
我们可以看到,其实result 最终是一个 Row,里面一共有两个 widget:
1.innerItemsWidget 2.Icon
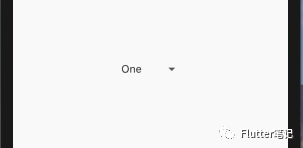
样子如下:
其中 One 就是 innerItemsWidget ,箭头就是 Icon。
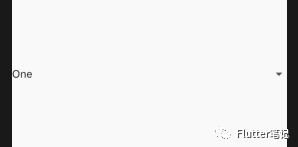
而且 innerItemsWidget 判断了是否是展开状态,如果是展开状态则套一个 Expanded 来水平填充父级。
innerItemsWidget 是什么
接着往上面找:
// 如果值为空(则_selectedindex为空),或者如果禁用,则显示提示或完全不显示。
final int index = _enabled ? (_selectedIndex ?? hintIndex) : hintIndex;
Widget innerItemsWidget;
if (items.isEmpty) {
  innerItemsWidget = Container();
} else {
  innerItemsWidget = IndexedStack(
    index: index,
    alignment: AlignmentDirectional.centerStart,
    children: items,
  );
}
从这我们可以看得出来,innerItemsWidget 是一个 IndexedStack,
它把所有的 item 都罗列到了一起,用 index 来控制展示哪一个。
那看到这我们也就明白了,其实 DropdownButton 就是一个 IndexedStack。
那这样来说,主要的逻辑应该在点击事件里。
在点击 DropdownButton 的时候发生了什么?
上面我们在 return 的时候看到了,在 onTap 的时候调用的是 _handleTap() 方法。
那我们直接来看一下:
void _handleTap() {
  final RenderBox itemBox = context.findRenderObject();
  final Rect itemRect = itemBox.localToGlobal(Offset.zero) & itemBox.size;
  final TextDirection textDirection = Directionality.of(context);
  final EdgeInsetsGeometry menuMargin = ButtonTheme.of(context).alignedDropdown
    ?_kAlignedMenuMargin
    : _kUnalignedMenuMargin;

  assert(_dropdownRoute == null);
  _dropdownRoute = _DropdownRoute<T>(
    items: widget.items,
    buttonRect: menuMargin.resolve(textDirection).inflateRect(itemRect),
    padding: _kMenuItemPadding.resolve(textDirection),
    selectedIndex: 0,
    elevation: widget.elevation,
    theme: Theme.of(context, shadowThemeOnly: true),
    style: _textStyle,
    barrierLabel: MaterialLocalizations.of(context).modalBarrierDismissLabel,
  );

  Navigator.push(context, _dropdownRoute).then<void>((_DropdownRouteResult<T> newValue) {
    _dropdownRoute = null;
    if (!mounted || newValue == null)
      return;
    if (widget.onChanged != null)
      widget.onChanged(newValue.result);
  });
}
首先上面定义了几个 final 的变量,这些变量就是一些参数,见名知意。
后面重点来了:
1.首先定义了一个 _DropdownRoute
2.然后跳转该 route,并且在返回的时候把该 route 置空。
_DropdownRoute
首先我们来看一下 _DropdownRoute,上篇文章魔改代码的时候也已经说过,
_DropdownRoute 继承自 PopupRoute,是一个浮在当前页面上的 route。
然后我们找到他 buildPage 方法:
@override
Widget buildPage(BuildContext context, Animation<double> animation, Animation<double> secondaryAnimation) {
  return LayoutBuilder(
    builder: (BuildContext context, BoxConstraints constraints) {
      return _DropdownRoutePage<T>(
        route: this,
        constraints: constraints,
        items: items,
        padding: padding,
        buttonRect: buttonRect,
        selectedIndex: selectedIndex,
        elevation: elevation,
        theme: theme,
        style: style,
      );
    }
  );
}
可以看到这里是返回了一个 LayoutBuilder。
LayoutBuilder 最有用的是他可以知道该父级的大小和约束,通过该约束我们就可以做一些操作。
并且我们也看到确实是给 _DropdownRoutePage 传入了 constraints .
_DropdownRoutePage
如上,_DropdownRoute 返回了 _DropdownRoutePage,那下面就来看一下它,
_DropdownRoutePage 是一个无状态的小部件,我们也是直接来看一下 build 方法的 return:
return MediaQuery.removePadding(
  context: context,
  removeTop: true,
  removeBottom: true,
  removeLeft: true,
  removeRight: true,
  child: Builder(
    builder: (BuildContext context) {
      return CustomSingleChildLayout(
        delegate: _DropdownMenuRouteLayout<T>(
          buttonRect: buttonRect,
          menuTop: menuTop,
          menuHeight: menuHeight,
          textDirection: textDirection,
        ),
        child: menu,
      );
    },
  ),
);
首先 MediaQuery.removePadding 是创建一个给定的 context 的 MediaQuery,但是删除了 padding。最后通过 CustomSingleChildLayout 返回了 menu。
其中 delegate 为自定义的 _DropdownMenuRouteLayout,这里主要是给定一些约束和控制了位置,这里不在本节内容当中,所以不过多的讲解。
到这里点击的逻辑就结束了,主要就是弹出了一个 PopupRoute。
为什么每次弹出的位置都是我上次选择item的位置?
上面可以看到在点击的时候跳转到了 _DropdownRoute,而 _DropdownRoute 最终返回了一个 _DropdownMenu。
_DropdownMenu
_DropdownMenu 是一个有状态的小部件,那我们直接看它的 _State.
还是找到 build 方法,看一下都返回了什么:
return FadeTransition(
  opacity: _fadeOpacity,
  child: CustomPaint(
    painter: _DropdownMenuPainter(
      color: Theme.of(context).canvasColor,
      elevation: route.elevation,
      selectedIndex: route.selectedIndex,
      resize: _resize,
    ),
    child: Semantics(
      scopesRoute: true,
      namesRoute: true,
      explicitChildNodes: true,
      label: localizations.popupMenuLabel,
      child: Material(
        type: MaterialType.transparency,
        textStyle: route.style,
        child: ScrollConfiguration(
          behavior: const _DropdownScrollBehavior(),
          child: Scrollbar(
            child: ListView(
              controller: widget.route.scrollController,
              padding: kMaterialListPadding,
              itemExtent: _kMenuItemHeight,
              shrinkWrap: true,
              children: children,
            ),
          ),
        ),
      ),
    ),
  ),
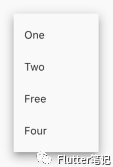
);首先是返回了一个自定义组件,自定义组件里的逻辑是:根据当前选中的 index 来画展开的方框:
就是外面带阴影的那个框。
代码如下:
@override
void paint(Canvas canvas, Size size) {
  final double selectedItemOffset = selectedIndex * _kMenuItemHeight + kMaterialListPadding.top;
  final Tween<double> top = Tween<double>(
    begin: selectedItemOffset.clamp(0.0, size.height - _kMenuItemHeight),
    end: 0.0,
  );

  final Tween<double> bottom = Tween<double>(
    begin: (top.begin + _kMenuItemHeight).clamp(_kMenuItemHeight, size.height),
    end: size.height,
  );

  final Rect rect = Rect.fromLTRB(0.0, top.evaluate(resize), size.width, bottom.evaluate(resize));

  _painter.paint(canvas, rect.topLeft, ImageConfiguration(size: rect.size));
}
这里就不多说,有兴趣的可以自行看一下。
然后最终返回了一个 ListView,我们可以去看一下这个 children:
final List<Widget> children = <Widget>[];
for (int itemIndex = 0; itemIndex < route.items.length; ++itemIndex) {
  CurvedAnimation opacity;
  if (itemIndex == route.selectedIndex) {
    opacity = CurvedAnimation(parent: route.animation, curve: const Threshold(0.0));
  } else {
    final double start = (0.5 + (itemIndex + 1) * unit).clamp(0.0, 1.0);
    final double end = (start + 1.5 * unit).clamp(0.0, 1.0);
    opacity = CurvedAnimation(parent: route.animation, curve: Interval(start, end));
  }
  children.add(FadeTransition(
    opacity: opacity,
    child: InkWell(
      child: Container(
        padding: widget.padding,
        child: route.items[itemIndex],
      ),
      onTap: () => Navigator.pop(
        context,
        _DropdownRouteResult<T>(route.items[itemIndex].value),
      ),
    ),
  ));
}
children 当中最主要的逻辑有三个:
1.如果是已经选中的index,则不显示透明动画
2.如果不是选中的 index,则根据 index 来控制透明动画延时时间,来达到效果
3.点击时用 Navigator.pop 来返回选中的值
到这里我们就把 material/dropdown.dart 中所有的代码看了一遍。
总结
把源码看完,我们可以来进行总结一下:
1.未展开的 DropdownButton 是一个 IndexStack 2.展开的 DropdownButton 是通过 PopupRoute 浮在当前页上面的 ListView 3.展开时通过计算当前选中的 index 来进行绘制背景,以达到效果
通过查看源码,我们是不是可以进行举一反三:
1.是否可以使用 PopupRoute 来实现一些功能? 2.是否可以使用 IndexStack 来实现一些功能? 3.是否学会了一点自定义 widget 的知识?
其实个人认为,查看源码,不仅仅可以学到当前组件是如何实现的,
而且在查看源码的过程中,会遇到非常多的问题,这些问题都会促使我们去查文档,查资料,
这难道不也是一个学习的过程么。


