手摸手Electron + Vue实战教程(二)
1 Electron升级
2020年5月19号,Electron更新了最新的 9.0.0 版本,带来了诸多改进,具体的我就不在此赘述了,大家可以看一下官方介绍:https://github.com/electron/electron/blob/master/docs/breaking-changes.md
好了,我们现在就把上节课初始化好的项目升级到Electron9.0.0,只要简单的两步:
1、命令行直接执行重新安装yarn add electron即可升级到最新版本Electron;
2、删除src目录中background.js文件内的代码app.allowRendererProcessReuse = true,这行代码其实就是我们上节课添加的,9.0 的版本已经设置为默认值了,所以此处我们就不需要了。
2 项目介绍
估计大家看到这里都已经忍不住了:你BB了那么久,你到底是要搞啥子项目呀……
咳咳,我的锅我的锅,一开始就应该介绍一下先的了,拖到了现在……这实战教程其实并不是什么高难度的项目,就是仿有道云笔记,没错又是仿某某某的套路。。当然,鉴于时间的问题,我应该不会全仿下来,只挑选 Markdown 的文件编写部分。在此,我有个小小的建议:「不要为了仿而仿,而是为了如何在一个项目中把你所学会的知识技能点糅合在一起,融会贯通举一反三,这才是我们的最终目的」
3 工欲善其事必先利其器
在开始正式写代码之前,有必要先安利一下前端最好的编辑器之一Visual Studio Code,当然,这是个仁者见仁智者见智的问题,最适合你的才是最好的!如果你选择不使用这个编辑器,那么你可以直接跳过这一小节了。 必装插件ESLint和Prettier - Code formatter,推荐一下我常用的代码风格和eslint设置,在项目根目录下分别新建三个文件.editorconfig、.eslintrc.js、.prettierrc.js,如下图所示: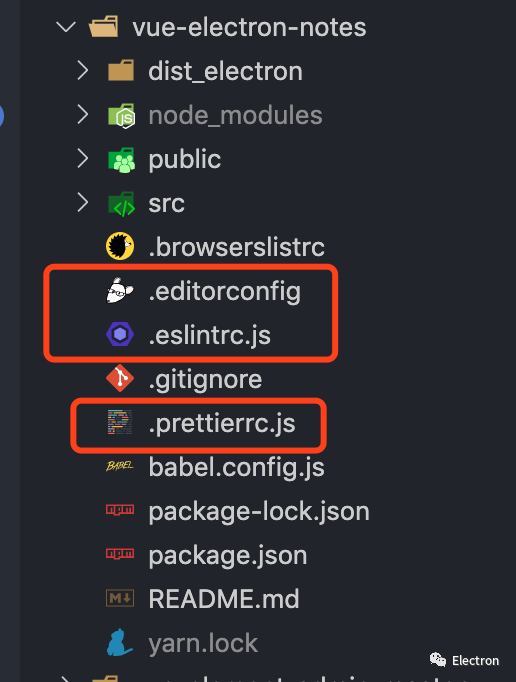
# 这是 .editorconfig 文件内容

[*.{js,jsx,ts,tsx,vue}]
indent_style = space
indent_size = 2
end_of_line = lf
trim_trailing_whitespace = true
insert_final_newline = true
max_line_length = 120
// 这是 .eslintrc.js 文件内容
module.exports = {
root: true,
env: {
node: true
},
extends: ['plugin:vue/essential', '@vue/airbnb'],
parserOptions: {
parser: 'babel-eslint'
},
rules: {
'no-console': 0,
'no-debugger': 0,
semi: ['error', 'never'], // 禁用 分号
'no-multiple-empty-lines': ['error'], // 代码空行 数量
'linebreak-style': [0, 'error', 'windows'], // 使用windows的换行
'comma-dangle': [2, 'never'], // 对象数组最后一个不带逗号
'no-trailing-spaces': 0, // 禁用 校验代码末尾带空格
'import/no-dynamic-require': 0, // 禁用 动态require
'import/no-unresolved': 0,
'no-param-reassign': 0, // 声明为函数参数的变量可能会引起误解
'max-len': ['error', 120], // 单行代码最大长度
'guard-for-in': 0, // 禁用 禁用for in 循环
'no-shadow': 0, // 禁用 禁止页面内相容参数名
'object-shorthand': 0, // 禁用 禁止对象内使用带引号字符串
'no-restricted-syntax': 0,
'no-plusplus': 0, // 禁用 ++
'consistent-return': 0, // 关闭箭头函数必须要return
'no-return-assign': 0, // return 语句中不能有赋值表达式
'global-require': 0, // 关闭禁止使用requrie
'prefer-promise-reject-errors': 0, // 这条规则旨在确保承诺只被Error对象拒绝。
'import/extensions': 'off', // 禁用文件名详细文件类型后缀
'import/no-extraneous-dependencies': ['error', { devDependencies: true }],
'arrow-parens': ['error', 'as-needed'], // 箭头函数参数括号,可选 always:(默认)在所有情况下都需要参数;as-needed:当只有一个参数时允许省略参数
'no-undef': 0, // 关闭显式声明全局变量的要求
'class-methods-use-this': 0,
'no-underscore-dangle': ['error', { allow: ['_id'] }], // 允许指定的标识符具有悬挂下划线
camelcase: 0, // 关闭使用骆驼拼写法
'no-global-assign': 0, // 允许修改只读全局变量,
'space-before-function-paren': [
'error',
{
anonymous: 'never',
named: 'never',
asyncArrow: 'always'
}
],
// 对象解构不需要换行
'object-curly-newline': [
'error',
{
ObjectPattern: {
multiline: true
}
}
],
'no-unused-expressions': ['error', { allowShortCircuit: true, allowTernary: true }] // 允许在表达式中使用三元运算符,类似于短路评估
}
}
// 这是 .prettierrc.js 文件内容
module.exports = {
  semi: false, // 去掉分号
  singleQuote: true, // 使用单引号
  printWidth: 120, // 单行代码最大长度
  trailingComma: 'none' // 去掉结尾逗号(对象,数组等)
}
搞定!现在我们可以愉快的撸码了……
4 左侧面板开发
有道云笔记截图
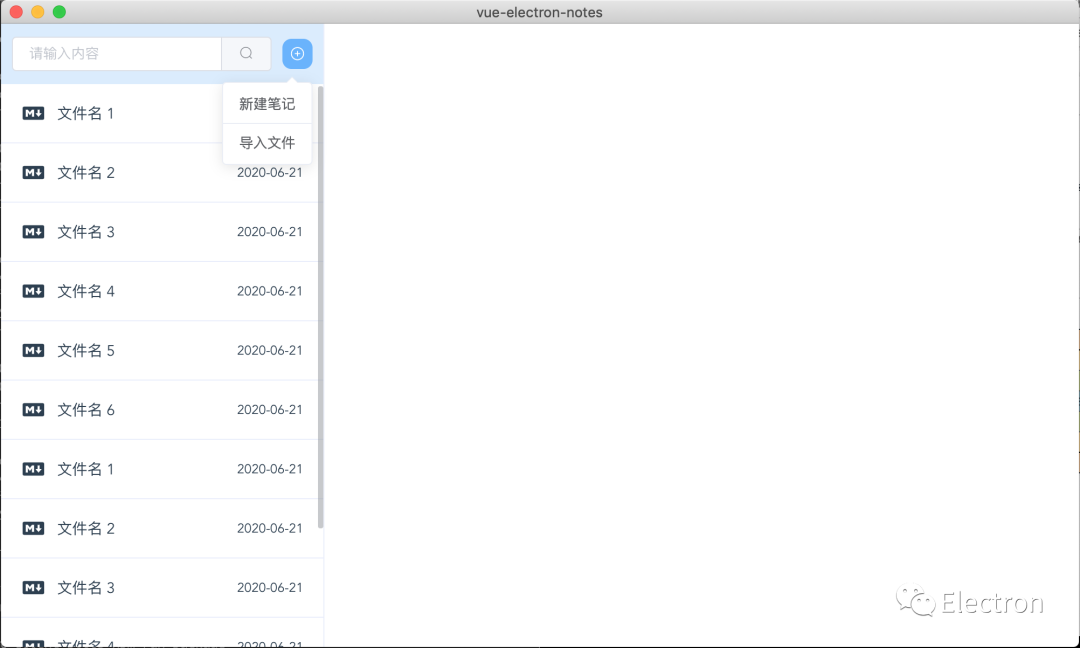
可以看到,左侧面板就是一个文件列表,我们这里不仅需要做出图片中的列表,还要在列表顶部添加搜索栏,便于我们方便快捷搜索列表笔记。当前,还需要有新增笔记和导入笔记的功能,先看一下我们这一节的成品图:
4.1 整体布局
我们先删除项目中的多余页面与组件: vue-electron-notes/src/components/HelloWorld.vue vue-electron-notes/src/views/About.vue 删减后的路由文件:
import Vue from 'vue'
import VueRouter from 'vue-router'

Vue.use(VueRouter)

const routes = [
  {
    path: '/',
    name: 'Home',
    component: () => import('@/views/Home')
  }
]

const router = new VueRouter({
  mode: 'history',
  base: process.env.BASE_URL,
  routes
})

export default router删减后的App.vue文件:
<template>
  <div id="app">
    <router-view />
  </div>
</template>

<style lang="less">
* {
  margin: 0;
  padding: 0;
  outline: none;
  box-sizing: border-box;
}
#app {
  font-family: Avenir, Helvetica, Arial, sans-serif;
  -webkit-font-smoothing: antialiased;
  -moz-osx-font-smoothing: grayscale;
  color: #2c3e50;
}
</style>
这里为了方便快捷,就简单粗暴地使用了 css 通配符 *,但是建议大家在实际项目中不要这么干,懂的自然懂……
我们继续修改view目录下的Home.vue文件,使用flex布局设置为最常见的两栏布局(flex的爽我就不多说了,更何况我们这里不需要考虑什么 css 兼容性),左侧面板固定宽度,右侧内容编辑区自适应:
<template>
  <div class="app-wrapper">
    <div class="sidebar-container"></div>
    <div class="main-container"></div>
  </div>
</template>

<script>
export default {
  name: 'Home'
}
</script>

<style lang="less" scoped>
.app-wrapper {
  display: flex;
  .sidebar-container {
    width: 300px;
    height: 100vh;
    border-right: 1px solid #eaeefb;
  }
  .main-container {
    flex: 1;
  }
}
</style>
4.2 引入element-ui和fontawesome图标库
在src目录中创建文件夹plugin,我们以后所有引入的外部框架与插件全部都放在这里。我们使用命令行yarn add element-ui安装element-ui,接着在plugin文件中新建文件element-ui.js:
/*
 * @Description: 引入 element-ui 框架
 * @Author: sufen
 * @Date: 2020-05-21 09:58:49
 * @LastEditTime: 2020-05-21 09:59:20
 * @LastEditors: sufen
 */
import Vue from 'vue'
import ElementUI from 'element-ui'
import 'element-ui/lib/theme-chalk/index.css'

Vue.use(ElementUI, { size: 'small' })
继续安装fontawesome图标库,先安装所有的图标依赖,后续再按需引入我们所需要的图标。
MacBook-Pro:vue-electron-notes Bill$ yarn add @fortawesome/vue-fontawesome @fortawesome/free-solid-svg-icons @fortawesome/fontawesome-svg-core @fortawesome/free-brands-svg-icons @fortawesome/free-regular-svg-icons接着在plugin文件中新建文件fortawesome.js,里面的faMarkdown、faUserSecret就是我们按需引入的图标,后续如果我们需要新的图标就在这里新增就完事了:
/*
 * @Description: fortawesome 图标库
 * @Author: sufen
 * @Date: 2020-05-21 09:55:29
 * @LastEditTime: 2020-05-21 10:06:46
 * @LastEditors: sufen
 */
import Vue from 'vue'
import { library } from '@fortawesome/fontawesome-svg-core'
import { faUserSecret } from '@fortawesome/free-solid-svg-icons'
import { faMarkdown } from '@fortawesome/free-brands-svg-icons'
// import { faUserSecret } from '@fortawesome/free-regular-svg-icons'
import { FontAwesomeIcon } from '@fortawesome/vue-fontawesome'

library.add(faUserSecret, faMarkdown)

Vue.component('font-awesome-icon', FontAwesomeIcon)搞完上面两个还没完呢,最后我们需要在main.js文件中引入:
import Vue from 'vue'
import App from './App.vue'
import router from './router'
import store from './store'
import '@/plugin/element-ui'
import '@/plugin/fortawesome'

Vue.config.productionTip = false

new Vue({
  router,
  store,
  render: h => h(App)
}).$mount('#app')至此,我们就已经完成了element-ui和fortawesome的引入了,可以愉快的在项目内使用咯,不信你试试看
4.2 FileSearch 搜索组件
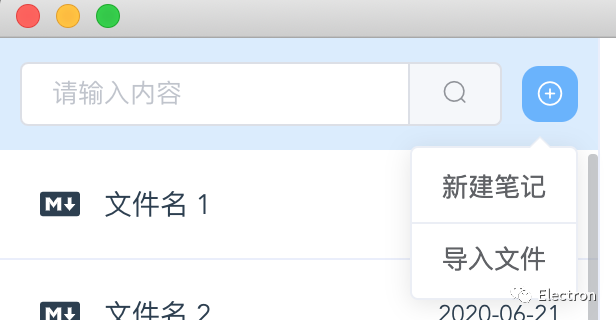
FileSearch组件,这个组件主要由一个输入框和下拉菜单组成,这两个我们都可以直接使用 element 的组件,需要注意的是,我们这里使用到了Vue v2.4中新增的$attrs及$listeners属性。
❝attrs:包含了父作用域中不被认为 (且不预期为) props 的特性绑定 (class 和 style 除外)。当一个组件没有声明任何 props 时,这里会包含所有父作用域的绑定 (class 和 style 除外),并且可以通过 v-bind=”$attrs” 传入内部组件——在创建更高层次的组件时非常有用。
❞
❝listeners:包含了父作用域中的 (不含 .native 修饰器的) v-on 事件监听器。它可以通过 v-on=”$listeners” 传入内部组件——在创建更高层次的组件时非常有用。
❞
在我们编写 vue 高阶组件中,这两个属性简直就是神器,简直不要太爽!!!
FileSearch组件调用时直接使用v-model绑定需要搜索的内容,新建文件与导入文件则通过$emit调用自定义事件,这些都是属于vue基础知识,在这里就不多说了。 看一下我们已经完成好的FileSearch组件源码:
<!--
 * @Description: 左侧文件搜索组件
 * @Author: sufen
 * @Date: 2020-05-20 16:08:49
 * @LastEditTime: 2020-05-21 10:36:49
 * @LastEditors: sufen
 -->
<template>
  <div class="search-container">
    <el-input placeholder="请输入内容" v-bind="$attrs" v-on="$listeners">
      <el-button slot="append" icon="el-icon-search" />
    </el-input>
    <el-dropdown>
      <el-button type="primary" icon="el-icon-circle-plus-outline" circle />
      <el-dropdown-menu slot="dropdown">
        <el-dropdown-item @click="createFile()">新建笔记</el-dropdown-item>
        <el-dropdown-item divided @click="importFile()">导入文件</el-dropdown-item>
      </el-dropdown-menu>
    </el-dropdown>
  </div>
</template>

<script>
export default {
  name: 'FileSearch',
  methods: {
    // 新建笔记
    createFile() {
      this.$emit('create')
    },
    // 导入文件
    importFile() {
      this.$emit('import')
    }
  }
}
</script>

<style lang="less" scoped>
.search-container {
  display: flex;
  align-items: center;
  padding: 12px 10px;
  background: #daecfe;

  .el-dropdown {
    .el-button--small {
      margin-left: 10px;
      padding: 6px;
      font-size: 14px;
      border-radius: 30%;
    }
  }
}
</style>
4.3 FileList 文件列表组件
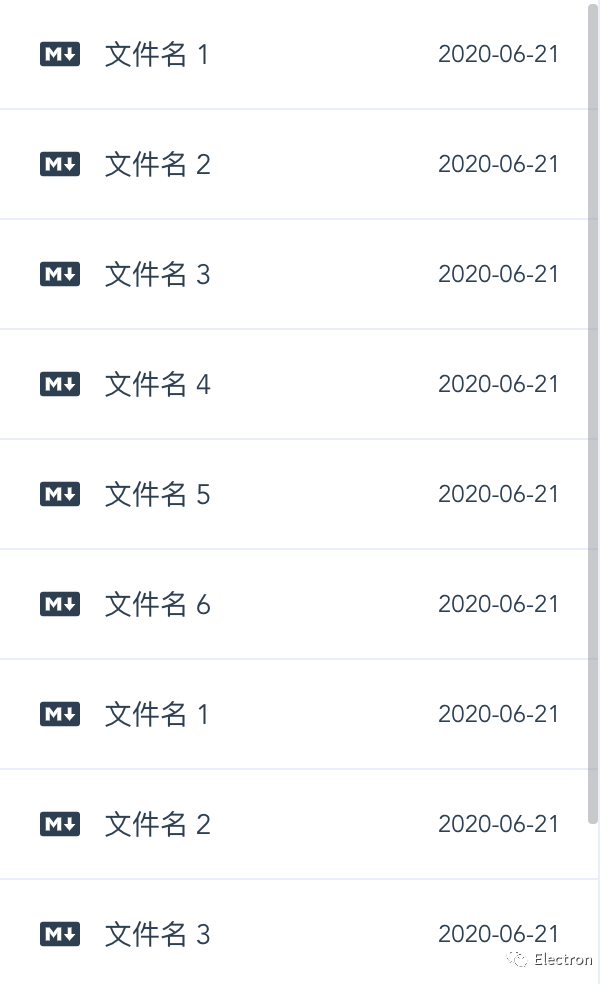
FileList组件,我们这一节主要就是完成这么一个列表,至于后面使用到的右键菜单等等,到我们后续使用到了再说,路要一步步走。
可以看到,我们这个组件props接收一个fileList数组,然后通过v-for直接渲染后搞定了。每一个li都使用flex布局,li包含了我们的文件标题和文件的最后修改时间,不得不说flex真的是布局神器,一直用一直爽!图标当然就使用我们前面所引入的fortawesome图标库了,我们前面具体的图标引入代码为:
import { faMarkdown } from '@fortawesome/free-brands-svg-icons'
library.add(faMarkdown)接着我们直接在FileList组件中使用fortawesome组件,markdown 图标就已经展示出来了,后面稍微修改样式调节一下间距就能很完美了:
<font-awesome-icon :icon="['fab', 'markdown']" />如果仅仅到这里就结束了,那么这个组件确实也太没技术含量了吧。
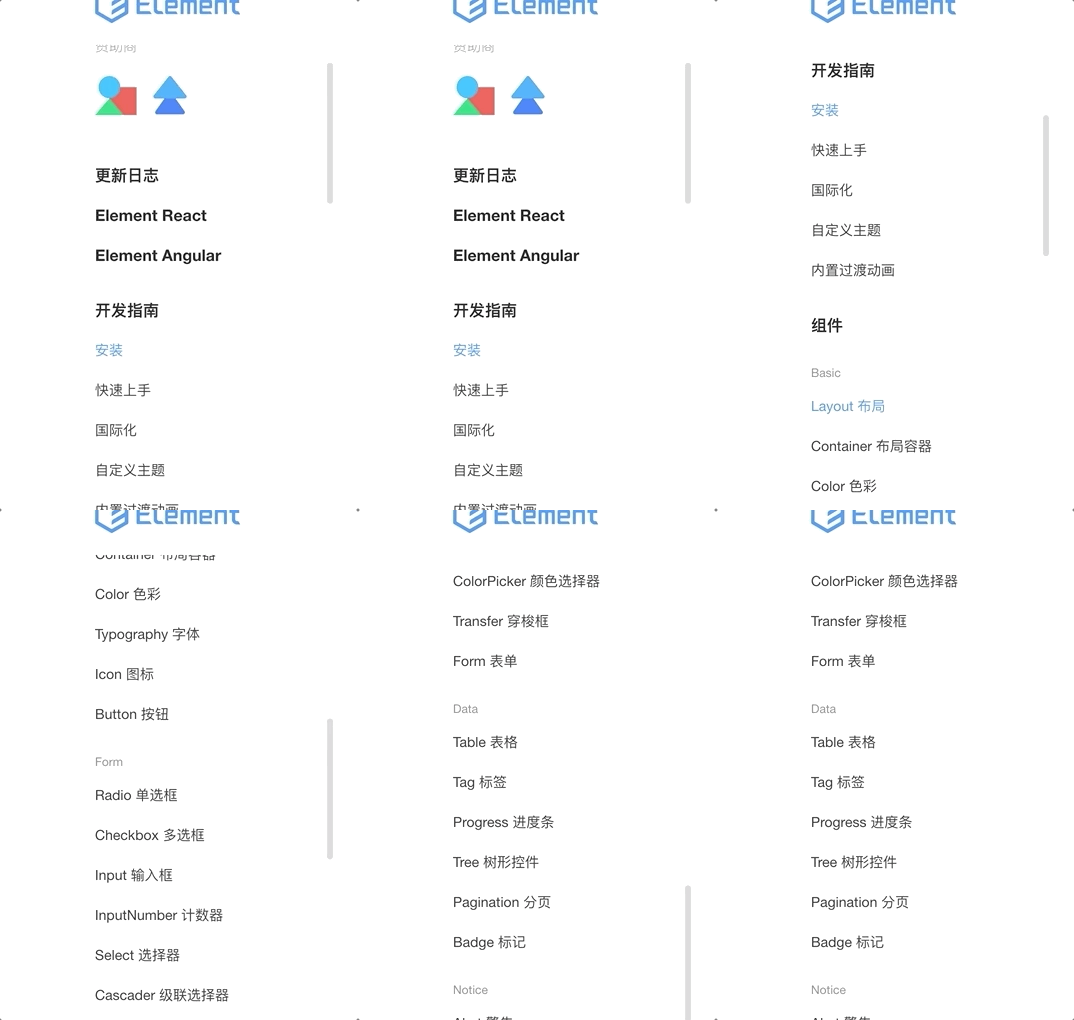
随着我们的文件越来越多,列表的长度会越来越长,那么就必然会出现滚动条,作为一个有追求的程序猿,浏览器原生的滚动条我是肯定无法接受的,简直丑爆了一点也不优雅好不好……为了既可以解决这个问题而又不用自己造轮子,我选用了element-ui的隐藏组件el-scrollbar,看一下官方文档的使用效果:
虽然在官方文档中没有给出这个组件,但是在源码中是有的。所以我们可以直接使用:
<el-scrollbar></el-scrollbar>这个组件的使用还是些坑需要注意的,大家可以参考这篇文章所写,里面已经是写得很清晰明了了,我就不在此重复啰嗦了。
看看我们最后完整的组件代码:
<!--
 * @Description: 左侧文件列表组件
 * @Author: sufen
 * @Date: 2020-05-20 16:18:34
 * @LastEditTime: 2020-05-21 10:37:18
 * @LastEditors: sufen
 -->
<template>
  <el-scrollbar class="file-list" wrap-class="scrollbar-filelist" :noresize="false" tag="ul">
    <li v-for="(item, index) in fileList" :key="index" class="file-item">
      <font-awesome-icon :icon="['fab', 'markdown']" class="item-icon" />
      <p class="item-title">{{ item.title }}</p>
      <p class="item-time">{{ item.time }}</p>
    </li>
  </el-scrollbar>
</template>

<script>
export default {
  name: 'FileList',
  props: {
    fileList: {
      type: Array,
      default: () => []
    }
  },
  data() {
    return {}
  }
}
</script>

<style lang="less" scoped>
.file-list {
  user-select: none;
  .file-item {
    display: flex;
    align-items: center;
    height: 55px;
    border-bottom: 1px solid #eaeefb;

    .item-icon {
      margin-left: 20px;
      margin-right: 12px;
    }

    .item-title {
      flex: 1;
      margin-right: 5px;
      font-size: 14px;
      text-overflow: ellipsis;
      white-space: nowrap;
      overflow: hidden;
    }
    .item-time {
      width: 80px;
      font-size: 12px;
    }
  }
}
</style>
<style lang="less">
.scrollbar-filelist {
  height: calc(100vh - 56px);
  overflow-x: hidden !important;
}
.el-scrollbar__bar {
  opacity: 1;

  &.is-vertical {
    right: 0px;
    width: 5px;
    .el-scrollbar__thumb {
      background-color: rgba(144, 147, 153, 0.5);
    }
  }
}
</style>
4.4 组件引入
上面已经完成了左侧面板所需的两个组件,是时候在主页面引入看看最后的效果了,在view目录的中的Home.vue主页文件中编写:
<template>
  <div class="app-wrapper">
    <div class="sidebar-container">
      <file-search v-model="searchTitle" />
      <file-list :fileList="fileList" />
    </div>
    <div class="main-container"></div>
  </div>
</template>

<script>
import FileSearch from '@/components/FileSearch'
import FileList from '@/components/FileList'

export default {
  name: 'Home',
  components: { FileSearch, FileList },
  data() {
    return {
      searchTitle: '',
      fileList: [
        { id: 1, title: '文件名 1', time: '2020-06-21' },
        { id: 2, title: '文件名 2', time: '2020-06-21' },
        { id: 3, title: '文件名 3', time: '2020-06-21' },
        { id: 4, title: '文件名 4', time: '2020-06-21' },
        { id: 5, title: '文件名 5', time: '2020-06-21' },
        { id: 6, title: '文件名 6', time: '2020-06-21' },
        { id: 1, title: '文件名 1', time: '2020-06-21' },
        { id: 2, title: '文件名 2', time: '2020-06-21' },
        { id: 3, title: '文件名 3', time: '2020-06-21' },
        { id: 4, title: '文件名 4', time: '2020-06-21' },
        { id: 5, title: '文件名 5', time: '2020-06-21' },
        { id: 6, title: '文件名 6', time: '2020-06-21' }
      ]
    }
  }
}
</script>

<style lang="less" scoped>
.app-wrapper {
  display: flex;
  .sidebar-container {
    width: 300px;
    height: 100vh;
    border-right: 1px solid #eaeefb;
  }
  .main-container {
    flex: 1;
  }
}
</style>
列出最后的文件树:
├── public
│   ├── favicon.ico
│   └── index.html
├── src
│   ├── assets
│   │   └── logo.png
│   ├── components
│   │   ├── FileList
│   │   │   └── index.vue
│   │   └── FileSearch
│   │       └── index.vue
│   ├── plugin
│   │   ├── element-ui.js
│   │   └── fortawesome.js
│   ├── router
│   │   └── index.js
│   ├── store
│   │   └── index.js
│   ├── views
│   │   └── Home.vue
│   ├── App.vue
│   ├── background.js
│   └── main.js
├── .editorconfig
├── .eslintrc.js
├── .gitignore
├── .prettierrc.js
├── README.md
├── babel.config.js
└── package.json
搞定!这就是我们左侧面板的最后效果图:

