canvas 实现鱿鱼游戏——木头人
123木头人游戏
游戏的在线体验地址:123木头人游戏(打开音频效果更佳)
http://gcdncs.101.com/v0.1/static/web3d/test/game.html?v=7
游戏功能
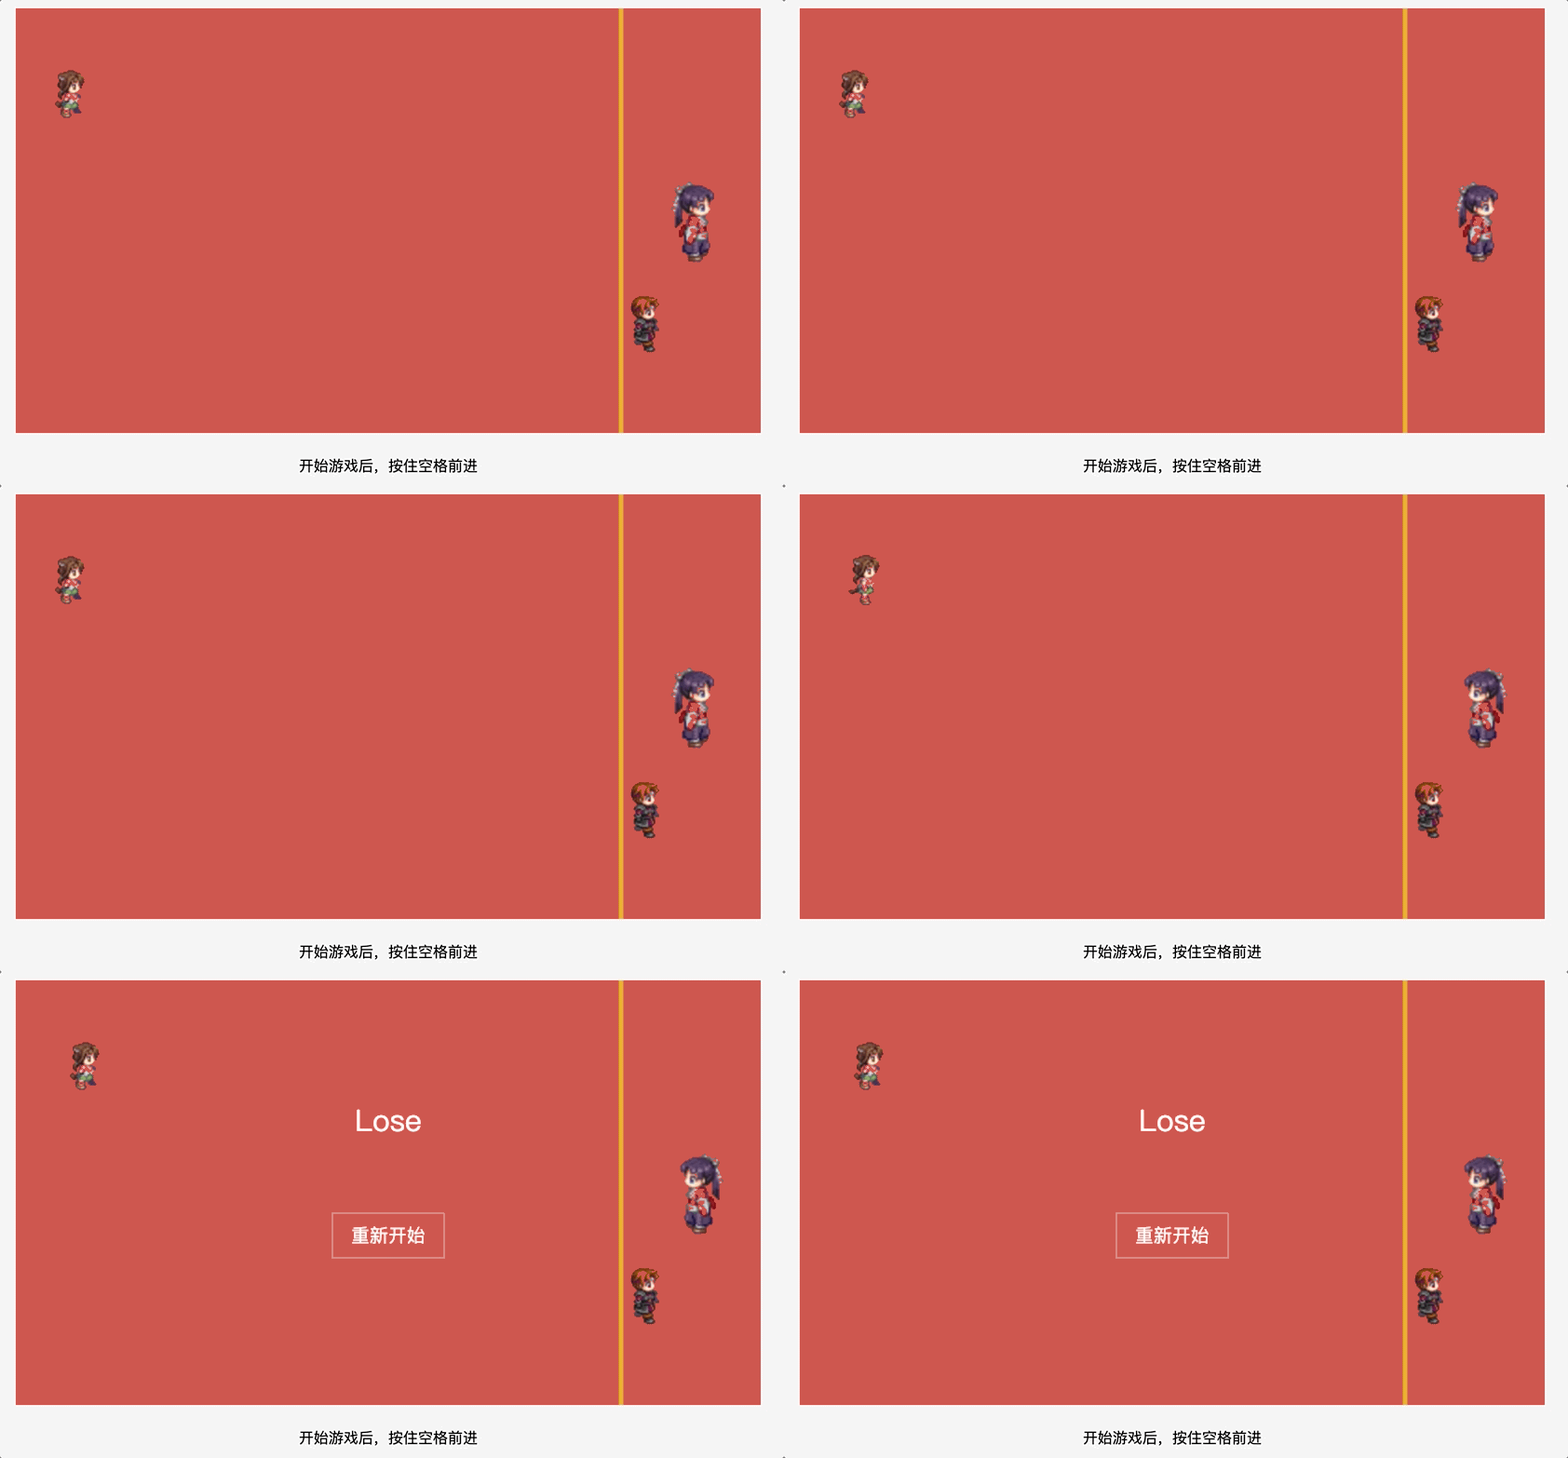
游戏规则很简单,在点击开始后,就可以按住空格键控制人物前进,但是要在右侧的木头人背身的时候才可以前进,不然就判定为输,只要控制人物越过白线,就算赢。
功能拆分:
- 开始按钮
- 玩家和木头人
- 背景
- 规则实现
游戏实现
此小游戏是用原生 canvas 实现的。首先代码中拆分出了三个 canvas 画布,第一个背景画布,主要绘制游戏背景;第一个是游戏内容画布,主要用于显示玩家和木头;第三个是前景画布,主要用于显示开始按钮。实现完三个画布后,只需把游戏规则实现即可。
背景绘制
游戏背景的绘制比较简单,直接看代码
const bgPaint = {
  ctx: bgCanvas.getContext("2d"),
  drawBg() {
    this.ctx.beginPath();
    this.ctx.rect(0, 0, width, height);
    this.ctx.fillStyle = "#ce574f";
    this.ctx.fill();
    const perHeight = height / 4;
    const end = 650;
    this.ctx.beginPath();
    this.ctx.lineWidth = 5;
    this.ctx.strokeStyle = "#e6b322";
    this.ctx.moveTo(end, 0);
    this.ctx.lineTo(end, height);
    this.ctx.closePath();
    this.ctx.stroke();
  }
}
复制代码
绘制了一个矩形,填充了背景颜色,然后再绘制一条白线作为终点线。
玩家和木头人绘制
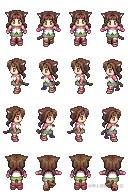
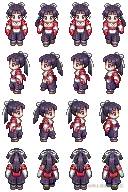
玩家和木头人的资源都来自网上。对于玩家使用 drawImage 方法来绘制第三行的每一帧就可以实现人物的走动。对于木头人只要使用第三列的二三两行内容就可以实现转头效果。

玩家这边实现了一个类
class Character {
  constructor(context, options = {}) {
    const { src, width = 32, height = 48, top = 50, listener } = options;
    this.ctx = context;
    this.src = src;
    this.width = width;
    this.height = height;
    this.top = top;
    this.actionIndex = 0;
    this.moveX = 0;
    this.timer = null;
    this.isMove = false;
    this.listener = listener;
    this.init();
  }

  init() {
    this.image = new Image();
    this.image.onload = () => {
      this.ctx.drawImage(
        this.image,
        this.actionIndex * this.width, this.height * 2, this.width, this.height,
        0, this.top, this.width * 1.5, this.height * 1.5
      );
    };
    this.image.src = this.src;
  }

  walk() {
    if (this.isMove) {
      return;
    }
    this.isMove = true;
    this.forward();
    this.timer = setInterval(() => {
      this.forward();
    }, 150);
  }

  forward() {
    this.actionIndex = (this.actionIndex + 1) % 4;
    this.moveX += 4;
    this.ctx.clearRect(0, this.top, 800, this.height * 1.5);
    this.ctx.drawImage(
      this.image,
      this.actionIndex * this.width, this.height * 2, this.width, this.height,
      this.moveX, this.top, this.width * 1.5, this.height * 1.5
    );
    this.listener && this.listener(this.moveX);
  }

  stop() {
    this.isMove = false;
    clearInterval(this.timer);
  }
}
复制代码
代码中使用 actionIndex 来记录当前的动画帧,使用 moveX 记录玩家的前进距离。人物的宽高对应就是雪碧图宽高除以 4。
类中的 init 方法就是把人物绘制在起点;forward 方法就是将人物水平方向位置加 4,同时切换动画帧;walk 方法调用 forward 的方法,同时使用 setInterval 重复执行前进方法;stop 方法就是取消 setInterval。同时这边还有个监听器属性,向外传递前进距离参数。
这个类中最主要就是 drawImge API,这个在后文中会详细介绍。
木头人的绘制代码:
const judge = {
  image: new Image(),
  init() {
    this.image.onload = () => {
      this.draw();
    };
    this.image.src = "https://s3.bmp.ovh/imgs/2021/10/727fc27ee8b9a6e7.png";
  },
  turn(isLeft) {
    ctx.clearRect(700, (height - 96) / 2, 64, 96);
    this.draw(isLeft);
  },
  draw(isLeft) {
    ctx.drawImage(
      this.image,
      64, isLeft ? 48 : 96, 32, 48,
      700, (height - 96) / 2, 64, 96
    );
  }
}
复制代码
木头绘制就是把对于图片绘制在终点位置,然后根据需要绘制对于的帧。
开始功能的绘制
const forePaint = {
  ctx: foreCanvas.getContext("2d"),
  drawButton(text) {
    const btnW = 120;
    const btnH = 48;
    this.ctx.beginPath();
    this.ctx.rect((width - btnW) / 2, 250, btnW, btnH);
    this.ctx.strokeStyle = "#ccc";
    this.ctx.stroke();
    this.ctx.font = '20px "微软雅黑"';
    this.ctx.textBaseline = "middle";
    this.ctx.textAlign = "center";
    this.ctx.fillStyle = "#fff";
    this.ctx.fillText(text, width / 2, 250 + btnH / 2);
  },
  drawStart() {
    this.drawButton("开始");
  },
  drawWin() {
    this.ctx.font = '32px "微软雅黑"';
    this.ctx.textBaseline = "middle";
    this.ctx.textAlign = "center";
    this.ctx.fillStyle = "#fff";
    this.ctx.fillText("Win", width / 2, 150);
    this.drawButton("再来一次");
  },
  drawLose() {
    this.ctx.font = '32px "微软雅黑"';
    this.ctx.textBaseline = "middle";
    this.ctx.textAlign = "center";
    this.ctx.fillStyle = "#fff";
    this.ctx.fillText("Lose", width / 2, 150);
    this.drawButton("重新开始");
  },
  clear() {
    this.ctx.clearRect(0, 0, width, height);
  }
};
复制代码
开始功能绘制在前景画布上,方便实现点击功能。代码也比较简单,主要使用绘制矩形和绘制文字的能力
规则的实现
foreCanvas.addEventListener("click", (e) => {
  const isClickBtn = forePaint.ctx.isPointInPath(e.offsetX, e.offsetY);
  if (!isClickBtn || isGaming) {
    return;
  }

  isGaming = true;
  forePaint.clear();
  gameCount++;
  isCat = gameCount > 5;
  initGame();
})

const initGame = () => {
  let isAllowRun = true;
  let timer = null;

  ctx.clearRect(0, 0, width, height);
  judge.init();
  const girl = new Character(ctx, {
    src: isCat
      ? "https://s3.bmp.ovh/imgs/2021/10/035e5eb7556f6cf3.png"
      : "https://s3.bmp.ovh/imgs/2021/10/70b59c5699cfbab5.png",
    width: 32,
    height: isCat ? 32 : 48,
    listener: (x) => {
      if (x > 650) {
        girl.stop();
        forePaint.drawWin();
        audio.pause();
        audio.currentTime = 0;
        isGaming = false;
        isAllowRun = false;
        clearTimeout(timer);
        document.removeEventListener("keypress", handleKeyPress);
        document.removeEventListener("keyup", handleKeyUp);
      }
    }
  });

  let isRobotEnd = false;
  const robot = new Character(ctx, {
    src: "https://s3.bmp.ovh/imgs/2021/10/56c68440f5c1a836.png",
    top: 300,
    listener: (x) => {
      if (x > 650) {
        isRobotEnd = true;
        robot.stop();
      }
    }
  });
  robot.walk();

  const handleKeyUp = () => {
    girl.stop();
  };
  const handleKeyPress = (e) => {
    e.preventDefault();
    if (!isGaming) {
      return;
    }
    if (!isAllowRun && isGaming && !isCat) {
      girl.walk();
      girl.stop();
      forePaint.drawLose();
      audio.pause();
      audio.currentTime = 0;
      isGaming = false;
      isAllowRun = false;
      clearTimeout(timer);
      document.removeEventListener("keypress", handleKeyPress);
      document.removeEventListener("keyup", handleKeyUp);
      return;
    }
    if (event.keyCode !== 32 || girl.isMove) {
      return;
    }
    girl.walk();
  };

  audio.play();
  const singAndLook = () => {
    isAllowRun = !isAllowRun;
    judge.turn(!isAllowRun);
    if (isAllowRun) {
      audio.play();
      !isRobotEnd && robot.walk();
    } else {
      audio.pause();
      audio.currentTime = 0;
      robot.stop();
    }
    timer = setTimeout(
      () => { singAndLook(); },
      isAllowRun ? 5000 : 3000
    );
  };
  timer = setTimeout(() => {
    singAndLook();
  }, 5000);

  document.addEventListener("keypress", handleKeyPress);
  document.addEventListener("keyup", handleKeyUp);
};

复制代码
在点击开始按钮后,我们就初始化玩家和木头人,同时启动定时器控制木头人的背身和正面。游戏规则并不是很复杂,代码只需按上述游戏规则实现即可。
常用 API 和使用技巧
Canvas 的绘制主要通过上文对象来绘制。通过 getContext 就可以获取到 context 对象。
基本 API
绘制图形
context.rect(x, y, width, height)
复制代码
x,y 为距离画布左上角位置,width, height 为宽高。绘制好矩形路径后,通过 conetxt.stroke 或者 context.fill 方法来绘制边框或者填充
context.fillRect(x, y, width, height)
context.strokeRect(x, y, width, height)
复制代码
这两个方法从名称就可以看出,是 rect 和 fill(或stroke)方法的整合
绘制路径
绘制路径主要会使用到下面两个 API
moveTo(x, y) // 定义线条开始坐标
lineTo(x, y) // 定义线条结束坐标
复制代码
同时在绘制开始要调用 beginPath,表示开启一个新路线绘制,不会和前面的绘制混在一起。
绘制文字
fillText(text, x, y) // 在 canvas 上绘制实心的文本
strokeText(text, x, y) // 在 canvas 上绘制空心的文本
复制代码
文字的绘制通过上面两个 api 即可。同时可以通过设置 context 的 font,textAlign,textBaseLine 来控制文字的字体和显示方式。
绘制图片
// 在画布上定位图像
context.drawImage(img, x, y)
// 在画布上定位图像,并规定图像的宽度和高度
context.drawImage(img, x, y, width, height)
//剪切图像,并在画布上定位被剪切的部分
context.drawImage(img, sx, sy, swidth, sheight, x, y, width, height)
复制代码
绘制图片有三种语法方式,前两种比较容易理解,第三个参数比较多,每个参数意义如下:
- img 参数支持图像、画布或视频。
- sx 开始剪切的 x 坐标位置
- sy 开始剪切的 y 坐标位置
- swidth 被剪切图像的宽度
- sheight 被剪切图像的高度
- x 在画布上放置图像的 x 坐标位置
- y 在画布上放置图像的 y 坐标位置
- width 要使用的图像的宽度。(伸展或缩小图像)
- height 要使用的图像的高度。(伸展或缩小图像)
使用技巧
绘制动画
绘制动画主要就是使用 drawImage 方法。
- 如果你的动画每一帧都是一张图片,你直接切换图片就可以,使用 drawImage 的第一种或者第二种语法即可
- 如果你的动画是雪碧图,就需要使用到 drawImage 的第三种语法,对图片进行裁剪显示。每一帧都有对于的位置
支持点击事件
canvas 的点击事件不像 svg 可以直接监听对应的元素,canvas 这边需要代码自己去实现。上述代码种使用到了 isPointInPath 来判断。
context.isPointInPath(x, y)
复制代码
isPointInPath() 方法会返回 true,如果指定的点位于当前路径中;否则返回 false。
我们使用 beginPath 开始一段路径的绘制,在绘制完成后,可以使用 isPointInPath 来判断,是否点击到了这个元素。
但是这个方法只能判断最后的绘制路径,所有上述游戏代码中把按钮绘制在了前景画布中的最后一个。如果要支持多个路径的点击支持,方法是要重绘整个画布,绘制每个路径的时候都使用 isPointInPath 判断下。
总结
Canvas 还有很多高级的用法,如果你有兴趣,可以深入去学习。目前也有很多 Canvas 库,比如 Pixi.js,Fabric.js,paper.js 等等

