一天一夜,山月写完了这份高效组织 npm script 最佳实践
众所周知,一个 Javasript 项目的脚本类工具,可以使用 package.json 中的 scripts 字段来组织,简单来说,这就是 npm script。
最典型最常用约定俗成的一个是 npm start,用以启动项目:
{
  "scripts": {
    "start": "next"
  }
}
约定速成的还有很多,如下所列
- npm install
- npm test
- npm publish
- ...
约定速成的亲儿子脚本自然和其它第三方脚本不一样,如果需要执行它,直接使用 npm 前缀即可,如 npm start,那其它脚本呢?那就需要 npm run 前缀了。而 yarn 就没这么多讲究了,一视同仁。
$ npm run <user defined>
$ npm run-script dev

# 为了简单方便,等同于
$ npm run dev

# yarn
$ yarn dev
以上是众所周知的,以下讲一讲有可能不是众所周知的
运行: npm run dev 与 npm start 的区别
对于一个「纯生成静态页面打包」的前端项目而言,它们是没有多少区别的:生产环境的部署只依赖于构建生成的资源,更不依赖 npm scripts。可见 如何部署前端项目[1]。
使用 create-react-app 生成的项目,它的 npm script 中只有 npm start
{
  "start": "react-scripts start",
  "build": "react-scripts build",
  "test": "react-scripts test",
  "eject": "react-scripts eject"
}
使用 vuepress 生成的项目,它的 npm script 中只有 npm run dev
{
  "dev": "vuepress dev",
  "build": "vuepress build"
}在一个「面向服务端」的项目中,如 next、nuxt 与 nest。dev 与 start 的区别趋于明显,一个为生产环境,一个为开发环境
- dev: 在开发环境启动项目,一般带有 watch 选项,监听文件变化而重启服务,此时会耗费大量的 CPU 性能,不宜放在生产环境
- start: 在生产环境启动项目
在 nest 项目中进行配置
{
  "start": "nest start",
  "dev": "nest start --watch"
}
运行:Script Hooks -> 如何把新项目快速跑起来
新人入职新上手项目,如何把它跑起来,这是所有人都会碰到的问题:所有人都是从新手开始的。
有可能你会脱口而出:npm run dev/npm start,但实际工作中,处处藏坑,往往没这么简单。
- 查看是否有
CI/CD,如果有跟着CI/CD部署的脚本跑命令 - 查看是否有
dockerfile,如果有跟着dockerfile跑命令 - 查看 npm scripts 中是否有 dev/start,尝试
npm run dev/npm start - 查看是否有文档,如果有跟着文档走。为啥要把文档放到最后一个?原因你懂的
但即便是十分谨慎,也有可能遇到以下几个叫苦不迭、浪费了一下午时间的坑:
- 前端有可能在「本地环境启动时需要依赖前端构建时所产生的文件」,所以有时需要「先正常部署一遍,再试着按照本地环境启动 (即需要先
npm run build一下,再npm run dev/npm start)」。(比如,一次我们的项目 npm run dev 时需要 webpack DllPlugin 构建后的东西) - 别忘了设置环境变量或者配置文件
因此,设置一个少的 script,可以很好地避免后人踩坑,更重要的是,可以避免后人骂你
{
  "scripts": {
    "start": "npm run dev",
    "config": "node assets && node config",
    "build": "webpack",
    // 设置一个 dev 的钩子,在 npm run dev 前执行,此处有可能不是必须的
    "predev": "npm run build",
    "dev": "webpack-dev-server --inline --progress"
  }
}
Hooks
在 npm script 中,对于每一个命令都有 Pre/Post 钩子,分别在命令执行前后执行
npm run <script>
pre<script>
<script>
post<script>
在工作中,这些钩子与内置的命令为项目提供了简便的操作方式,也提供了更安全的项目操作流程
- 装包之后,进行 husky(v5.0) 的设置
- 打包之前,清理目标文件件
- 发包之前,进行打包构建
- 运行之前,准备好资源文件
{
  "scripts": {
    "postinstall": "husky install",
    "prebuild": "rimraf dist",
    "build": "webpack",
    "predev": "npm run assets",
    "dev": "webpack-dev-server --inline --progress"
  }
}
构建
构建打包,基本上所有的项目都含有这个命令,并且默认为 npm run build。
在 CI 或前端托管平台 Vercel/Netlify 中,对于部署前端项目,最重要的一步就是打包。但是有些项目有可能不需要打包,此时可以使用 if-present 参数,代表如果存在该 script,则执行,否则跳过
{
  "scripts": {
    "build": "next build"
  }
}
测试: Script 后缀
对于完成一件极为复杂的事情,可以使用前缀进行分组组织 npm script,比如测试。
npm run test: 使用 mocha[2] 进行单元测试npm run test:coverage: 使用 nyc[3] 查看单元测试覆盖率npm run test:e2e: 使用 cypress[4] 进行 UI 自动化测试
{
  "test": "mocha",
  "test:coverage": "nyc npm test",
  "test:e2e": "npm run cy:run --",
  "cy:run": "cypress run --config-file cypress/config.json",
  "cy:open": "cypress open --config-file cypress/config.json"
}对于测试而言,mocha 与 nyc 结合可以很好地进行单元测试,并提供覆盖率报告。
对于前端 e2e 测试而言,cypress 与 puppeteer 无疑是最流行的框架。
那如何对 Vue/React 组件进行更好地测试及文档呢?
组件测试:
storybook[5] 可以更好地对 React/Vue 组件进行调试、测试并形成帮助文档。开发基础组件库时,可以配置 npm run storybook 进行更好的测试
$ npm run storybook
{
  "scripts": {
    "storybook": "start-storybook -p 9001 -c .storybook",
    "storybook:build": "build-storybook -c .storybook -o .out",
    "prepublishOnly": "npm run build"
  }
}
如何使用 storybook
格式化: Prettier
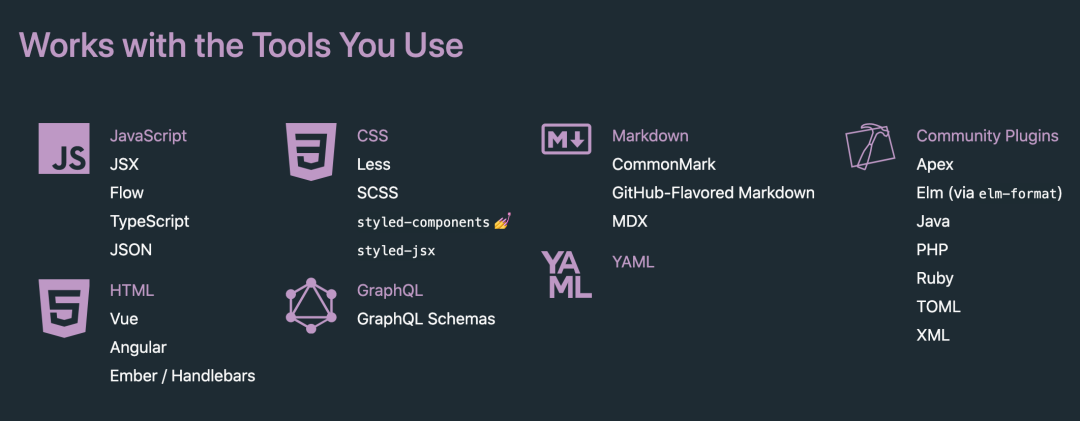
Prettier[6] 是一款支持多种编程语言,如 html、css、js、graphql、markdown 等并且可与编辑器 (vscode) 深度集成的代码格式化工具。

在 npm script 中配置代码格式化如下所示:对 js、css、json、markdown 进行格式化
{
  "scripts": {
    // 配置文件: .prettierrc
    // 格式化: --write
    // 文件: *.js
    "prettier": "prettier --config .prettierrc --write {.,components,lib,pages}/*.{js,css,json,md}",
  }
}
.prettierrc 是 prettier 的配置文件,一般是比较简单的配置,可供配置的 Prettier Options[7] 也没有很多。
{
  "singleQuote": true,
  "printWidth": 100,
  "semi": false,
  "arrowParens": "avoid"
}
Lint: 代码格式化及质量检查
那 Prettier 与 ESLint/StyleLint/TSLint 有什么区别?
Prettier 仅仅作代码的格式化,如空格、是否添加分号之类。而 ESLint 之类对代码格式化外,还对代码进行「质量检查」,如 no-unused-vars, no-implicit-globals 等规则。
JS 与 TS 的质量检查,还是要看 eslint[8]。
{
  "scripts": {
    "lint": "eslint .",
    "lint:fix": "eslint . --fix"
  }
}
除了 eslint 之外,还可以对 markdown、gitcommit 进行格式化
- markdownlint[9]
- commitlint[10]
Git: 你好,代码不合格,这里禁止提交
你的代码不合格,为了避免你被他人吐槽,这里不允许提交。这时候 Git Hooks 就派上了用场。
Git Hooks 中的 precommit hook 会在代码提交之前执行脚本,如果脚本不通过 (Exit Code 不是 0),则禁止提交。
husky[11] 与 lint-staged[12] 是 Git Hooks 的最佳搭配。
{
  "scripts": {
    "lint": "eslint .",
    "prettier": "prettier --config .prettierrc --write {.,components,lib,pages}/*.{js,css,json,md}",
  },
  "husky": {
    "hooks": {
      "pre-commit": "lint-staged"
    }
  },
  "lint-staged": {
    "*.js": [
      "npm run lint"
    ],
    "*.{js,css,json,md}": [
      "npm run prettier"
    ]
  }
}
Outdated: 你的依赖已过期
当一个库过期了会怎么样?
- 找不到文档,无处下手
- 经常有 Bug 由过期库引起,很难修复
- 存在安全风险
没有人会喜欢过期的库。
使用 npm outdated 可以发现 package.json 中依赖的过期库
$ npm outdated
Package                            Current  Wanted  Latest  Location                                        Depended by
@vuepress/plugin-google-analytics    1.7.1   1.8.2   1.8.2  node_modules/@vuepress/plugin-google-analytics  blog
axios                               0.21.0  0.21.1  0.21.1  node_modules/axios                              blog
dayjs                                1.9.6  1.10.4  1.10.4  node_modules/dayjs                              blog
graphql                             15.4.0  15.5.0  15.5.0  node_modules/graphql                            blog
koa                                 2.13.0  2.13.1  2.13.1  node_modules/koa                                blog
npm-check-updates                   10.2.2  10.3.1  11.3.0  node_modules/npm-check-updates                  blog
vuepress                             1.7.1   1.8.2   1.8.2  node_modules/vuepress                           blog
但是 npm outdated 并不好用,比如如何一键升级?就像应用商店升级所有手机软件一样。
node-check-updates 是加强版的 npm outdated,它最简单的功能是一键升级,细化功能是升级策略与安全升级。ncu 是它的二进制命令
$ ncu
Checking package.json
[====================] 5/5 100%

express           4.12.x  →   4.13.x
multer            ^0.1.8  →   ^1.0.1
react-bootstrap  ^0.22.6  →  ^0.24.0
react-a11y        ^0.1.1  →   ^0.2.6
webpack          ~1.9.10  →  ~1.10.5

Run ncu -u to upgrade package.json
使用 ncu --doctor,在升级每一个依赖时会对项目进行测试,如果测试通过则安装依赖成功,否则回退到原先版本
$ ncu --doctor -u
npm install
npm run test
ncu -u
npm install
npm run test
Failing tests found:
/projects/myproject/test.js:13
  throw new Error('Test failed!')
  ^
Now let's identify the culprit, shall we?
Restoring package.json
Restoring package-lock.json
npm install
npm install --no-save react@16.0.0
npm run test
  ✓ react 15.0.0 → 16.0.0
npm install --no-save react-redux@7.0.0
npm run test
  ✗ react-redux 6.0.0 → 7.0.0
Saving partially upgraded package.json
在 npm script 中进行配置 ncu:
{
  "scripts": {
    "ncu": "ncu"
  }
}
Audit: 你的依赖存在安全风险
当某一个 package 存在安全风险时,这时候就要小心了,毕竟谁也不想自己的网站被攻击。唯一的解决办法就是 package 升级版本。就像 Github 的机器人这样:

那使用 ncu 把所有依赖包升级到最新还会有安全风险吗?
会有,因为 ncu 只会把 package.json 中的依赖升级到最新,而不会把 lock file 中的依赖升级到最新。
npm audit 可以发现项目中的风险库,并使用 npm audit fix 进行修复。
然而美中不足,npm audit 的精准度没有 yarn audit 高。
再美中不足,yarn audit 并不支持 yarn audit fix 自动修复
$ npm audit

$ npm audit fix
snyk 是一个检查包风险的一个服务,他提供了命令行工具检测风险,可以使用它代替 npm audit。他也有缺陷,依赖一个服务,可以根据容器自建或者使用 SASS。
{
  "scripts": {
    "audit": "snyk test",
    "audit:fix": "snyk protect"
  }
}
Size: 控制你的 bundle 大小
size limit[13] 与 bundle size[14] 都是可以控制 bundle 体积的两个工具,不过 size-limit 对启动时间也有更强的支持。
{
  "scripts": {
    "size": "size-limit",
    "analyze": "size-limit --why"
  },
  "size-limit": [
    {
      "path": "dist/promise-utils.cjs.production.min.js",
      "limit": "10 KB"
    },
    {
      "path": "dist/promise-utils.esm.js",
      "limit": "10 KB"
    }
  ]
}
总结
在工作中高效使用 npm script,可以极高效率与代码质量,本文中涉及到的 package 如下所示
- husky[15]
- mocha[16]
- nyc[17]
- cypress[18]
- puppeteer[19]
- storybook[20]
- prettier[21]
- eslint[22]
- markdownlint[23]
- @commitlint/cli[24]
- lint-staged[25]
- husky[26]
- npm-check-updates[27]
- lerna[28]
- size-limit[29]
- bundle-size[30]
你可以在 npm devtool[31] 中找到更多有趣有用的库