GraphQL 实战篇之前端Vue+后端Nest
这篇文章记录使用Vue+GraphQL搭建客户端。
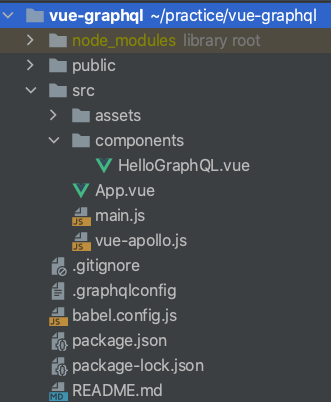
客户端项目目录结构如下:
安装
首先我们先使用vue-cli新建项目,接着安装依赖:
npm install apollo-cache-inmemory apollo-client apollo-link apollo-link-http apollo-link-ws apollo-utilities vue-apollo -S
引入依赖
// main.js
import Vue from 'vue'
import App from './App.vue'
import { apolloProvider } from './vue-apollo';

Vue.config.productionTip = false

new Vue({
    render: h => h(App),
    // 像 vue-router 或 vuex 一样注入apolloProvider
    apolloProvider,
}).$mount('#app')
// vue-apollo.js
// 相关文档请查阅 https://apollo.vuejs.org/zh-cn/
import { ApolloClient } from 'apollo-client'
import { createHttpLink } from 'apollo-link-http'
import { InMemoryCache } from 'apollo-cache-inmemory'
import Vue from 'vue'
import VueApollo from 'vue-apollo'
// 新的引入文件
import { split } from 'apollo-link'
import { WebSocketLink } from 'apollo-link-ws'
import { getMainDefinition } from 'apollo-utilities'

Vue.use(VueApollo)

// 与 API 的 HTTP 连接
const httpLink = createHttpLink({ // 你需要在这里使用绝对路径
    uri: 'http://localhost:3001/graphql',
})
// 创建订阅的 websocket 连接
const wsLink = new WebSocketLink({
    uri: 'ws://localhost:3001/graphql',
    options: {
        reconnect: true,
    }
})
// 使用分割连接的功能
// 你可以根据发送的操作类型将数据发送到不同的连接
const link = split(({ query }) => {
    const definition = getMainDefinition(query)
    return definition.kind === 'OperationDefinition' && definition.operation === 'subscription'
    },
    wsLink,
    httpLink
)
// 创建 apollo 客户端
const apolloClient = new ApolloClient({
    link,
    cache: new InMemoryCache(),
    connectToDevTools: true,
})

export const apolloProvider = new VueApollo({
    defaultClient: apolloClient,
})
编写业务代码
// App.vue
<template>
 <div id="app"> <img alt="Vue logo" src="./assets/logo.png"> <HelloGraphQL /> </div></template>
<script>
import HelloGraphQL from './components/HelloGraphQL.vue'

export default {
    name: 'app',
    components: {
        HelloGraphQL
    }
}
</script>
<style>
#app {
    font-family: 'Avenir',Helvetica, Arial, sans-serif;     -webkit-font-smoothing: antialiased;
    -moz-osx-font-smoothing: grayscale;
    text-align: center;
    color: #2c3e50;
    margin-top: 60px;
}
</style>
// HelloGraphQL.vue
<template>
    <div class="hello">
        作者姓氏:{{author.firstName}}
        <button @click="changeAuthor">修改作者姓氏</button>
        <br> <br>
        新增标题:{{post.title}}
        <button @click="addPost">添加文章</button>
        <br>
        订阅成功次数:{{receivedSubscriptionTimes}}
    </div>
</template>
<script>
import gql from 'graphql-tag'
export default {
    name: 'HelloGraphQL',
    data: function (){
        return {
            author: {},
            post: {},
            receivedSubscriptionTimes: 0
        }
    },
    apollo: {
        // Apollo 的具体选项
        author: gql`query author {
            author(id: 2) {
                id,
                firstName,
                posts {
                    id,
                    title
                }
            }
        }`,
        $subscribe: {
            postAdded: {
                query: gql`subscription postAdded{
                    postAdded {
                        id,
                        title
                    }
                }`,
                // 变更之前的结果
                result ({ data }) {
                    // 在这里用之前的结果和新数据组合成新的结果
                    // eslint-disable-next-line
                    console.log(data)
                    this.receivedSubscriptionTimes += 1                 }
            }
        }
    },
    methods: {
        // 修改作者
        changeAuthor() {
            // 调用 graphql 变更
            this.$apollo.mutate({
                // 查询语句
                mutation: gql`mutation changeAuthor {
                    changeAuthor(id: 3, firstName: "firstName" lastName: "lastName") {
                        id,
                        firstName,
                        lastName
                    }
                }`,
                // 参数
                variables: {
                    firstName: '',
                },
            }).then(res => {
                this.author.firstName = res.data.changeAuthor.firstName;
            })
        },
        // 添加文章
        addPost() {
            // 调用 graphql 变更
            this.$apollo.mutate({
                // 查询语句
                mutation: gql`mutation addPost {
                    post: addPost {
                        id,
                        title
                    }
                }`
            }).then(res => {
                this.post = res.data.post;
            })
        }
    }
}
</script>
至此,我们便可以请求server端服务了!
前面我们介绍了GraphQL的概念和基础知识,这篇文章记录下使用Nestjs+GraphQL搭建Node服务。
安装
npm i --save @nestjs/graphql graphql-tools graphql apollo-server-express
注册
// app.module.ts
import { Module } from '@nestjs/common';
import { GraphQLModule } from '@nestjs/graphql';
import { ConfigModule, ConfigService } from 'nestjs-config';
@Module({
imports: [
ConfigModule.load(path.resolve(__dirname, 'config', '**/!(*.d).{ts,js}')),
GraphQLModule.forRootAsync({
imports: [ConfigModule],
useFactory: (config: ConfigService) => config.get('graphql'),
inject: [ConfigService],
})
],})
export class ApplicationModule {}
// src/config/graphql.ts
import * as path from 'path';
export default {
autoSchemaFile: path.join(process.cwd(), 'src/schema.gql'), // 最后生成的`Schema 文件,不可修改`
installSubscriptionHandlers: true, // 启用订阅
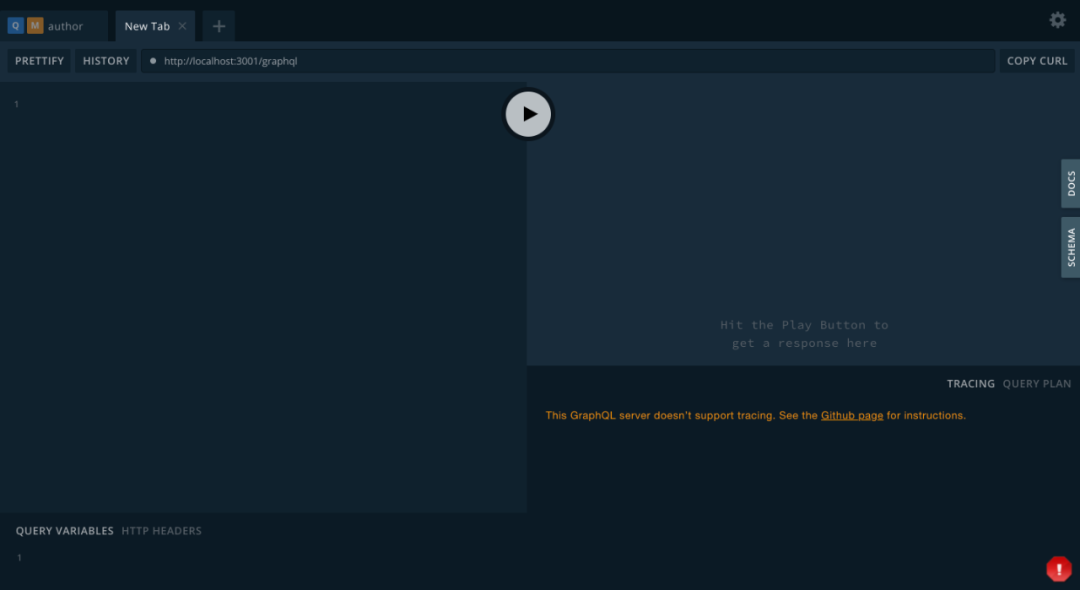
};启动项目,并访问 http://localhost:3000/graphql,我们便可以看到graphql页面。
编写服务端逻辑
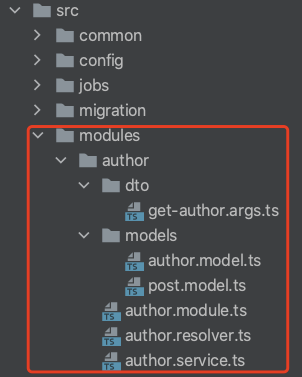
接下来我们注册一个author模块,目录结构如下:
// author.module.ts
import { Module } from '@nestjs/common';
import { AuthorService } from './author.service';
import { AuthorResolver } from './author.resolver';
@Module({
  providers: [
    AuthorService,
    AuthorResolver
  ]
})
export class AuthorModule {}
// author.service.ts
// 此文件用于写数据库查询等逻辑,我们着重学习GraphQL的使用,故此处不做相关Demo
import { Injectable } from '@nestjs/common';
@Injectable()
export class AuthorService {
  async findOneById() {}
}
// author.resolver.ts
import { Args, Mutation, Query, Resolver, Subscription, ResolveField, Parent, Int } from '@nestjs/graphql';
import { PubSub } from 'graphql-subscriptions';
import { Author } from './models/author.model';
import { Post } from './models/post.model';
import { AuthorService } from './author.service';
// import { GetAuthorArgs } from './dto/get-author.args';

const pubSub = new PubSub();

@Resolver(() => Author)
export class AuthorResolver {
  constructor(
     private authorsService: AuthorService
  ) {}
 // 根据id查询作者信息
 @Query(returns => Author, {
    name: 'author',
    description: 'get author info by id',
    nullable: false
 })
 async getAuthor(@Args('id', {
     type: () => Int,
     description: 'author id',
     nullable: false
 }) id: number): Promise<any> {
 // return this.authorsService.findOneById(id);
    return {
        id,
        firstName: 'wu',
        lastName: 'pat',
    };
}
// 使用DTO接受参数
// @Query(returns => Author)
// async getAuthor(@Args() args: GetAuthorArgs) {
//   return this.authorsService.findOneById(args);
// }
 // 修改作者信息
 @Mutation(returns => Author, {
    name: 'changeAuthor',
    description: 'change author info by id',
    nullable: false
 })
 async changeAuthor(
    @Args('id') id: number,
    @Args('firstName') firstName: string,
    @Args('lastName') lastName: string,
 ): Promise<any> {
 // return this.authorsService.findOneById(id);
 return {
    id,
    firstName,
    lastName,
  };
}

 // 解析posts字段
 @ResolveField()
 async posts(@Parent() author: Author): Promise<any> {
     const { id } = author;
     // return this.postsService.findAll({ authorId: id });
     return [{
        id: 4,
        title: 'hello',
        votes: 2412,
     }];
 }

 // 新增文章
 @Mutation(returns => Post)
 async addPost() {
     const newPost = {
        id: 1,
        title: '新增文章'
     };
     // 新增成功后,通知更新
     await pubSub.publish('postAdded', { postAdded: newPost });
     return newPost;
 }

 // 监听变更
 @Subscription(returns => Post, {
     name: 'postAdded',
     // filter: (payload, variables) => payload.postAdded.title === variables.title,
     // 过滤订阅
     // resolve(this: AuthorResolver, value) { // 修改payload参数
     //   return value;
     // } })
 async postAdded(/*@Args('title') title: string*/) {
    return (await pubSub.asyncIterator('postAdded'));
 }}
// author.model.ts
import { Field, Int, ObjectType } from '@nestjs/graphql';
import { Post } from './post.model';

@ObjectType({ description: 'Author model' })
export class Author {
 @Field(type => Int, {
    description: '作者id'
 })
 id: number;

 @Field({
    nullable: true,
    description: '作者姓姓氏'
 })
 firstName?: string;

 @Field({
    nullable: true,
    description: '作者姓名字'
 })
 lastName?: string;

 // 要声明数组的项(而不是数组本身)是可为空的,请将nullable属性设置'items'
 // 如果数组及其项都是可空的,则设置nullable为'itemsAndList'
 @Field(type => [Post], {
    nullable: 'items',
    description: '作者发表的文章'
 })
 posts: Post[];
}
// posts.model.ts
import { Field, Int, ObjectType } from '@nestjs/graphql';

@ObjectType()
export class Post {

 @Field(type => Int)
 id: number;

 @Field() title: string;

 @Field(type => Int, {
    nullable: true
 })
 votes?: number;
}
上面的代码包含了查询、变更、订阅类型,此时我们会发现src下面新增了一个文件schema.gql,这个文件就是自动生成的类型文件:
# ------------------------------------------------------
# THIS FILE WAS AUTOMATICALLY GENERATED (DO NOT MODIFY)
# ------------------------------------------------------
type Post {
    id: Int!
    title: String!
    votes: Int
}

"""Author model"""
type Author {
    """作者id"""
    id: Int!

    """作者姓姓氏"""
    firstName: String

    """作者姓名字"""
    lastName: String

    """作者发表的文章"""
    posts: [Post]!
}

type Query {
    """get author info by id"""
    author(
        """author id"""
        id: Int!
    ): Author!
}

type Mutation {
    """change author info by id"""
    changeAuthor(lastName: String!, firstName: String!, id: Float!): Author!
    addPost: Post!
}

type Subscription {
    postAdded: Post!
}
执行查询
这时我们的服务已经运行起来,可以执行查询了。
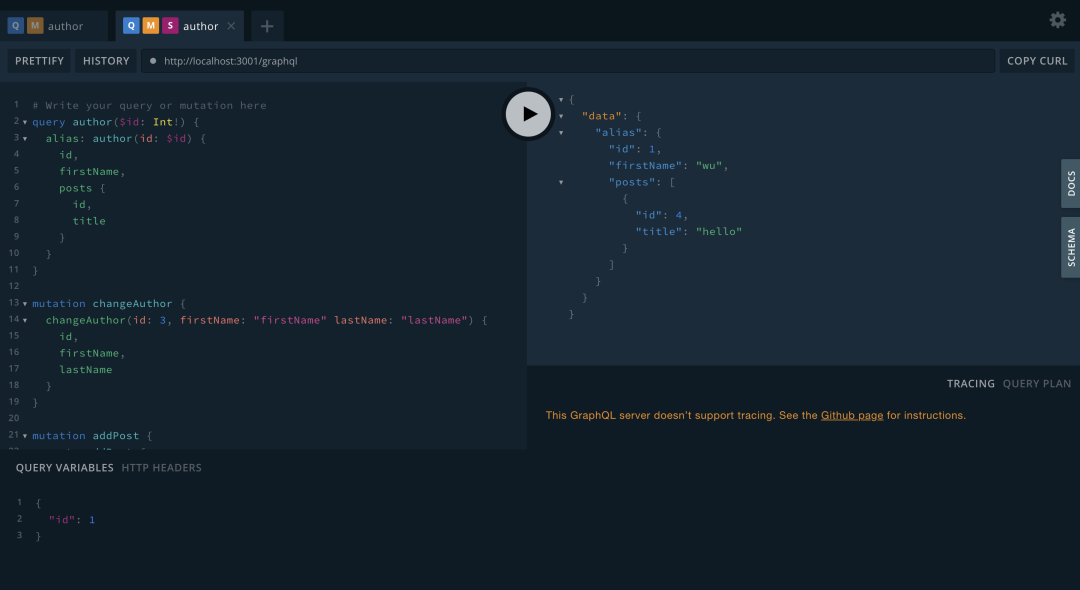
# 左下角编写QUERY VARIABLES
{
    "id": 1
}
# Write your query or mutation here
# 查询作者信息
query author($id: Int!) {
    alias: author(id: $id) {
        id,
        firstName,
        posts {
            id,
            title
        }
    }
}

# 修改作者信息
mutation changeAuthor {
    changeAuthor(id: 3, firstName: "firstName" lastName: "lastName") {
        id,
        firstName,
        lastName
    }
}

# 发布文章
mutation addPost {
    post: addPost {
        id,
        title
    }
}

# 订阅文章新增
subscription postAdded{
    postAdded {
        id,
        title
    }
}

// 自省查询
query schema{
    __schema {
        types {
            name
        }
    }
}
至此,我们的Nestjs+GraphQL服务便搭建完成,给自己一个!