为了让她10分钟入门canvas,我熬夜写了3个小项目和这篇文章
前言
大家好,回想起我当年校招的时候啊,多次被面试官问到canvas,但是我却不会,后来一直想找个机会学一下canvas,但是一直没时间。canvas在前端的地位是越来越重要了,为此,我特地写了3个小项目,让你们10分钟就能入门canvas,是的,我的心里没有她,只有你们

1 . canvas实现时钟转动
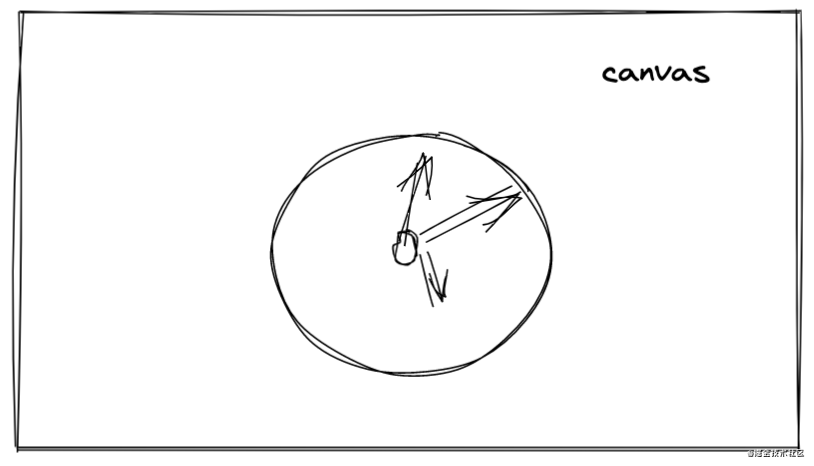
实现以下效果,分为几步:
- 1、找到canvas的
中心,画出表心,以及表框 - 2、获取
当前时间,并根据时间画出时针,分针,秒针,还有刻度 - 3、使用定时器,每过一秒
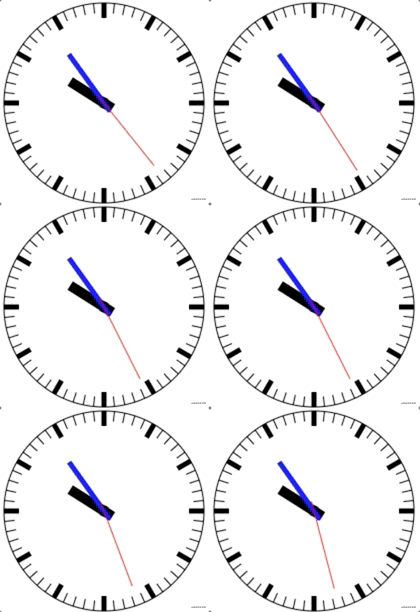
获取新的时间,并重新绘图,达到时钟转动的效果
1.1 表心,表框
画表心,表框有两个知识点:
- 1、找到canvas的
中心位置 - 2、绘制
圆形
//html

<canvas id="canvas" width="600" height="600"></canvas>

// js

// 设置中心点,此时300,300变成了坐标的0,0
ctx.translate(300, 300)
// 画圆线使用arc(中心点X,中心点Y,半径,起始角度,结束角度)
ctx.arc(0, 0, 100, 0, 2 * Math.PI)
ctx.arc(0, 0, 5, 0, 2 * Math.PI)
// 执行画线段的操作stroke
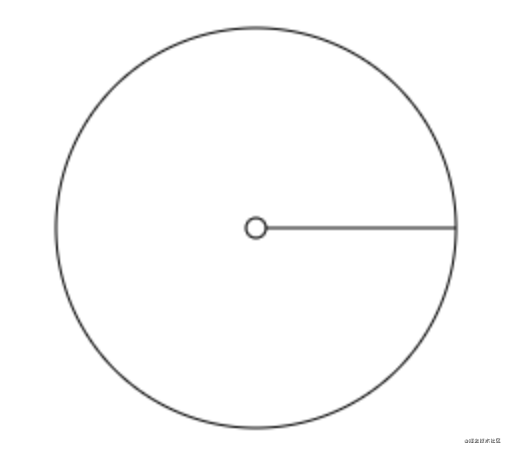
ctx.stroke() 让我们来看看效果,发现了,好像不对啊,我们是想画两个独立的圆线,怎么画出来的两个圆连到一起了:
beginPath,closePath
ctx.translate(300, 300) // 设置中心点,此时300,300变成了坐标的0,0

// 画大圆
+ ctx.beginPath()
// 画圆线使用arc(中心点X,中心点Y,半径,起始角度,结束角度)
  ctx.arc(0, 0, 100, 0, 2 * Math.PI)
  ctx.stroke() // 执行画线段的操作
+ ctx.closePath()

// 画小圆
+ ctx.beginPath()
  ctx.arc(0, 0, 5, 0, 2 * Math.PI)
  ctx.stroke()
+ ctx.closePath()
1.2 时针,分针,秒针
画这三个指针,有两个知识点:
- 1、根据当前
时,分,秒去计算角度 - 2、在计算好的角度上去画出
时针,分针,秒针
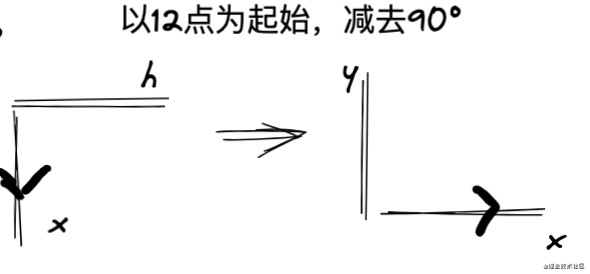
如何根据算好的角度去画线呢,比如算出当前是3点,那么时针就应该以12点为起始点,顺时针旋转2 * Math.PI / 12 * 3 = 90°,分针和秒针也是同样的道理,只不过跟时针不同的是比例问题而已,因为时在表上有12份,而分针和秒针都是60份
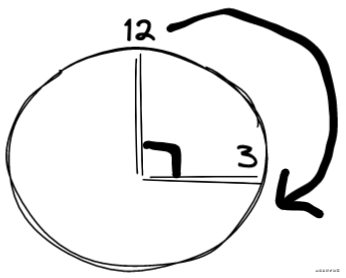
90°,那我们怎么画出时针呢?我们可以使用moveTo和lineTo去画线段。至于90°,我们只需要将x轴顺时针旋转90°,然后再画出这条线段,那就得到了指定角度的指针了。但是上面说了,是要以12点为起始点,我们的默认x轴确是水平的,所以我们时分秒针算出角度后,每次都要减去90°。可能这有点绕,我们通过下面的图演示一下,还是以上面3点的例子:
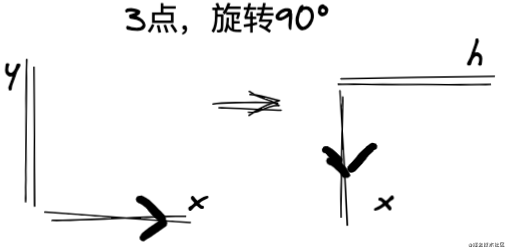
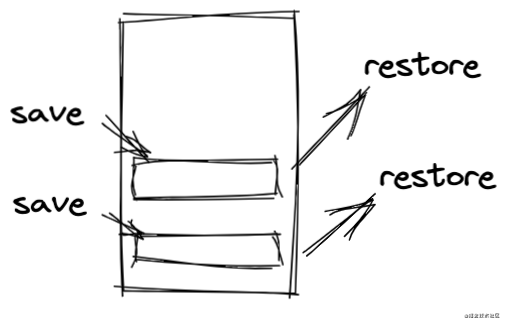
又又又有新问题了,比如现在我画完了时针,然后我想画分针,x轴已经在我画时针的时候偏转了,这时候肯定要让x轴恢复到原来的模样,我们才能继续画分针,否则画出来的分针是不准的。这时候save和restore就派上用场了,save是把ctx当前的状态打包压入栈中,restore是取出栈顶的状态并赋值给ctx,save可多次,但是restore取状态的次数必须等于save次数
刻度了,起始刻度的道理跟时分秒针道理一样,只不过刻度是死的,不需要计算,只需要规则画出60个小刻度,和12个大刻度就行
const canvas = document.getElementById('canvas')
const ctx = canvas.getContext('2d')

ctx.translate(300, 300) // 设置中心点,此时300,300变成了坐标的0,0
// 把状态保存起来
+ ctx.save()

// 画大圆
ctx.beginPath()
// 画圆线使用arc(中心点X,中心点Y,半径,起始角度,结束角度)
ctx.arc(0, 0, 100, 0, 2 * Math.PI)
ctx.stroke() // 执行画线段的操作
ctx.closePath()

// 画小圆
ctx.beginPath()
ctx.arc(0, 0, 5, 0, 2 * Math.PI)
ctx.stroke()
ctx.closePath()

----- 新加代码  ------

// 获取当前 时,分,秒
let time = new Date()
let hour = time.getHours() % 12
let min = time.getMinutes()
let sec = time.getSeconds()

// 时针
ctx.rotate(2 * Math.PI / 12 * hour + 2 * Math.PI / 12 * (min / 60) - Math.PI / 2)
ctx.beginPath()
// moveTo设置画线起点
ctx.moveTo(-10, 0)
// lineTo设置画线经过点
ctx.lineTo(40, 0)
// 设置线宽
ctx.lineWidth = 10
ctx.stroke()
ctx.closePath()
// 恢复成上一次save的状态
ctx.restore()
// 恢复完再保存一次
ctx.save()

// 分针
ctx.rotate(2 * Math.PI / 60 * min + 2 * Math.PI / 60 * (sec / 60) - Math.PI / 2)
ctx.beginPath()
ctx.moveTo(-10, 0)
ctx.lineTo(60, 0)
ctx.lineWidth = 5
ctx.strokeStyle = 'blue'
ctx.stroke()
ctx.closePath()
ctx.restore()
ctx.save()

//秒针
ctx.rotate(2 * Math.PI / 60 * sec -  - Math.PI / 2)
ctx.beginPath()
ctx.moveTo(-10, 0)
ctx.lineTo(80, 0)
ctx.strokeStyle = 'red'
ctx.stroke()
ctx.closePath()
ctx.restore()
ctx.save()

// 绘制刻度,也是跟绘制时分秒针一样,只不过刻度是死的
ctx.lineWidth = 1
for (let i = 0; i < 60; i++) {
    ctx.rotate(2 * Math.PI / 60)
    ctx.beginPath()
    ctx.moveTo(90, 0)
    ctx.lineTo(100, 0)
    // ctx.strokeStyle = 'red'
    ctx.stroke()
    ctx.closePath()
}
ctx.restore()
ctx.save()
ctx.lineWidth = 5
for (let i = 0; i < 12; i++) {
    ctx.rotate(2 * Math.PI / 12)
    ctx.beginPath()
    ctx.moveTo(85, 0)
    ctx.lineTo(100, 0)
    ctx.stroke()
    ctx.closePath()
}

ctx.restore()
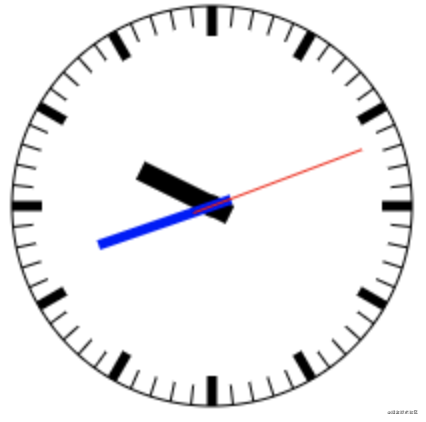
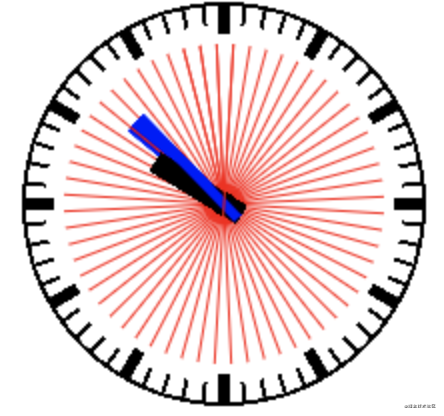
setInterval,但是注意一个问题:每次更新视图的时候都要把上一次的画布清除,再开始画新的视图,不然就会出现千手观音的景象
const canvas = document.getElementById('canvas')
const ctx = canvas.getContext('2d')

setInterval(() => {
    ctx.save()
    ctx.clearRect(0, 0, 600, 600)
    ctx.translate(300, 300) // 设置中心点,此时300,300变成了坐标的0,0
    ctx.save()

    // 画大圆
    ctx.beginPath()
    // 画圆线使用arc(中心点X,中心点Y,半径,起始角度,结束角度)
    ctx.arc(0, 0, 100, 0, 2 * Math.PI)
    ctx.stroke() // 执行画线段的操作
    ctx.closePath()

    // 画小圆
    ctx.beginPath()
    ctx.arc(0, 0, 5, 0, 2 * Math.PI)
    ctx.stroke()
    ctx.closePath()

    // 获取当前 时,分,秒
    let time = new Date()
    let hour = time.getHours() % 12
    let min = time.getMinutes()
    let sec = time.getSeconds()

    // 时针
    ctx.rotate(2 * Math.PI / 12 * hour + 2 * Math.PI / 12 * (min / 60) - Math.PI / 2)
    ctx.beginPath()
    // moveTo设置画线起点
    ctx.moveTo(-10, 0)
    // lineTo设置画线经过点
    ctx.lineTo(40, 0)
    // 设置线宽
    ctx.lineWidth = 10
    ctx.stroke()
    ctx.closePath()
    ctx.restore()
    ctx.save()

    // 分针
    ctx.rotate(2 * Math.PI / 60 * min + 2 * Math.PI / 60 * (sec / 60) - Math.PI / 2)
    ctx.beginPath()
    ctx.moveTo(-10, 0)
    ctx.lineTo(60, 0)
    ctx.lineWidth = 5
    ctx.strokeStyle = 'blue'
    ctx.stroke()
    ctx.closePath()
    ctx.restore()
    ctx.save()

    //秒针
    ctx.rotate(2 * Math.PI / 60 * sec - Math.PI / 2)
    ctx.beginPath()
    ctx.moveTo(-10, 0)
    ctx.lineTo(80, 0)
    ctx.strokeStyle = 'red'
    ctx.stroke()
    ctx.closePath()
    ctx.restore()
    ctx.save()

    // 绘制刻度,也是跟绘制时分秒针一样,只不过刻度是死的
    ctx.lineWidth = 1
    for (let i = 0; i < 60; i++) {
        ctx.rotate(2 * Math.PI / 60)
        ctx.beginPath()
        ctx.moveTo(90, 0)
        ctx.lineTo(100, 0)
        // ctx.strokeStyle = 'red'
        ctx.stroke()
        ctx.closePath()
    }
    ctx.restore()
    ctx.save()
    ctx.lineWidth = 5
    for (let i = 0; i < 12; i++) {
        ctx.rotate(2 * Math.PI / 12)
        ctx.beginPath()
        ctx.moveTo(85, 0)
        ctx.lineTo(100, 0)
        // ctx.strokeStyle = 'red'
        ctx.stroke()
        ctx.closePath()
    }

    ctx.restore()
    ctx.restore()
}, 1000)
效果 very good啊:
2 . canvas实现刮刮卡
小时候很多人都买过充值卡把,懂的都懂啊哈,用指甲刮开这层灰皮,就能看底下的答案了。
思路是这样的:
- 1、底下答案是一个
div,顶部灰皮是一个canvas,canvas一开始盖住div - 2、鼠标事件,点击时并移动时,鼠标经过的路径都
画圆形开路,并且设置globalCompositeOperation为destination-out,使鼠标经过的路径都变成透明,一透明,自然就显示出下方的答案信息。
关于fill这个方法,其实是对标stroke的,fill是把图形填充,stroke只是画出边框线
// html
<canvas id="canvas" width="400" height="100"></canvas>
<div class="text">恭喜您获得100w</div>
<style>
        * {
            margin: 0;
            padding: 0;
        }
        .text {
            position: absolute;
            left: 130px;
            top: 35px;
            z-index: -1;
        }
</style>


// js
const canvas = document.getElementById('canvas')
const ctx = canvas.getContext('2d')

// 填充的颜色
ctx.fillStyle = 'darkgray'
// 填充矩形 fillRect(起始X,起始Y,终点X,终点Y)
ctx.fillRect(0, 0, 400, 100)
ctx.fillStyle = '#fff'
// 绘制填充文字
ctx.fillText('刮刮卡', 180, 50)

let isDraw = false
canvas.onmousedown = function () {
    isDraw = true
}
canvas.onmousemove = function (e) {
    if (!isDraw) return
    // 计算鼠标在canvas里的位置
    const x = e.pageX - canvas.offsetLeft
    const y = e.pageY - canvas.offsetTop
    // 设置globalCompositeOperation
    ctx.globalCompositeOperation = 'destination-out'
    // 画圆
    ctx.arc(x, y, 10, 0, 2 * Math.PI)
    // 填充圆形
    ctx.fill()
}
canvas.onmouseup = function () {
    isDraw = false
}
效果如下:

3 . canvas实现画板和保存
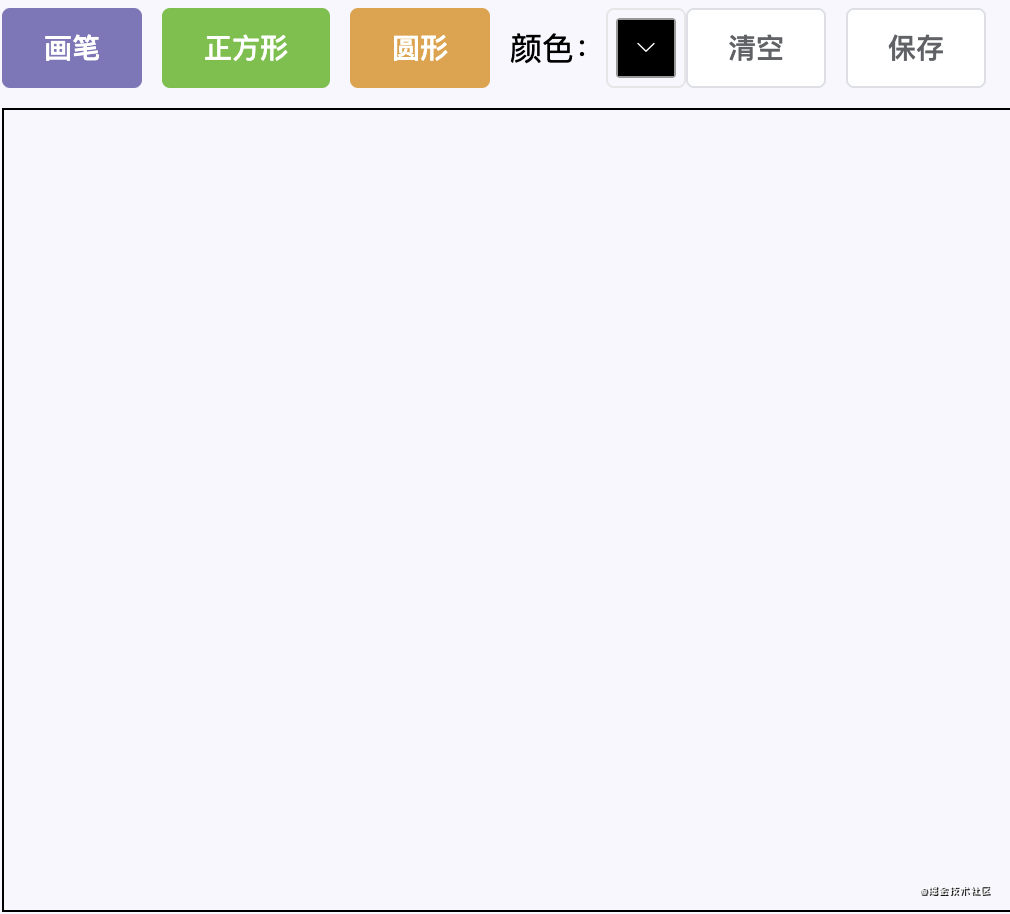
框架:使用vue + elementUI
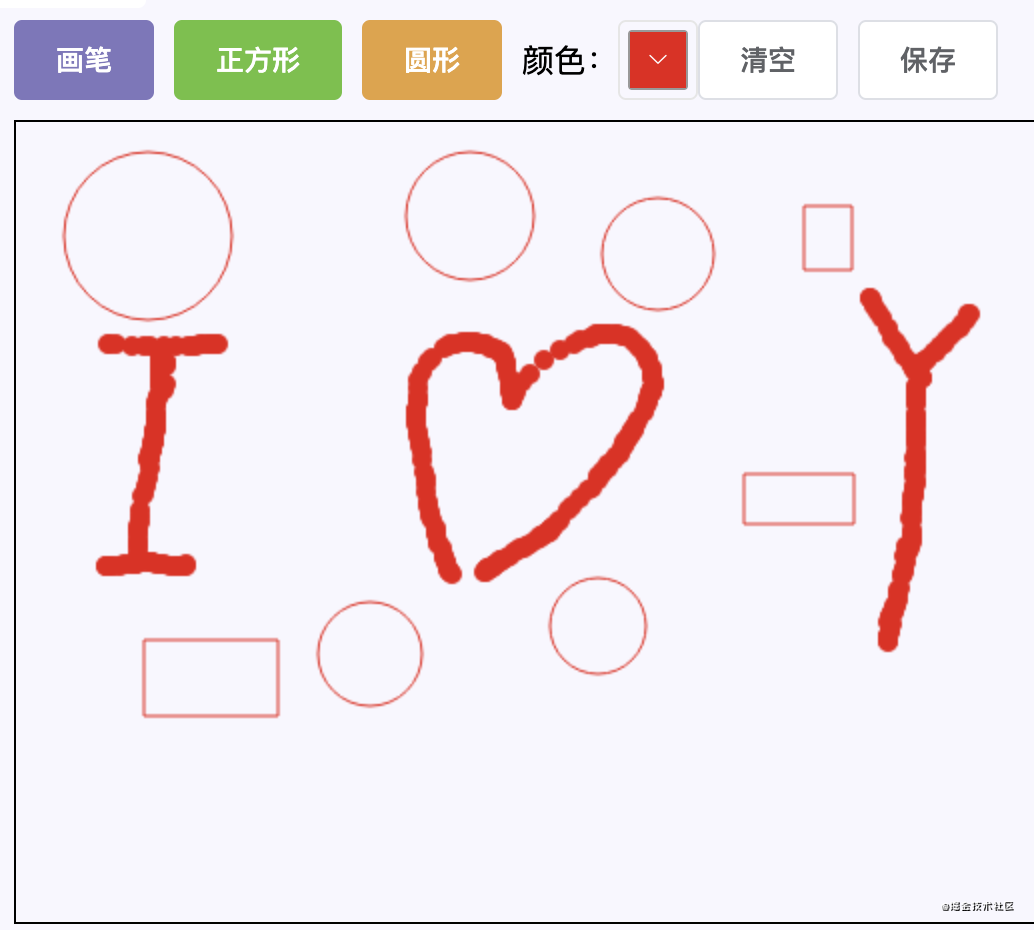
其实很简单,难点有以下几点:
- 1、鼠标拖拽画正方形和圆形
- 2、画完一个保存画布,下次再画的时候叠加
- 3、保存图片
第一点,只需要计算出鼠标点击的点坐标,以及鼠标的当前坐标,就可以计算了,矩形长宽计算:x \- beginX, y \- beginY,圆形则要利用勾股定理:Math.sqrt((x \- beginX) * (x \- beginX) + (y \- beginY) * (y \- beginY))
第二点,则要利用canvas的getImageData和putImageData方法
第三点,思路是将canvas生成图片链接,并赋值给具有下载功能的a标签,并主动点击a标签进行图片下载
看看效果吧:
<template>
  <div>
    <div style="margin-bottom: 10px; display: flex; align-items: center">
      <el-button @click="changeType('huabi')" type="primary">画笔</el-button>
      <el-button @click="changeType('rect')" type="success">正方形</el-button>
      <el-button
        @click="changeType('arc')"
        type="warning"
        style="margin-right: 10px"
        >圆形</el-button
      >
      <div>颜色:</div>
      <el-color-picker v-model="color"></el-color-picker>
      <el-button @click="clear">清空</el-button>
      <el-button @click="saveImg">保存</el-button>
    </div>
    <canvas
      id="canvas"
      width="800"
      height="400"
      @mousedown="canvasDown"
      @mousemove="canvasMove"
      @mouseout="canvasUp"
      @mouseup="canvasUp"
    >
    </canvas>
  </div>
</template>

<script>
export default {
  data() {
    return {
      type: "huabi",
      isDraw: false,
      canvasDom: null,
      ctx: null,
      beginX: 0,
      beginY: 0,
      color: "#000",
      imageData: null,
    };
  },
  mounted() {
    this.canvasDom = document.getElementById("canvas");
    this.ctx = this.canvasDom.getContext("2d");
  },
  methods: {
    changeType(type) {
      this.type = type;
    },
    canvasDown(e) {
      this.isDraw = true;
      const canvas = this.canvasDom;
      this.beginX = e.pageX - canvas.offsetLeft;
      this.beginY = e.pageY - canvas.offsetTop;
    },
    canvasMove(e) {
      if (!this.isDraw) return;
      const canvas = this.canvasDom;
      const ctx = this.ctx;
      const x = e.pageX - canvas.offsetLeft;
      const y = e.pageY - canvas.offsetTop;
      this[`${this.type}Fn`](ctx, x, y);
    },
    canvasUp() {
      this.imageData = this.ctx.getImageData(0, 0, 800, 400);
      this.isDraw = false;
    },
    huabiFn(ctx, x, y) {
      ctx.beginPath();
      ctx.arc(x, y, 5, 0, 2 * Math.PI);
      ctx.fillStyle = this.color;
      ctx.fill();
      ctx.closePath();
    },
    rectFn(ctx, x, y) {
      const beginX = this.beginX;
      const beginY = this.beginY;
      ctx.clearRect(0, 0, 800, 400);
      this.imageData && ctx.putImageData(this.imageData, 0, 0, 0, 0, 800, 400);
      ctx.beginPath();
      ctx.strokeStyle = this.color;
      ctx.rect(beginX, beginY, x - beginX, y - beginY);
      ctx.stroke();
      ctx.closePath();
    },
    arcFn(ctx, x, y) {
      const beginX = this.beginX;
      const beginY = this.beginY;
      this.isDraw && ctx.clearRect(0, 0, 800, 400);
      this.imageData && ctx.putImageData(this.imageData, 0, 0, 0, 0, 800, 400);
      ctx.beginPath();
      ctx.strokeStyle = this.color;
      ctx.arc(
        beginX,
        beginY,
        Math.round(
          Math.sqrt((x - beginX) * (x - beginX) + (y - beginY) * (y - beginY))
        ),
        0,
        2 * Math.PI
      );
      ctx.stroke();
      ctx.closePath();
    },
    saveImg() {
      const url = this.canvasDom.toDataURL();
      const a = document.createElement("a");
      a.download = "sunshine";
      a.href = url;
      document.body.appendChild(a);
      a.click();
      document.body.removeChild(a);
    },
    clear() {
        this.imageData = null
        this.ctx.clearRect(0, 0, 800, 400)
    }
  },
};
</script>

<style lang="scss" scoped>
#canvas {
  border: 1px solid black;
}
</style>