使用 jsencrypt 配合 axios 实现数据传输加密
背景
不希望应用发送的数据能在 Devtools 中被看到,避免接口被“同行”扒下来,然后被恶意使用

要避免此问题,首先想到的就是对传输的数据进行一次加密,让后端自行解密然后处理
尽管js源码是被浏览器公开的,但通过构建工具混淆后,在没有source map的情况下还不不易定位目标代码
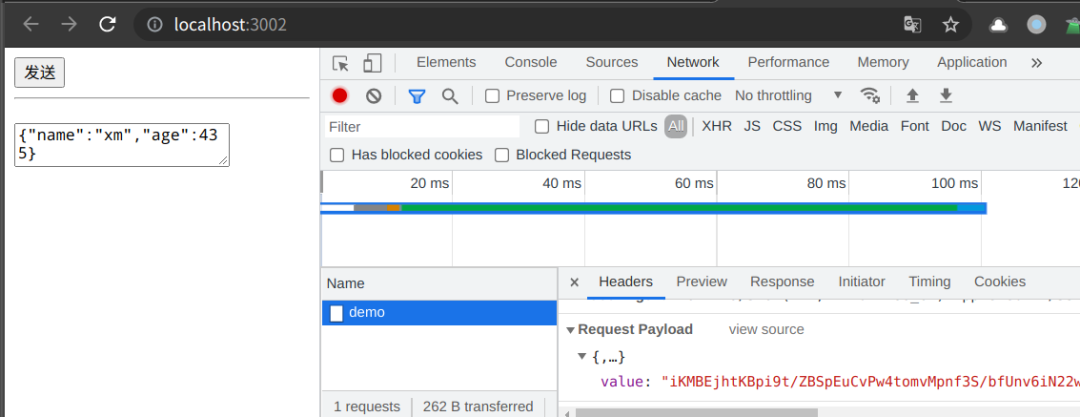
期望加密后的样子传输的内容如下

加密方案简述
对称加密
对称加密就是两边拥有相同的秘钥,两边都知道如何将密文加密解密。
这种加密方式固然很好,但是问题就在于如何让双方知道秘钥。
由于传输数据都是走的网络,如果将秘钥通过网络的方式传递的话,一旦秘钥被截获就没有加密的意义
非对称加密
有公钥私钥之分:
- 公钥所有人都可以知道,可以将数据用公钥加密,但是将数据解密必须使用私钥解密
- 私钥只有分发放公钥的一方才知道
这种加密方式就可以完美解决对称加密存在的问题
通过对比,选用保密性好的 非对称加密 方案作为加密方案
本文选用 RSA[1] 对称加密算法
公私钥生成
根据百度经验的建议,生成一个1024位的的秘钥
这里使用openssl生成,window下建议在Git Bash下使用
私钥
openssl genrsa -out rsa_1024_priv.pem 1024
公钥
openssl rsa -pubout -in rsa_1024_priv.pem -out rsa_1024_pub.pem
jsencrypt
- jsencrypt[2]
- nodejs-jsencrypt[3]
“使用 Javascript 进行RSA加密的解决方案
使用
安装依赖
# web
npm i jsencrypt

# node
npm i nodejs-jsencrypt
引入
// web
import JSEncrypt from 'jsencrypt'

// node
const { JSEncrypt } = require('nodejs-jsencrypt')
公钥加密方法
// 上述自动生成
const pubKey = '上述生成的公钥'

function publicEncrypt(str){
    const encrypt = new JSEncrypt()
    encrypt.setPublicKey(pubKey)
    return encrypt.encrypt(str)
}
私钥解密方法
const privKey = `上述生成的私钥`

function privDecrypt(str) {
    const encrypt = new JSEncrypt()
    encrypt.setPrivateKey(privKey)
    return encrypt.decrypt(str)
}
可以看出API非常简洁
使用示例
let str = publicEncrypt('hello world')
console.log(str)
console.log(privDecrypt(str))
结合Axios实践
Axios配置
npm i axios
将加密逻辑放入到axios的请求拦截器中,将原内容使用 JSON.stringify处理后再进行加密,加密后的内容使用value属性传递,如下所示
import axios from "axios";

// 引入刚刚编写的加密方法
import { publicEncrypt } from "./utils/crypto";

const http = axios;
http.defaults.baseURL = '/api'
http.defaults.headers = {
  "content-Type": "application/json"
};

// 请求拦截器
http.interceptors.request.use(
  config => {
    // 发送之前操作config
    // 对传递的 data 进行加密
    config.data = {
      value:publicEncrypt(JSON.stringify(config.data))
    }
    return config;
  },
  err => {
    // 处理错误
    return Promise.reject(err);
  }
);
http.interceptors.response.use(
  response => {
    // 返回前操作
    return response.data;
  },
  err => {
    return Promise.reject(err);
  }
);

export default http;
服务端解密示例代码
这里列举了两种,一种直接使用Node.js的http模块编写,一种使用Express编写:
- 解密收到的内容
- 将解密后的内容直接返回
http模块示例
使用data事件与end事件配合,接收传递的数据,然后进行解密返回
const http = require('http')

// 引入解密方法
const { privDecrypt } = require('./utils/crypto')

const server = http.createServer((req, res) => {
    res.setHeader('content-type','application/json')
    let buffer = Buffer.alloc(0)

    // 接收传递的数据
    req.on('data',(chunk)=>{
        buffer = Buffer.concat([buffer, chunk])
    })
    req.on('end',()=>{
        try {
            // 解密传递的数据
            const data = privDecrypt(JSON.parse(buffer.toString('utf-8')).value)
            res.end(data)
        } catch (error) {
            console.log(error);
            res.end('error')
        }
    })
})

// 启动
server.listen(3000, err => {
    console.log(`listen 3000 success`);
})
Express示例
配置一个前置的*路由,解密传递的内容,然后将其重新绑定到req.body上,供后续其它路由使用
const express = require('express')
const { privDecrypt } = require('./utils/crypto')

const server = express()

server.use(express.urlencoded({ extended: false }))
server.use(express.json({ strict: true }))

// 首先进入的路由
server.route('*').all((req, res, next) => {
    console.log(`${req.method}--${req.url}`)
    req.body = JSON.parse(privDecrypt(req.body.value))
    next()
})

server.post('/test/demo',(req,res)=>{
    // 直接返回实际的内容
    res.json(req.body)
})

// 启动
server.listen(3000, err => {
    console.log(`listen 3000 success`);
})
前端代码示例
使用了 Vite 作为开发预览工具
vite.config.js配置: 只做了请求代理,解决开发跨域问题
export default {
    server: {
        proxy: {
            '/api': {
                target: 'http://localhost:3000',
                changeOrigin: true,
                rewrite: (path) => path.replace(/^\/api/, '')
            },
        }
    }
}
页面
<body>
    <button id="send">发送</button>
    <hr>
    <h2></h2>
    <textarea id="receive" placeholder="接收的内容"></textarea>
    <script type="module" src="./index.js"></script>
</body>
逻辑
import $http from './http'
const $send = document.getElementById('send')
const $receive = document.getElementById('receive')

$send.addEventListener('click',function(){
    // 发送一个随机内容
    $http.post('/test/demo',{
        name:'xm',
        age:~~(Math.random()*1000)
    }).then((res)=>[
        updateReceive(res)
    ])
})

function updateReceive(data){
    $receive.value = data instanceof Object?JSON.stringify(data):data
}
运行结果
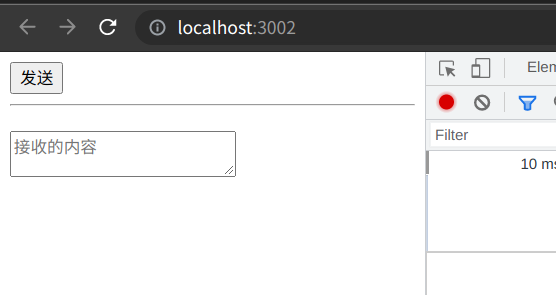
页面

发送网络请求

请求响应内容

大功告成,接入十分简单