十分钟精进 Webpack:module.issuer 属性详解
本文讲解 webpack 的 module.issuer 属性,内容涵盖该属性的作用、运行原理,并结合 webpack 实例讲解应用场景。
module.issuer 是什么
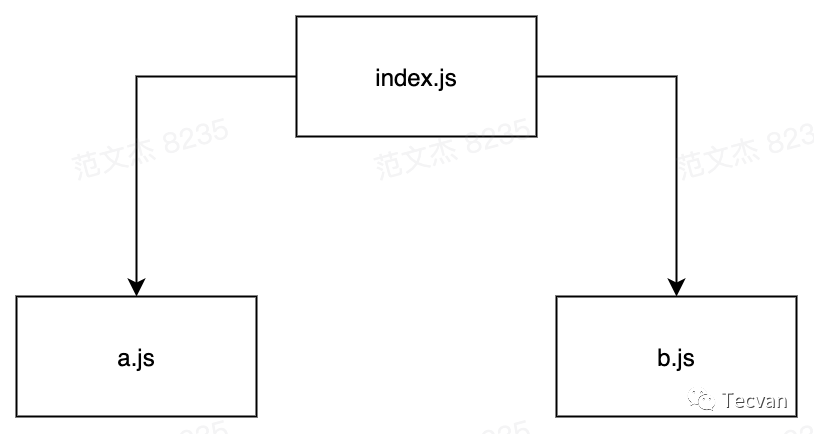
在 webpack 实现上,文件资源使用 Module 类管理,所有关于资源的操作、转译、合并、关系都在 module 实现。而 module.issuer 属性用于记录资源的引用者,例如对于下面的资源依赖:

index 引用了 a/b 两个文件,webpack 构建时会用三个 module 对象分别对应三个文件,同时在 a/b 模块中通过 issuer 属性指向 index 模块:
module['a.js'].issuer = module['index.js']module['b.js'].issuer = module['index.js']
通过 issuer 属性,模块可以反向查找到引用者。
实例:Stats 类
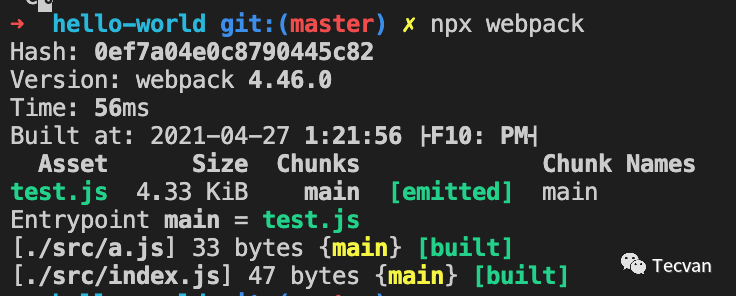
Stats 是 webpack 内置的对象,用于收集构建过程信息,比如耗时、模块依赖关系、错误信息、报警信息等,我们运行 webpack 命令输出的命令行信息就是由 Stats 类提供的:

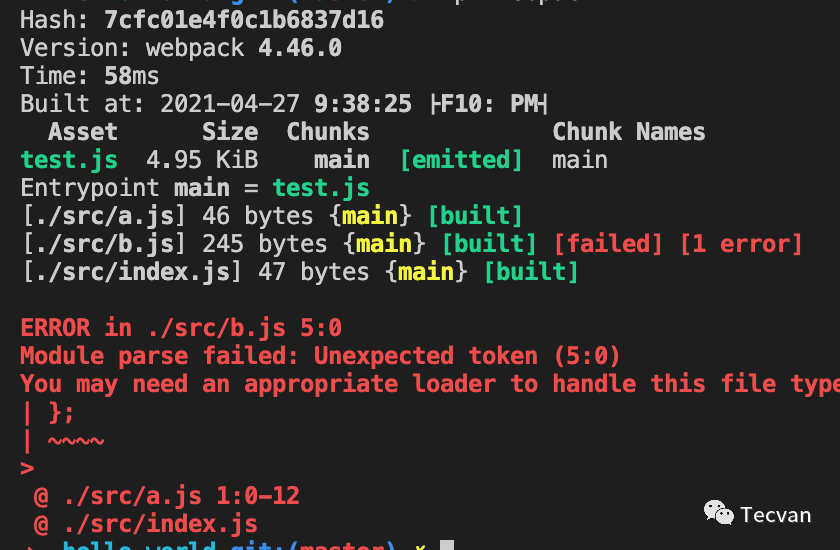
Stats 会通过 module.issuer 属性逐级往上查找出完整调用堆栈:
class Stats {
  constructor(compilation) {
    // ...
  }
  toJson(options, forToString) {
    const formatError = (e) => {
      // ...
      if (showModuleTrace && e.origin) {
        text += `\n @ ${this.formatFilePath(
          e.origin.readableIdentifier(requestShortener)
        )}`;
        // ...
        while (current.issuer) {
          current = current.issuer;
          text += `\n @ ${current.readableIdentifier(requestShortener)}`;
        }
      }
      return text;
    };
  }
}
最终输出下图最后两行错误堆栈:
源码
issuer 属性定义在 webpack/lib/Module.js 的 construct 函数,但 webpack 中使用较少,难以追踪,这里取了个巧,用 Object.defineProperty 拦截 issuer 属性,定位出哪里获取/修改了这个属性:
// webpack/lib/Module.js
class Module extends DependenciesBlock {
  constructor(type, context = null) {
    // ...
    // 注释掉原本的定义
    // this.issuer = null;
    // 用 Object.defineProperty 拦截
    this._issuer=null;
    Object.defineProperty(this, "issuer", {
        get: () => {
            debugger;
            return this._issuer;
        },
        set: (value) => {
            debugger;
            this._issuer = value;
        },
    });
    // ...
  }
}
之后,使用 ndb 断点追踪 issuer 的使用情况,可以看到只有在 compilation 对象的 addModuleDependencies 函数中触发 set 函数:
class Compilation {
  addModuleDependencies(
    module,
    dependencies,
    bail,
    cacheGroup,
    recursive,
    callback
  ) {
    // ...
    if (addModuleResult.issuer) {
      if (currentProfile) {
        dependentModule.profile = currentProfile;
      }
      // 触发更改
      dependentModule.issuer = module;
    }
    // ...
  }
}
addModuleDependencies 函数的作用是为已有 module 添加依赖声明,例如对于上面的例子:

compilation 解析(解析过程可参考:[万字总结] 一文吃透 Webpack 核心原理)出 index.js 内容的 AST 后,遍历 require/import 语句解读当前模块引用了那些资源,解析到任意依赖后就会调用 addModuleDependencies 记录依赖关系,从 addModuleDependencies 源码看在依赖被创建为 module 时,会同步修改新模块的 issuer ,记录引用者的信息。
示例:追溯模块引用关系
基于 module.issuer ,我们可以从特定 module 出发反向遍历依赖关系链,为此我写了个示例插件:
function RevertTracePlugin(options) {
}

RevertTracePlugin.prototype.apply = function(compiler) {
  // compilation 被创建出来后触发
  compiler.hooks.thisCompilation.tap("RevertTracePlugin", function(compilation) {
    // 构建模块前触发
    compilation.hooks.buildModule.tap("RevertTracePlugin", (module) => {
      const stack = [];
      let current = module;
      // 向上遍历,找出所有引用者
      while (current.issuer) {
        stack.push(current.issuer.rawRequest);
        current = current.issuer;
      }
      if (stack.length > 0) {
        console.group(`资源 ${module.rawRequest} 引用链: `);
        console.log(stack.join("\n"));
        console.groupEnd();
        console.log();
      }
    });
  });
};
上述插件用到两个钩子:
compiler.hooks.thisCompilation:webpack 启动编译,创建出compilation对象时触发,在示例场景中作为中间步骤,用于获取创建出的compilation对象compilation.hooks.buildModule:执行模块构建之前触发,此时module对象所有原信息都初始化完毕,可以正常获取到issuer属性
❝关于 webpack 钩子的更多内容,可查阅往前文章:[源码解读] Webpack 插件架构深度讲解
❞
在 buildModule 钩子内部通过 while 循环不断向上遍历,最终可追溯到完整引用链条,例如对于下图的文件依赖关系:

index.js 文件引用了 a.js,a.js 文件引用了 b.js,上述插件运行效果:
总结
module.issuer 属性在 webpack 中使用的比较少,因为大多数时候模块间的依赖关系都可以通过 dependency graph 相关的属性正向获取,下一期我们就来聊聊 dependency graph 相关内容 。

