如何实现一个文件上传功能
本文将带领读者从零开始一步一步完成一个文件上传功能
目录
- 实现一个最简单的上传功能
- 分片上传
- 断点续传
实现一个最简单的上传功能
type为file类型的input标签被触发click事件时会触发浏览器的选取文件功能,因此我们可以点击 <input type="file" /> 来选取想要上传的,但通常我们在做上传文件的触发按钮时都需要自定义样式,有时很难用 input 标签来完成想要的样式,因此我们希望能够通过js的方式来调用选取文件功能,这个功能可以通过 input.click() 方法实现,代码如下
<!DOCTYPE html>
<html lang="en">
<head>
  <meta charset="UTF-8">
  <meta http-equiv="X-UA-Compatible" content="IE=edge">
  <meta name="viewport" content="width=device-width, initial-scale=1.0">
  <title>Document</title>
  <style>
    .btn {
      width: 100px;
      height: 100px;
      border: none;
      border: 1px dashed rgb(31, 154, 158);
      background: #fff;
      cursor: pointer;
    }
  </style>
</head>
<body>
  <button id="btn" class="btn">上传文件</button>
  <input id="input" type="file" style="display: none;" />
  <script src="https://lib.baomitu.com/axios/0.21.1/axios.js"></script>
  <script>
    const axios = window.axios.create({ baseURL: 'http://localhost:3000' })

    const domBtn = document.querySelector('#btn')
    const domInput = document.querySelector('#input')
    domBtn.onclick = function () {
      domInput.click()
    }
  </script>
</body>
</html>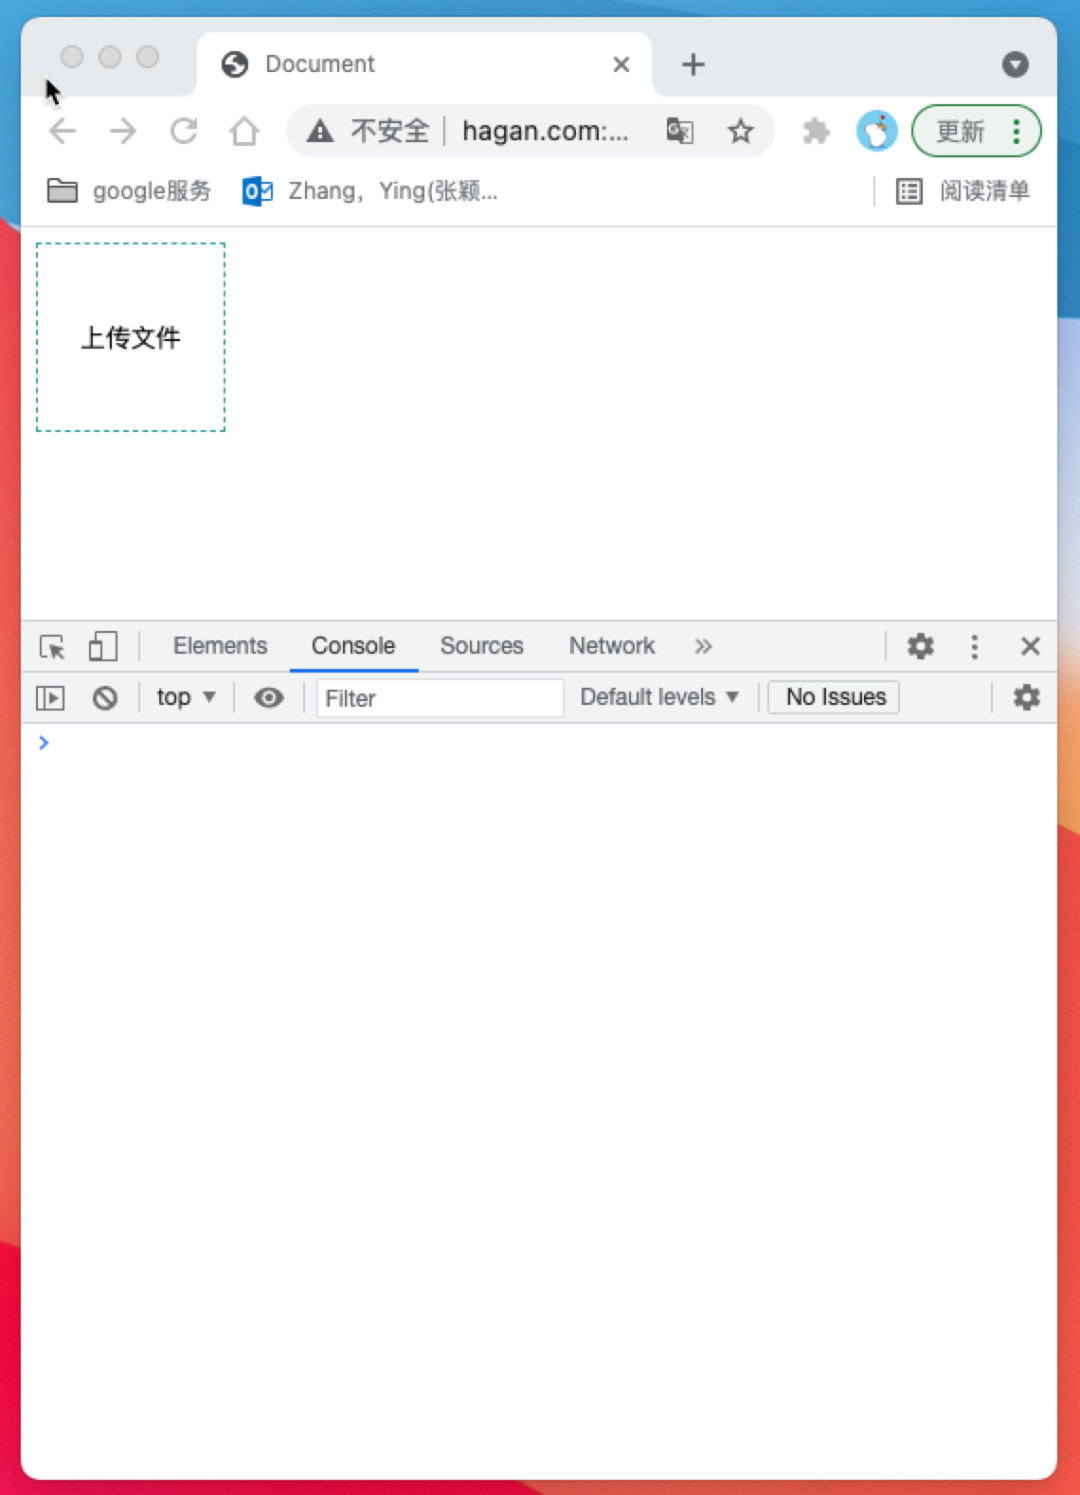
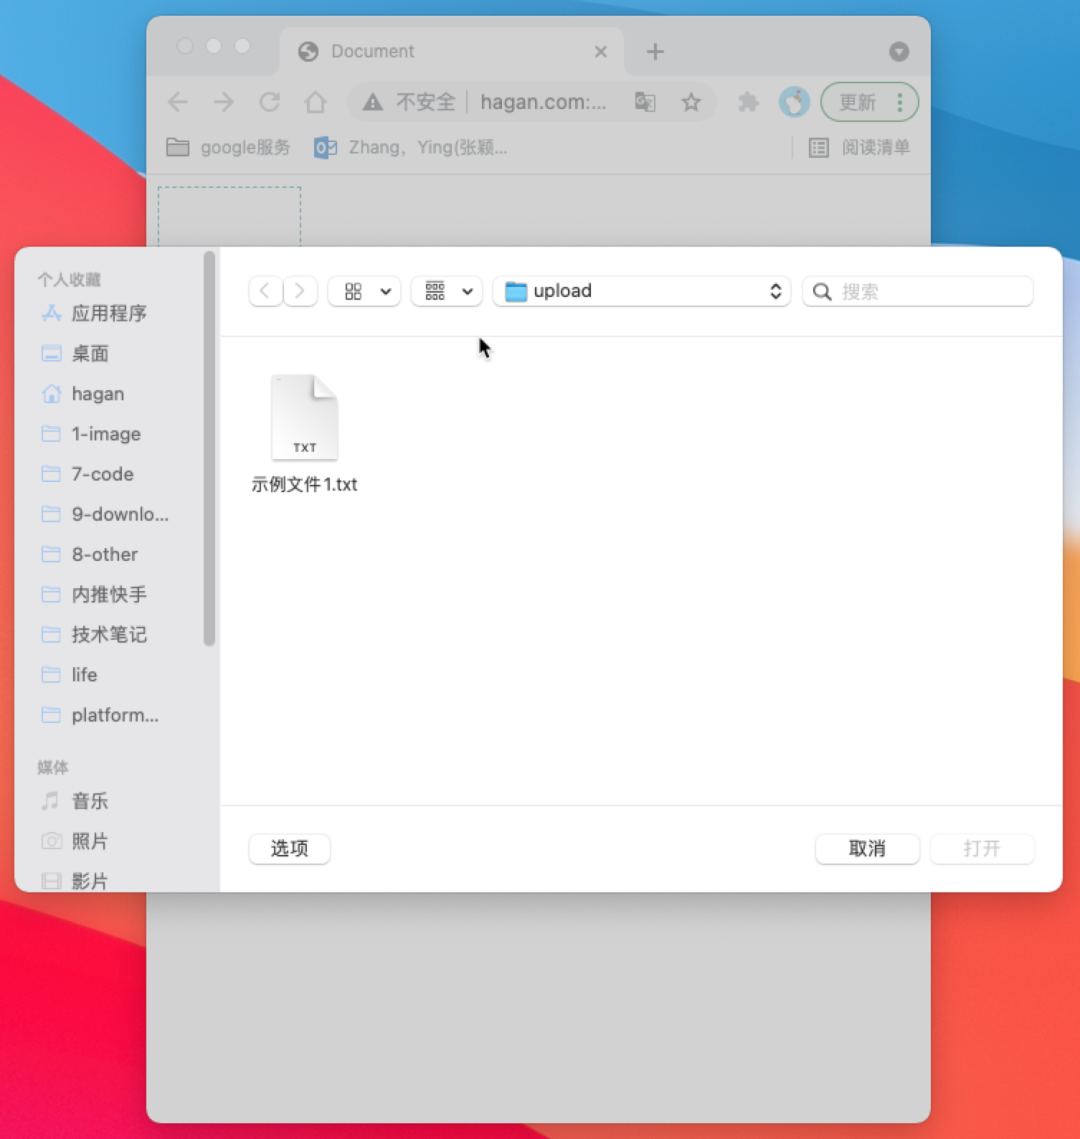
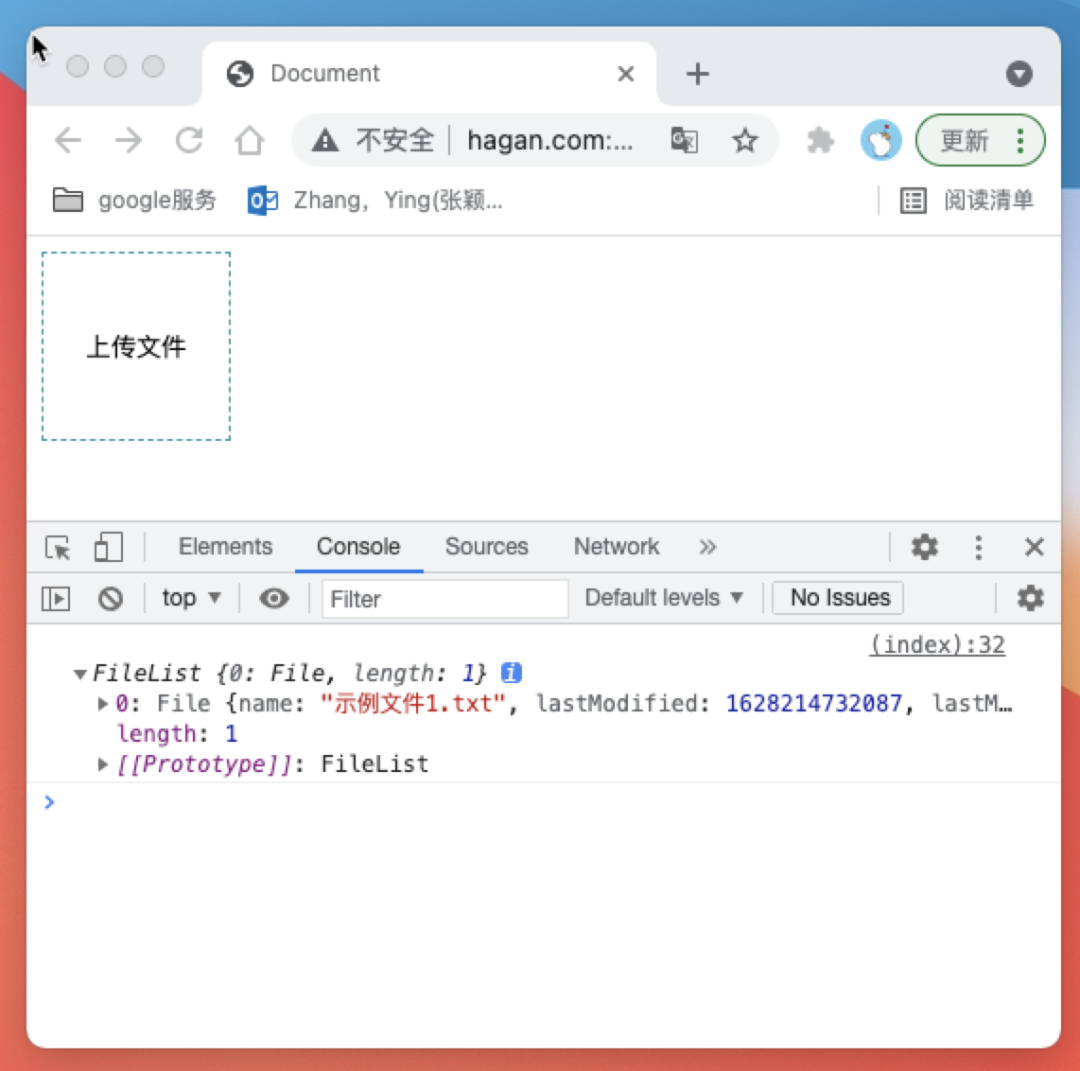
input的change事件就可以在选取文件后获取到被选择的文件了
domInput.onchange = function (ev) {
  console.log(ev.target.files)
}
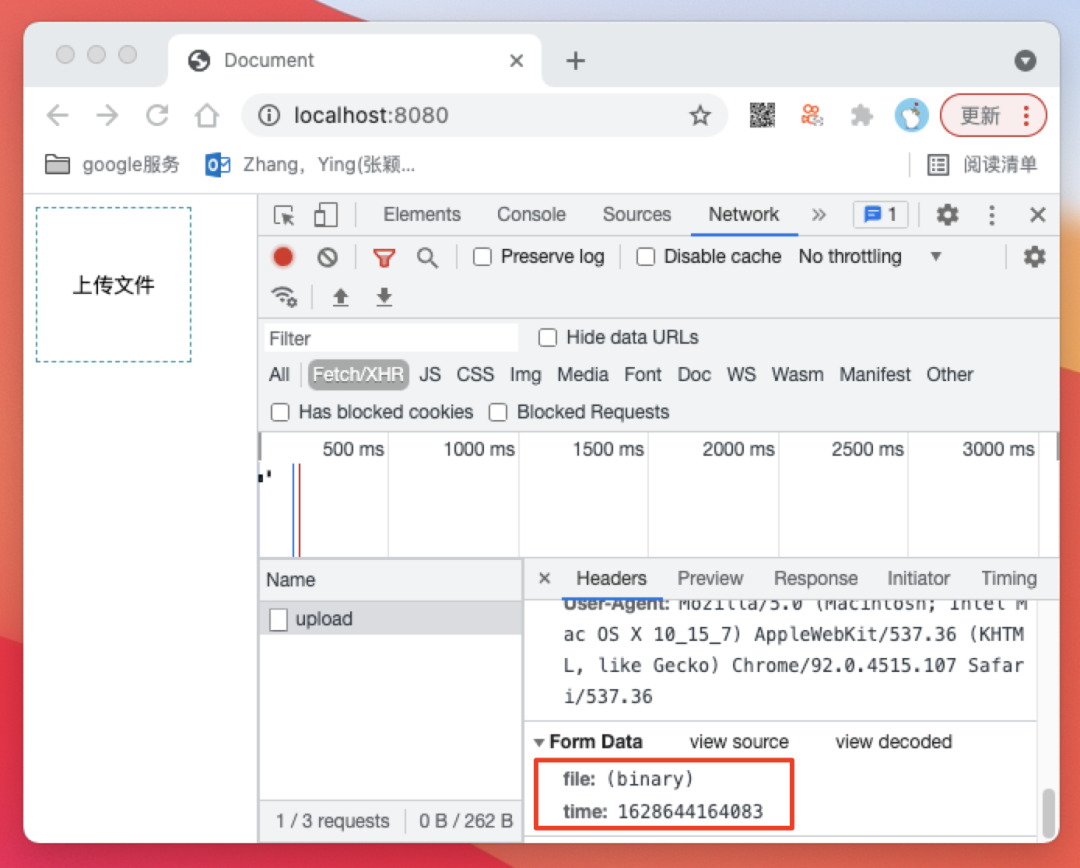
FormData 类来完成文件上传的参数构建
domInput.onchange = async function (ev) {
  const [ file ] = ev.target.files
  const formData = new FormData()
  formData.append('file', file)
  formData.append('time', Date.now())
  const res = await axios.post('/api/upload', formData)
  console.log('res: ', res)
}
接着我们使用node启动一个能接受跨域请求的http服务器
const http = require('http')

const app = http.createServer((req, res) => {
  const { method, url } = req
  console.log(url, ': ', method)

  res.setHeader('Access-Control-Allow-Origin', 'http://localhost:8080') // 可通过预检请求的域名
  res.setHeader('Access-Control-Allow-Headers', 'Content-Type') // 可通过预检请求的Headers
  res.setHeader('Access-Control-Allow-Methods', 'POST') // 可通过预检请求的Method

  if (method === 'OPTIONS') {
    res.statusCode = 200
    res.end()
  }

  if (method === 'POST' && url === '/api/upload') {
      res.statusCode = 200
      res.setHeader('Content-Type', 'application/json; charset=utf-8')
      res.end('上传文件成功')
  }

})

app.listen(3000, () => {
  console.log('listen 3000')
})接收/api/upload请求正文内容
if (method === 'POST' && url === '/api/upload') {
  const bufferList = []
  req.on('data', data => {
    bufferList.push(data)
  })
  req.on('end', () => {
    const body = Buffer.concat(bufferList)
    console.log(body.toString())
    res.statusCode = 200
    res.setHeader('Content-Type', 'application/json; charset=utf-8')
    res.end('上传文件成功')
  })
}
console.log(body)
------WebKitFormBoundary2ODGfkwq5lbAe2A1
Content-Disposition: form-data; name="file"; filename="示例文件1.txt"
Content-Type: text/plain

示例内容1

------WebKitFormBoundary2ODGfkwq5lbAe2A1
Content-Disposition: form-data; name="time"

1628296918322
------WebKitFormBoundary2ODGfkwq5lbAe2A1--
从请求正文中我们拿到上面的数据后我们来分析这段数据
------WebKitFormBoundary2ODGfkwq5lbAe2A1为分隔符,分割每一段数据,这个分隔符我们可以在Content-Type中获取到
console.log(req.headers['content-type']) // multipart/form-data; boundary=----WebKitFormBoundaryDlkzZ9dkbBCPuqIg
body和分隔符都已经拿到了,接下来我们开始解析数据
首先我们用分隔符切分数据
function bufferSplit (buffer, separator) { // 根据分隔符分隔数据
  let result = []
  let index = buffer.indexOf(separator)
  while (index !== -1) {
    const buf = buffer.slice(0, index)
    result.push(buf)
    buffer = buffer.slice(index + separator.length)
    index = buffer.indexOf(separator)
  }
  result.push(buffer)
  return result
}

// 1. 用分隔符切分数据
const bodyArray = bufferSplit(body, boundary)
console.log(bodyArray.map(item => item.toString()))
打印如下内容
[
  '',
  '\r\n' +
    'Content-Disposition: form-data; name="file"; filename="示例文件1.txt"\r\n' +
    'Content-Type: text/plain\r\n' +
    '\r\n' +
    '示例内容1\n' +
    '\r\n',
  '\r\nContent-Disposition: form-data; name="time"\r\n\r\n1628644164083\r\n',
  '--\r\n'
]
紧接着我们删除数组头尾数据,并且将每一项数据头尾的的\r\n删除
// 2. 删除数组头尾数据
bodyArray.shift() // 去掉头 ''
bodyArray.pop() // 去掉尾 '--\r\n'

// 3. 将每一项数据头尾的的\r\n删除
const bodyArrayNew = bodyArray.map(buffer => buffer.slice(2, buffer.length - 2))
console.log(bodyArrayNew.map(item => item.toString()))
打印如下内容
[
  'Content-Disposition: form-data; name="file"; filename="示例文件1.txt"\r\n' +
    'Content-Type: text/plain\r\n' +
    '\r\n' +
    '示例内容1\n',
  'Content-Disposition: form-data; name="time"\r\n\r\n1628644164083'
]
现在数组中的两项对应着我们从前端传过来的两个参数 file``time
// 4.获取最终结果
const fileInfo = {
  filePath: '',
  fileData: Buffer([]),
  fieldInfo: {}
}
bodyArrayNew.forEach(buffer => {
  const bufferInfo = bufferSplit(buffer, '\r\n\r\n') // 使用\r\n\r\n分割可得到包含参数信息和参数内容两项内容的数组

  const info = bufferInfo[0].toString() // info为字段信息,这是字符串类型数据,直接转换成字符串
  const data = bufferInfo[1] // data可能是普通数据也可能是文件内容
  const fieldName = info.split('; ')[1].split('=')[1].slice(1, -1)
  if (info.indexOf('\r\n') !== -1) {  // 若为文件内容,则数据中含有一个回车符\r\n,可以据此判断数据为文件还是为普通数据。
    const filename = info.split('; ')[2].split('\r\n')[0].split('=')[1].slice(1,-1)
    fileInfo.filePath = path.resolve(__dirname, './file', filename)
    fileInfo.fileData = data
  } else {
    fileInfo.fieldInfo[fieldName] = data.toString()
  }
})
console.log(fileInfo)
打印内容如下
{
  filePath: '/Users/hagan/7-code/gitlab/hagan/studyBackend/NodeJs/web全栈架构师node/03.网络编程/文件上传/file/示例文件1.txt',
  fileData: <Buffer e7 a4 ba e4 be 8b e5 86 85 e5 ae b9 31 0a>,
  fieldInfo: { token: '123' }
}
我们判断如果其他参数符合预期则储存文件内容
// 判断如果其他参数符合预期则储存文件内容
if (fileInfo.fieldInfo.token === '123') {
  fs.writeFileSync(fileInfo.filePath, fileInfo.fileData)
}
完整代码如下
server.js
const http = require('http')
const fs = require('fs')
const path = require('path')

const app = http.createServer((req, res) => {
  const { method, url } = req

  res.setHeader('Access-Control-Allow-Origin', 'http://localhost:8080') // 可通过预检请求的域名
  res.setHeader('Access-Control-Allow-Headers', 'Content-Type') // 可通过预检请求的Headers
  res.setHeader('Access-Control-Allow-Methods', 'POST') // 可通过预检请求的Method

  if (method === 'OPTIONS') {
    res.statusCode = 200
    res.end()
  }

  if (method === 'POST' && url === '/api/upload') {
    const bufferList = []
    req.on('data', data => {
      bufferList.push(data)
    })
    req.on('end', () => {
      const body = Buffer.concat(bufferList)
      const boundary = `--${req.headers['content-type'].split('; ')[1].split('=')[1]}` // 获取分隔符

      function bufferSplit (buffer, separator) { // 根据分隔符分隔数据
        let result = []
        let index = buffer.indexOf(separator)
        while (index !== -1) {
          const buf = buffer.slice(0, index)
          result.push(buf)
          buffer = buffer.slice(index + separator.length)
          index = buffer.indexOf(separator)
        }
        result.push(buffer)
        return result
      }

      // 1. 用分隔符切分数据
      const bodyArray = bufferSplit(body, boundary)
      // console.log(bodyArray.map(item => item.toString()))

      // 2. 删除数组头尾数据
      bodyArray.shift() // 去掉头 ''
      bodyArray.pop() // 去掉尾 '--\r\n'

      // 3. 将每一项数据头尾的的\r\n删除
      const bodyArrayNew = bodyArray.map(buffer => buffer.slice(2, buffer.length - 2))
      // console.log(bodyArrayNew.map(item => item.toString()))

      // 4.获取最终结果
      const fileInfo = {
        filePath: '',
        fileData: Buffer([]),
        fieldInfo: {}
      }
      bodyArrayNew.forEach(buffer => {
        const bufferInfo = bufferSplit(buffer, '\r\n\r\n') // 使用\r\n\r\n分割可得到包含参数信息和参数内容两项内容的数组

        const info = bufferInfo[0].toString() // info为字段信息,这是字符串类型数据,直接转换成字符串
        const data = bufferInfo[1] // data可能是普通数据也可能是文件内容
        const fieldName = info.split('; ')[1].split('=')[1].slice(1, -1)
        if (info.indexOf('\r\n') !== -1) {  // 若为文件内容,则数据中含有一个回车符\r\n,可以据此判断数据为文件还是为普通数据。
          const filename = info.split('; ')[2].split('\r\n')[0].split('=')[1].slice(1,-1)
          fileInfo.filePath = path.resolve(__dirname, './file', filename)
          fileInfo.fileData = data
        } else {
          fileInfo.fieldInfo[fieldName] = data.toString()
        }
      })
      // 判断如果其他参数符合预期则储存文件内容
      if (fileInfo.fieldInfo.token === '123') {
        fs.writeFileSync(fileInfo.filePath, fileInfo.fileData)
        res.statusCode = 200
        res.setHeader('Content-Type', 'application/json charset=utf-8')
        res.end('上传成功')
      }
    })
  }

})

app.listen(3000, () => {
  console.log('listen 3000')
})
index.html
<!DOCTYPE html>
<html lang="en">
<head>
  <meta charset="UTF-8">
  <meta http-equiv="X-UA-Compatible" content="IE=edge">
  <meta name="viewport" content="width=device-width, initial-scale=1.0">
  <title>Document</title>
  <style>
    .btn {
      width: 100px;
      height: 100px;
      border: none;
      border: 1px dashed rgb(31, 154, 158);
      background: #fff;
      cursor: pointer;
    }
  </style>
</head>
<body>
  <button id="btn" class="btn">上传文件</button>
  <input id="input" type="file" style="display: none;" />
  <script src="https://lib.baomitu.com/axios/0.21.1/axios.js"></script>
  <script>
    const axios = window.axios.create({ baseURL: 'http://localhost:3000' })

    const domBtn = document.querySelector('#btn')
    const domInput = document.querySelector('#input')
    domBtn.onclick = function () {
      domInput.click()
    }
    domInput.onchange = async function (ev) {
      const [ file ] = ev.target.files
      const formData = new FormData()
      formData.append('file', file)
      formData.append('token', '123')
      const res = await axios.post('/api/upload', formData)
      console.log('res: ', res)
    }
  </script>
</body>
</html>
上面已经完成了基本的文件上传功能,但如果上传一个很大的文件,这时上传的时间会比较长(要传输更多的报文,丢包重传的概率也更大),用户不能刷新页面,只能耐心等待请求完成,一旦上传失败,那么就需要从0开始重新传,试想如果你上传一个1G大小的文件,已经上传了1023M了,突然网络异常,然后告诉你上传失败需要从0开始重新上传,你的心情会是什么样子。。。
为了解决这个问题,我们引入分片上传和断点续传的概念。
分片上传
前端上传时首先需要将文件切割成更小的块,然后将每一个小块标明索引后上传
前端上传分片的代码如下
domInput.onchange = async function (ev) {
  const [ file ] = ev.target.files

  async function upload (blobIndex) {
    const chunkSize = 10 // 定义10字节为一个小块
    const startIndex = blobIndex * chunkSize // 定义本次上传的开始位置
    if (file.size < startIndex) { // 代表文件小块都上传完毕,停止上传
      return
    }

    const blob = file.slice(startIndex, startIndex + chunkSize) // 获取本次上传的Blob格式文件内容
    const fileBlob = new File([blob], file.name) // 将Blob转换成File
    const formData = new FormData()
    formData.append('fileBlob', fileBlob)
    formData.append('fileBlobIndex', blobIndex) // 标明本次上传的索引
    const res = await axios.post('/api/upload', formData)
    if (res.status === 200) {
      upload(blobIndex + 1) // 如果上传成功则继续上传下一个文件小块
    }
  }

  upload(0)
}
后端保存时我们以fileBlob为分片根目录,以文件名创建一个文件夹,我们把分片都保存在分片对应的文件名创建的文件夹下
后端处理并保存分片的代码如下
// 4.获取fileBlobInfo
const fileBlobPath = path.resolve(__dirname, './fileBlob') // 定义文件小块的保持位置
const filePath = path.resolve(__dirname, './file') // 定义文件的保持位置
const fileBlobInfo = {} // 定义文件小块信息对象
bodyArrayNew.forEach(buffer => {
  const bufferInfo = bufferSplit(buffer, '\r\n\r\n') // 使用\r\n\r\n分割可得到包含参数信息和参数内容两项内容的数组

  const info = bufferInfo[0].toString() // info为字段信息,这是字符串类型数据,直接转换成字符串
  const data = bufferInfo[1] // data可能是普通数据也可能是文件内容
  const fieldName = info.split('; ')[1].split('=')[1].slice(1, -1)
  if (info.indexOf('\r\n') !== -1) {  // 若为文件内容,则数据中含有一个回车符\r\n,可以据此判断数据为文件还是为普通数据。
    const filename = info.split('; ')[2].split('\r\n')[0].split('=')[1].slice(1,-1)
    fileBlobInfo.filename = filename // 保存文件名到文件小块信息对象
    fileBlobInfo[fieldName] = data // 保存二进制数据到文件小块信息对象
  } else {
    fileBlobInfo[fieldName] = data.toString() // 保存其他字段到文件小块信息对象
  }
})
console.log(fileBlobInfo) // 此时fileBlobInfo下应该有如下三个字段,filename/fileBlob/fileBlobIndex

// 5.保存分片
fs.mkdirSync(path.resolve(fileBlobPath, fileBlobInfo.filename), { recursive: true }) // 以文件名为key创建文件夹
fs.writeFileSync(path.resolve(fileBlobPath, fileBlobInfo.filename, fileBlobInfo.fileBlobIndex), fileBlobInfo.fileBlob) // 将分片写入文件夹
res.statusCode = 200
res.setHeader('Content-Type', 'application/json charset=utf-8')
res.end('上传成功')
我们尝试上传一个示例文件
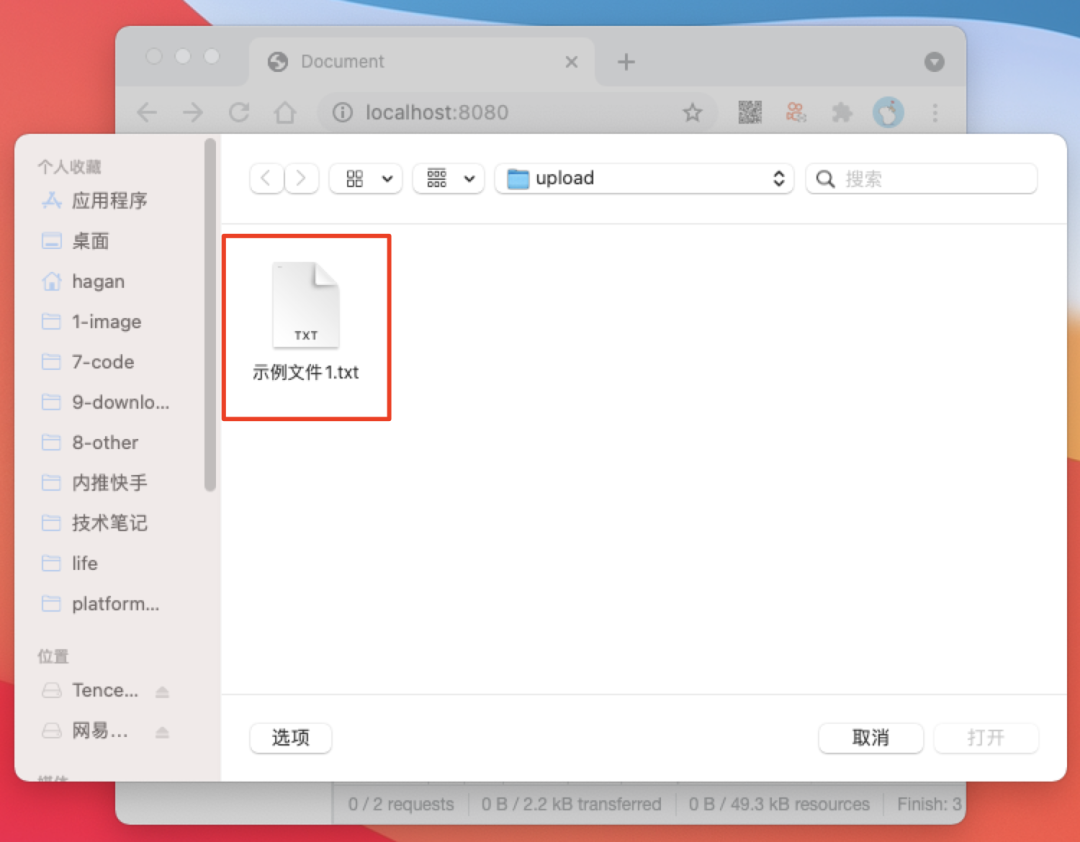
示例文件1.txt
示例内容1
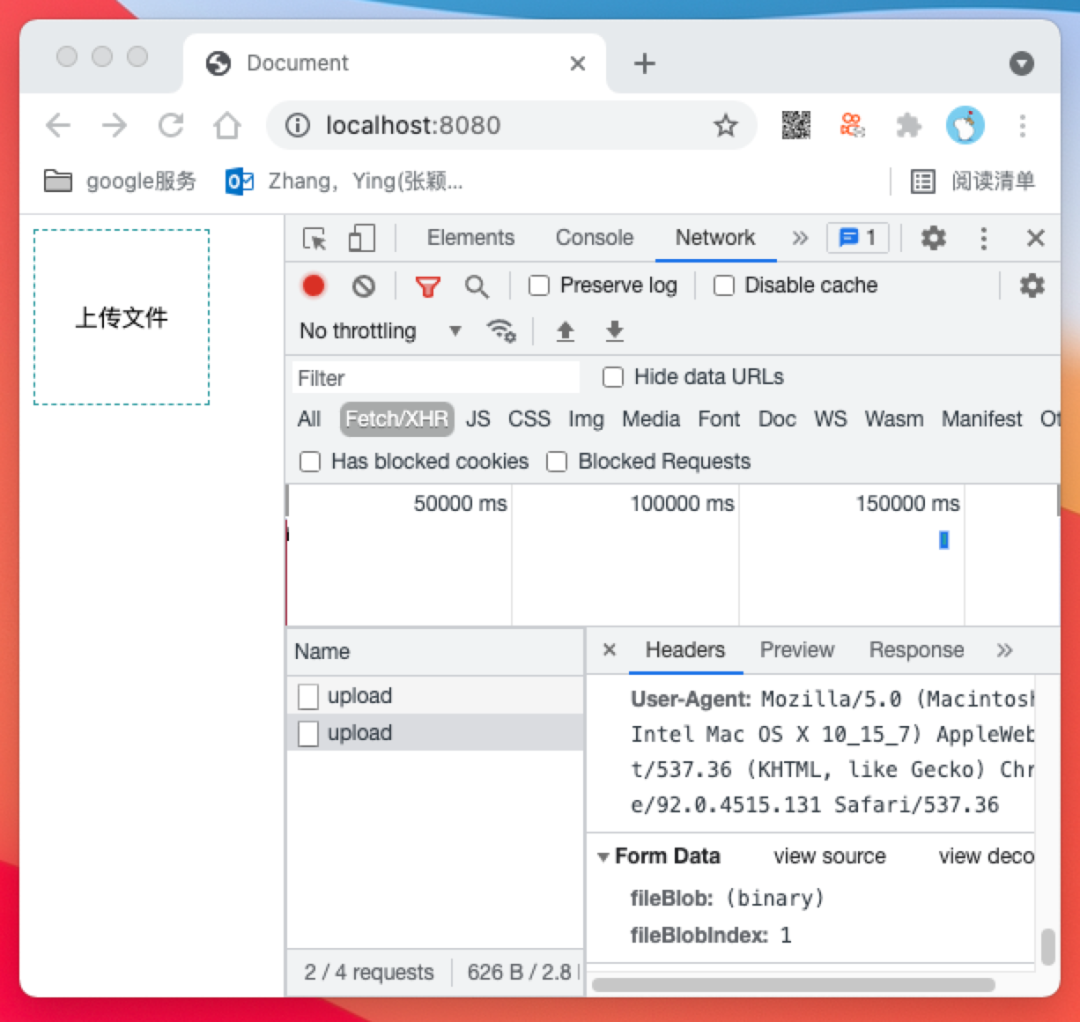
此时发送了两个http请求,符合预期
/api/merge 接口来实现
前端代码如下
domInput.onchange = async function (ev) {
  const [ file ] = ev.target.files

  async function upload (blobIndex) {
    const chunkSize = 10 // 定义10字节为一个小块
    const startIndex = blobIndex * chunkSize // 定义本次上传的开始位置
    if (file.size < startIndex) { // 代表文件小块都上传完毕,停止上传
      const resMerge = await axios.post('/api/merge', { filename: file.name })
      console.log('resMerge: ', resMerge)
      return
    }

    const blob = file.slice(startIndex, startIndex + chunkSize) // 获取本次上传的Blob格式文件内容
    const fileBlob = new File([blob], file.name) // 将Blob转换成File
    const formData = new FormData()
    formData.append('fileBlob', fileBlob)
    formData.append('fileBlobIndex', blobIndex) // 标明本次上传的索引
    const resUpload = await axios.post('/api/upload', formData)
    if (resUpload.status === 200) {
      upload(blobIndex + 1) // 如果上传成功则继续上传下一个文件小块
    }
  }

  upload(0)
}
服务端根据前端传过来的filename参数去切块文件夹获取所有切块,并合并成一个新的文件。
服务端代码如下
if (method === 'POST' && url === '/api/merge') {
  const fileBlobPath = path.resolve(__dirname, './fileBlob') // 定义文件小块的保存位置
  const filePath = path.resolve(__dirname, './file') // 定义文件的保存位置
  const arrayBuffer = []
  req.on('data', data => {
    arrayBuffer.push(data)
  })
  req.on('end', () => {
    const body = JSON.parse(Buffer.concat(arrayBuffer)) // 获取请求正文内容

    fs.mkdirSync(filePath, { recursive: true }) // 创建文件夹
    const filenameList = fs.readdirSync(path.resolve(fileBlobPath, body.filename)) // 获取切块文件的文件名列表
    filenameList.sort((a, b) => a - b).forEach(filename => {
      const file = fs.readFileSync(path.resolve(fileBlobPath, body.filename, filename)) // 分别获取切块文件
      fs.appendFileSync(path.resolve(filePath, body.filename), file) // 将切块文件数据添加到新的文件里
    })

    fs.rmSync(path.resolve(fileBlobPath, body.filename), { force: true, recursive: true })

    res.statusCode = 200
    res.setHeader('Content-Type', 'application/json; charset=utf-8')
    res.end('合并成功')
  })
}
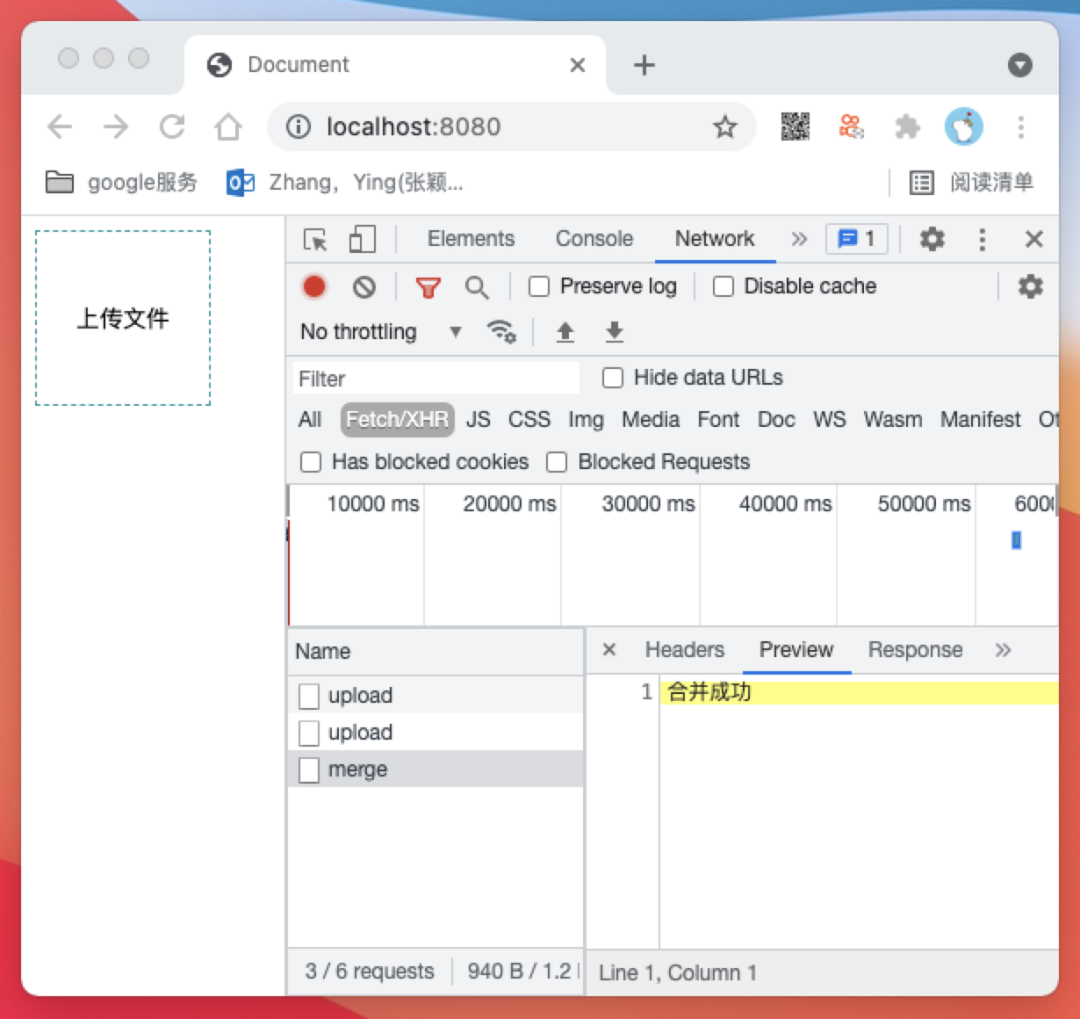
我们尝试在浏览器中上传一个文件
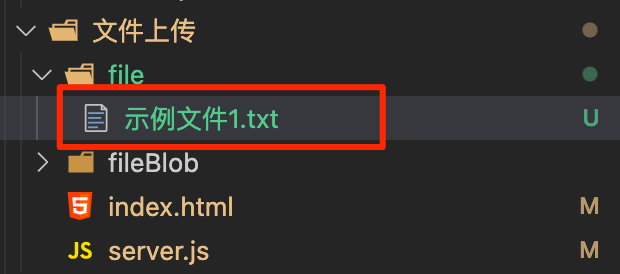
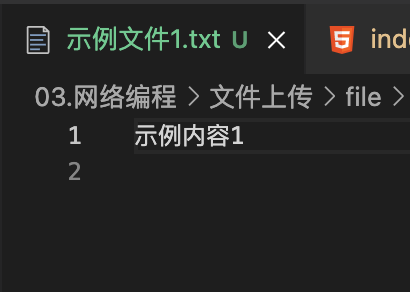
index.html
<!DOCTYPE html>
<html lang="en">
<head>
  <meta charset="UTF-8">
  <meta http-equiv="X-UA-Compatible" content="IE=edge">
  <meta name="viewport" content="width=device-width, initial-scale=1.0">
  <title>Document</title>
  <style>
    .btn {
      width: 100px;
      height: 100px;
      border: none;
      border: 1px dashed rgb(31, 154, 158);
      background: #fff;
      cursor: pointer;
    }
  </style>
</head>
<body>
  <button id="btn" class="btn">上传文件</button>
  <input id="input" type="file" style="display: none;" />
  <script src="https://lib.baomitu.com/axios/0.21.1/axios.js"></script>
  <script>
    const axios = window.axios.create({ baseURL: 'http://localhost:3000' })

    const domBtn = document.querySelector('#btn')
    const domInput = document.querySelector('#input')
    domBtn.onclick = function () {
      domInput.click()
    }
    domInput.onchange = async function (ev) {
      const [ file ] = ev.target.files

      async function upload (blobIndex) {
        const chunkSize = 10 // 定义10字节为一个小块
        const startIndex = blobIndex * chunkSize // 定义本次上传的开始位置
        if (file.size < startIndex) { // 代表文件小块都上传完毕,停止上传
          const resMerge = await axios.post('/api/merge', { filename: file.name })
          console.log('resMerge: ', resMerge)
          return
        }

        const blob = file.slice(startIndex, startIndex + chunkSize) // 获取本次上传的Blob格式文件内容
        const fileBlob = new File([blob], file.name) // 将Blob转换成File
        const formData = new FormData()
        formData.append('fileBlob', fileBlob)
        formData.append('fileBlobIndex', blobIndex) // 标明本次上传的索引
        const resUpload = await axios.post('/api/upload', formData)
        if (resUpload.status === 200) {
          upload(blobIndex + 1) // 如果上传成功则继续上传下一个文件小块
        }
      }

      upload(0)
    }
  </script>
</body>
</html>
server.js
const http = require('http')
const fs = require('fs')
const path = require('path')

const app = http.createServer((req, res) => {
  const { method, url } = req

  res.setHeader('Access-Control-Allow-Origin', 'http://localhost:8080') // 可通过预检请求的域名
  res.setHeader('Access-Control-Allow-Headers', 'Content-Type') // 可通过预检请求的Headers
  res.setHeader('Access-Control-Allow-Methods', 'POST') // 可通过预检请求的Method

  if (method === 'OPTIONS') {
    res.statusCode = 200
    res.end()
  }

  if (method === 'POST' && url === '/api/upload') {
    const bufferList = []
    req.on('data', data => {
      bufferList.push(data)
    })
    req.on('end', () => {
      const body = Buffer.concat(bufferList)
      const boundary = `--${req.headers['content-type'].split('; ')[1].split('=')[1]}` // 获取分隔符

      function bufferSplit (buffer, separator) { // 根据分隔符分隔数据
        let result = []
        let index = buffer.indexOf(separator)
        while (index !== -1) {
          const buf = buffer.slice(0, index)
          result.push(buf)
          buffer = buffer.slice(index + separator.length)
          index = buffer.indexOf(separator)
        }
        result.push(buffer)
        return result
      }

      // 1. 用分隔符切分数据
      const bodyArray = bufferSplit(body, boundary)
      // console.log(bodyArray.map(item => item.toString()))

      // 2. 删除数组头尾数据
      bodyArray.shift() // 去掉头 ''
      bodyArray.pop() // 去掉尾 '--\r\n'

      // 3. 将每一项数据头尾的的\r\n删除
      const bodyArrayNew = bodyArray.map(buffer => buffer.slice(2, buffer.length - 2))
      // console.log(bodyArrayNew.map(item => item.toString()))

      // 4.获取fileBlobInfo
      const fileBlobPath = path.resolve(__dirname, './fileBlob') // 定义文件小块的保存位置
      const filePath = path.resolve(__dirname, './file') // 定义文件的保存位置
      const fileBlobInfo = {} // 定义文件小块信息对象
      bodyArrayNew.forEach(buffer => {
        const bufferInfo = bufferSplit(buffer, '\r\n\r\n') // 使用\r\n\r\n分割可得到包含参数信息和参数内容两项内容的数组

        const info = bufferInfo[0].toString() // info为字段信息,这是字符串类型数据,直接转换成字符串
        const data = bufferInfo[1] // data可能是普通数据也可能是文件内容
        const fieldName = info.split('; ')[1].split('=')[1].slice(1, -1)
        if (info.indexOf('\r\n') !== -1) {  // 若为文件内容,则数据中含有一个回车符\r\n,可以据此判断数据为文件还是为普通数据。
          const filename = info.split('; ')[2].split('\r\n')[0].split('=')[1].slice(1,-1)
          fileBlobInfo.filename = filename // 保存文件名到文件小块信息对象
          fileBlobInfo[fieldName] = data // 保存二进制数据到文件小块信息对象
        } else {
          fileBlobInfo[fieldName] = data.toString() // 保存其他字段到文件小块信息对象
        }
      })
      console.log(fileBlobInfo) // 此时fileBlobInfo下应该有如下三个字段,filename/fileBlob/fileBlobIndex

      // 5.保存分片
      fs.mkdirSync(path.resolve(fileBlobPath, fileBlobInfo.filename), { recursive: true }) // 以文件名为key创建文件夹
      fs.writeFileSync(path.resolve(fileBlobPath, fileBlobInfo.filename, fileBlobInfo.fileBlobIndex), fileBlobInfo.fileBlob) // 将分片写入文件夹
      res.statusCode = 200
      res.setHeader('Content-Type', 'application/json charset=utf-8')
      res.end('上传成功')
    })
  }

  if (method === 'POST' && url === '/api/merge') {
    const fileBlobPath = path.resolve(__dirname, './fileBlob') // 定义文件小块的保存位置
    const filePath = path.resolve(__dirname, './file') // 定义文件的保存位置
    const arrayBuffer = []
    req.on('data', data => {
      arrayBuffer.push(data)
    })
    req.on('end', () => {
      const body = JSON.parse(Buffer.concat(arrayBuffer)) // 获取请求正文内容

      fs.mkdirSync(filePath, { recursive: true }) // 创建文件夹
      const filenameList = fs.readdirSync(path.resolve(fileBlobPath, body.filename)) // 获取切块文件的文件名列表
      filenameList.sort((a, b) => a - b).forEach(filename => {
        const file = fs.readFileSync(path.resolve(fileBlobPath, body.filename, filename)) // 分别获取切块文件
        fs.appendFileSync(path.resolve(filePath, body.filename), file) // 将切块文件数据添加到新的文件里
      })

      fs.rmSync(path.resolve(fileBlobPath, body.filename), { force: true, recursive: true })

      res.statusCode = 200
      res.setHeader('Content-Type', 'application/json; charset=utf-8')
      res.end('合并成功')
    })
  }

})

app.listen(3000, () => {
  console.log('listen 3000')
})
断点续传
分片上传已经实现将一个大的文件分割成多个切块储存,在所有切块都上传完成后再在服务端进行一次合并操作。那么假如在上传切块的过程中因断网、页面崩溃等原因导致上传过程被迫中断,这时其实服务端已经储存了部分切块数据了,下次再次上传该文件时我们可以不再重复上传已经保存好的切块,而只上传服务端没有的切块,这样就避免了重复上传的麻烦,这就是断点续传。接下来我们开始实现断点续传
要实现断点续传我们在上传之前需要知道服务端已经储存了哪些切块,所以我们可以先发送一个 /api/check 请求来进行检查
index.html
const params = { filename: file.name }
const resCheck = await axios.get('/api/check', { params })
console.log(resCheck)
/api/check 请求的目的是通过检查,让服务端告诉前端当前文件是否上传过,是否上传完成,如果没上传完成,上传到第几个切块
server.js
if (method === 'GET' && pathname === '/api/check') {
  const filename = urlSearchParams.get('filename')
  const isExistFile = fs.existsSync(path.resolve(filePath, filename)) // 判断是否已经上传过文件
  if (isExistFile) { // 如果已经上传过文件,直接返回成功
    res.statusCode = 200
    res.setHeader('Content-Type', 'application/json; charset=utf8')
    res.end(JSON.stringify({ code: 1, message: '文件已上传', url: `http://localhost:8080/file/${filename}` }))
    return
  }

  const isExistBlob = fs.existsSync(path.resolve(fileBlobPath, filename)) // 如果没上传过文件则判断是否上传过切块
  if (!isExistBlob) { // 如果没上传过切块则返回文件未上传过
    res.statusCode = 200
    res.setHeader('Content-Type', 'application/json; charset=utf8')
    res.end(JSON.stringify({ code: 0, message: '文件未上传过', data: { index: 0 } }))
    return
  }

  const readdir = fs.readdirSync(path.resolve(fileBlobPath, filename)).sort((a, b) => b - a) // 如果上传过切块则获取切块索引
  if (readdir.length === 0) { // 如果切块数量为0则返回文件未上传过
    res.statusCode = 200
    res.setHeader('Content-Type', 'application/json; charset=utf8')
    res.end(JSON.stringify({ code: 0, message: '文件未上传过', data: { index: 0 } }))
  }

  res.statusCode = 200
  res.setHeader('Content-Type', 'application/json; charset=utf8')
  res.end(JSON.stringify({ code: 0, message: '触发断点续传', data: { index: Number(readdir[0]) + 1 } }))
}
服务端先判断文件是否上传完成过,如果上传完成过则直接返回已经上传完成过的结果,如果没上传完成过,则判断是否曾经上传过该文件的文件切块,如果有的话则返回给浏览器应该从第几个切块开始继续上传。
我们来尝试调用一下。
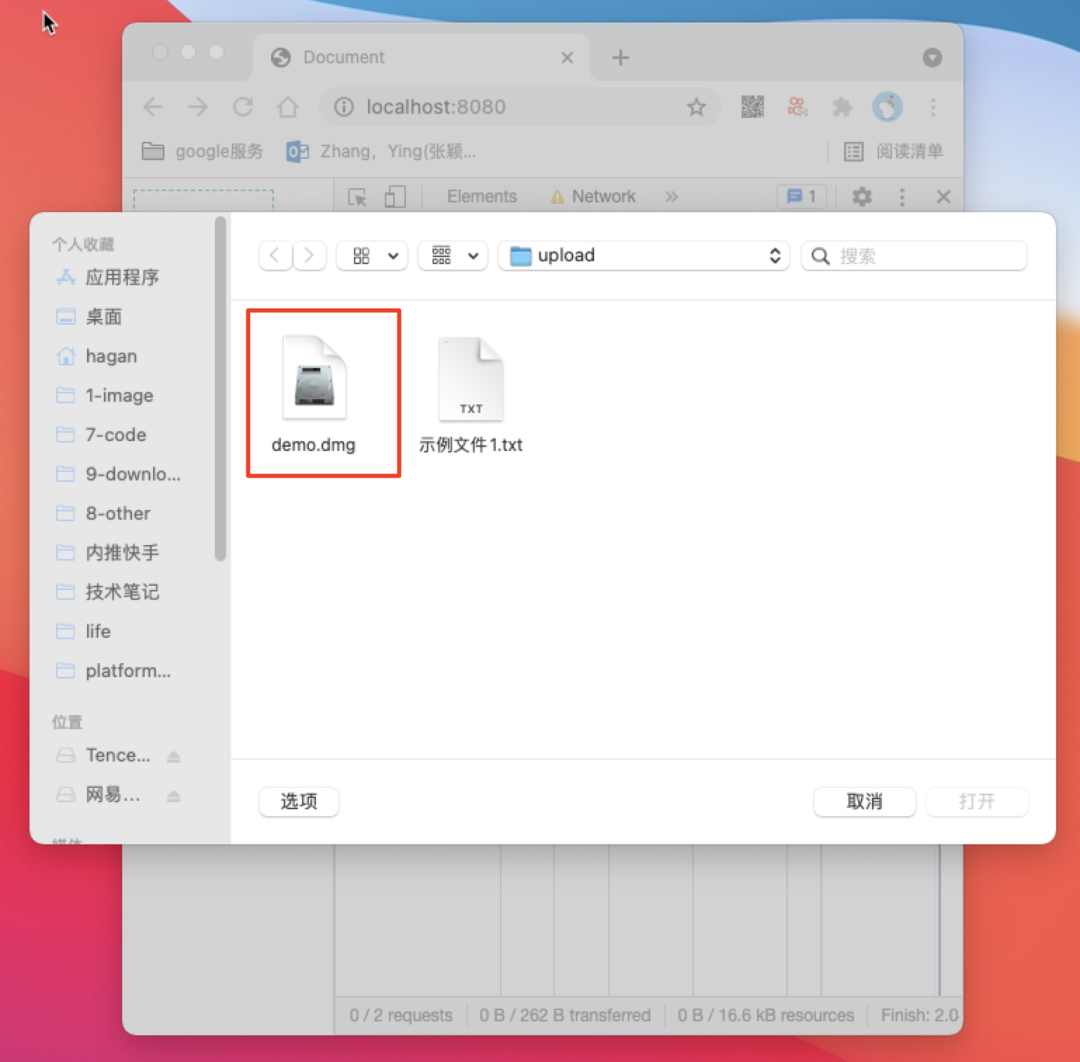
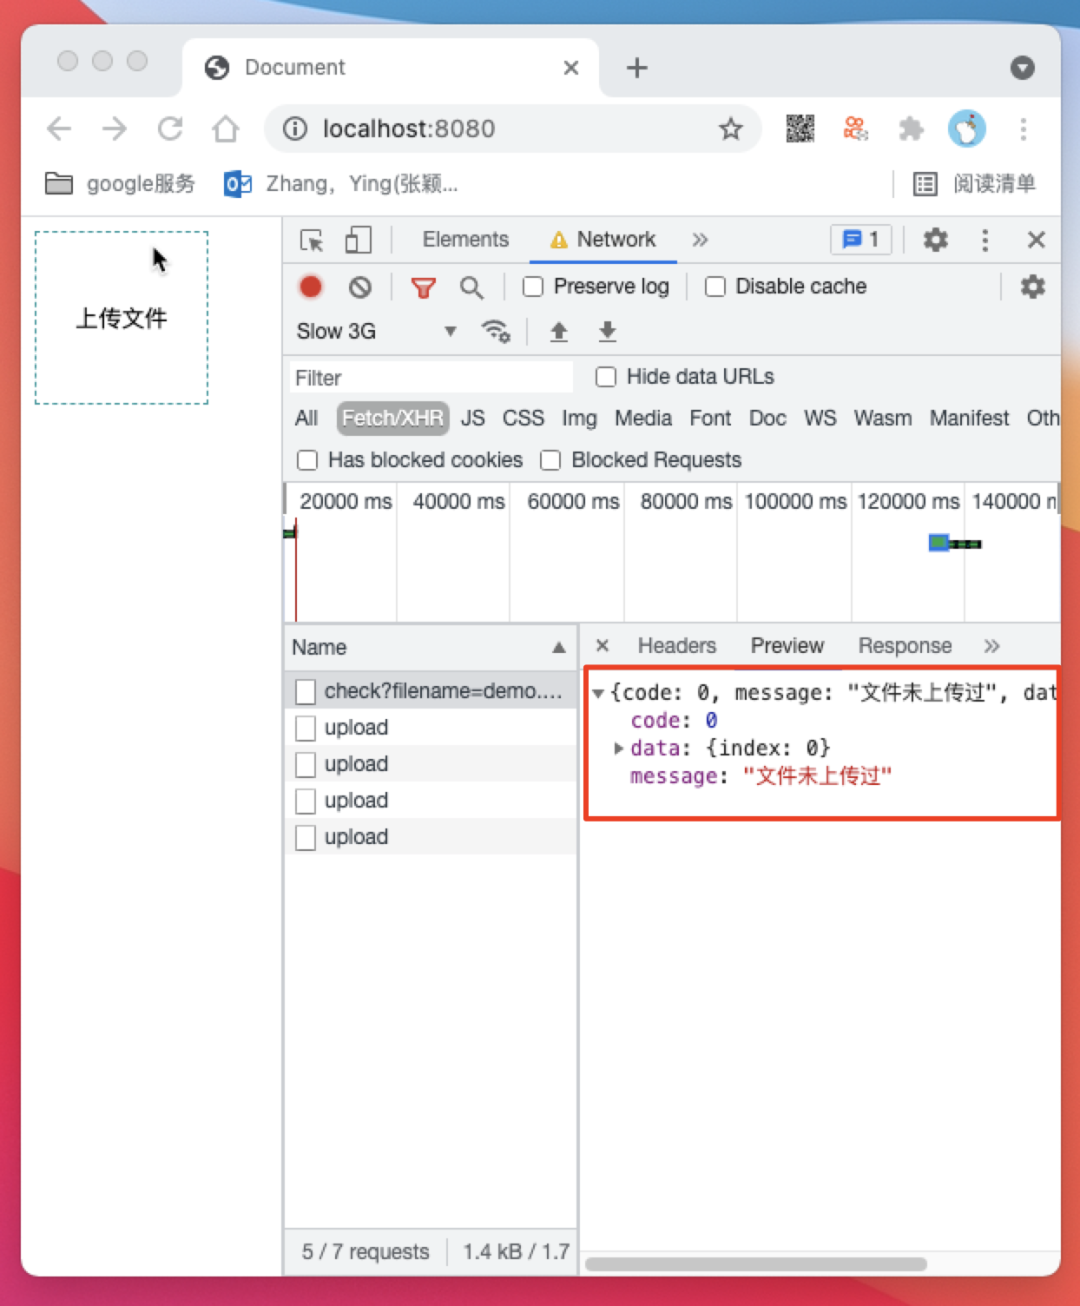
/api/check 请求返回文件未上传过,/api/upload 接口开始从第 0 个开始上传切块
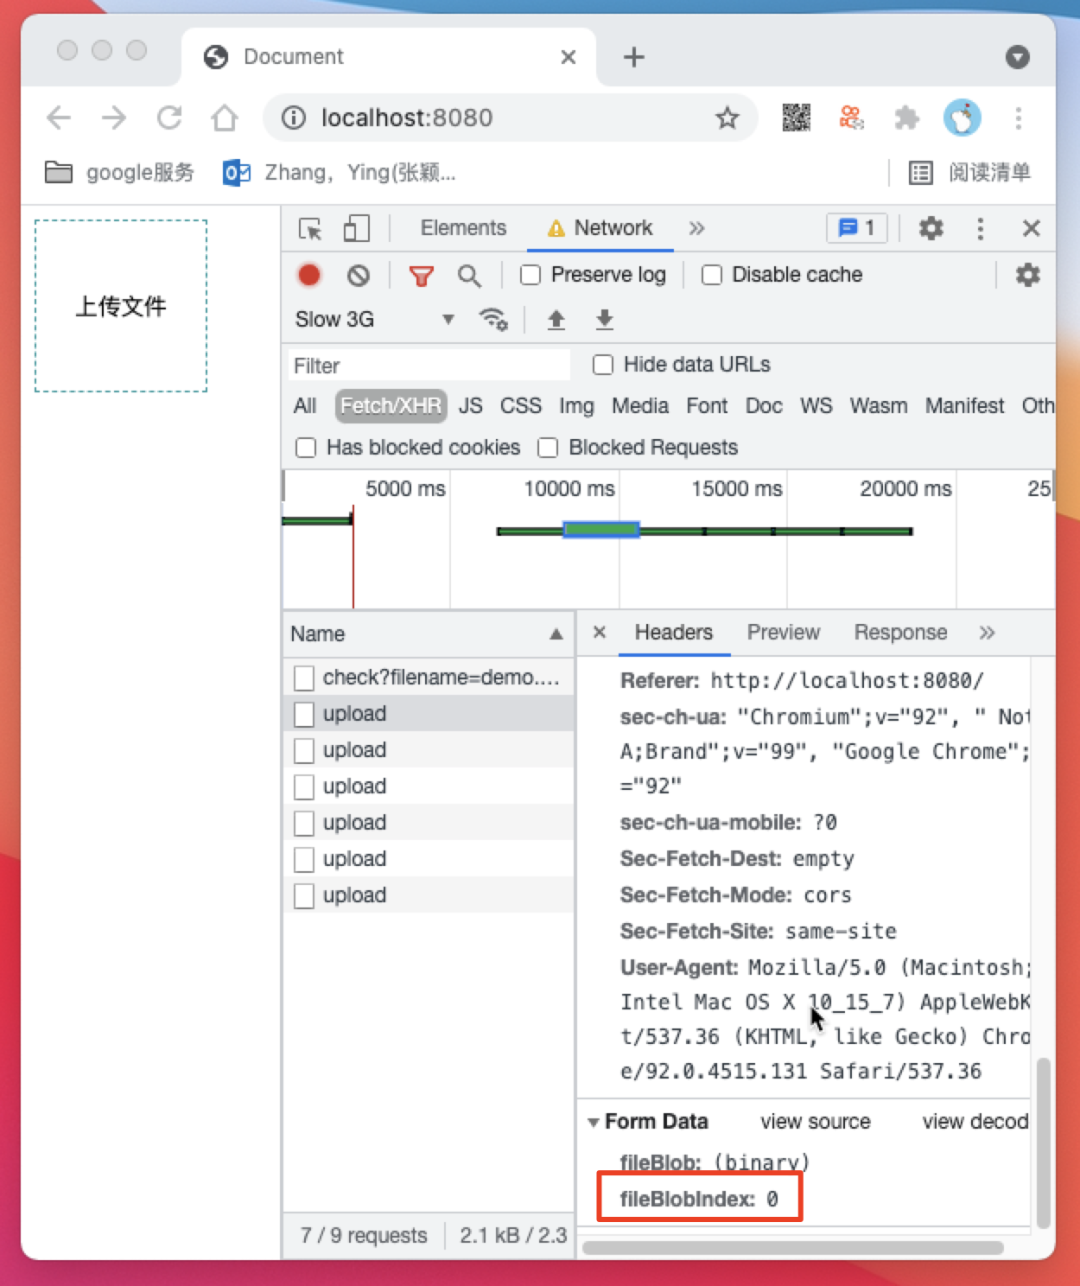
23个切块的时候刷新页面,这时我们看一看服务端的保存结果
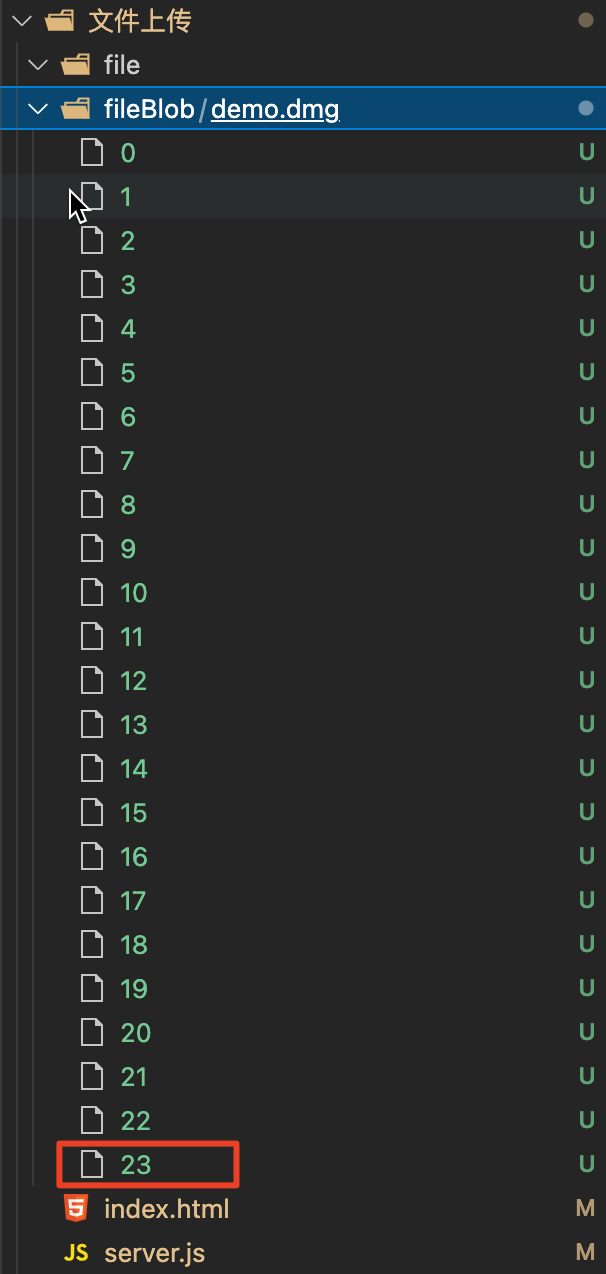
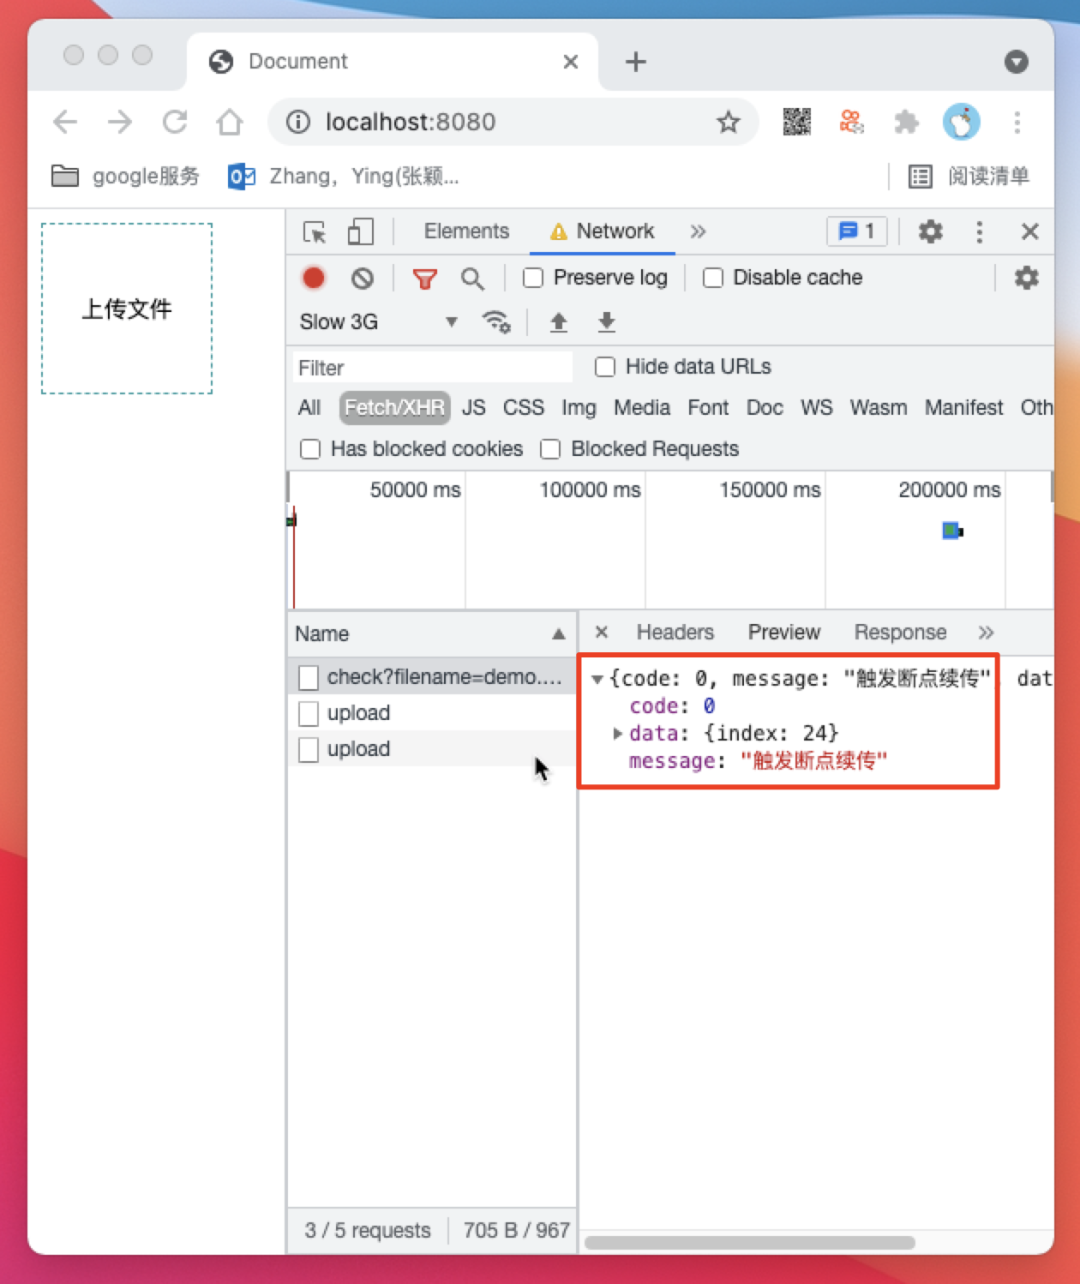
/api/check 触发了断点续传逻辑并返回了断点续传索引 index 为 24,然后前端以24为起点继续开始上传切块
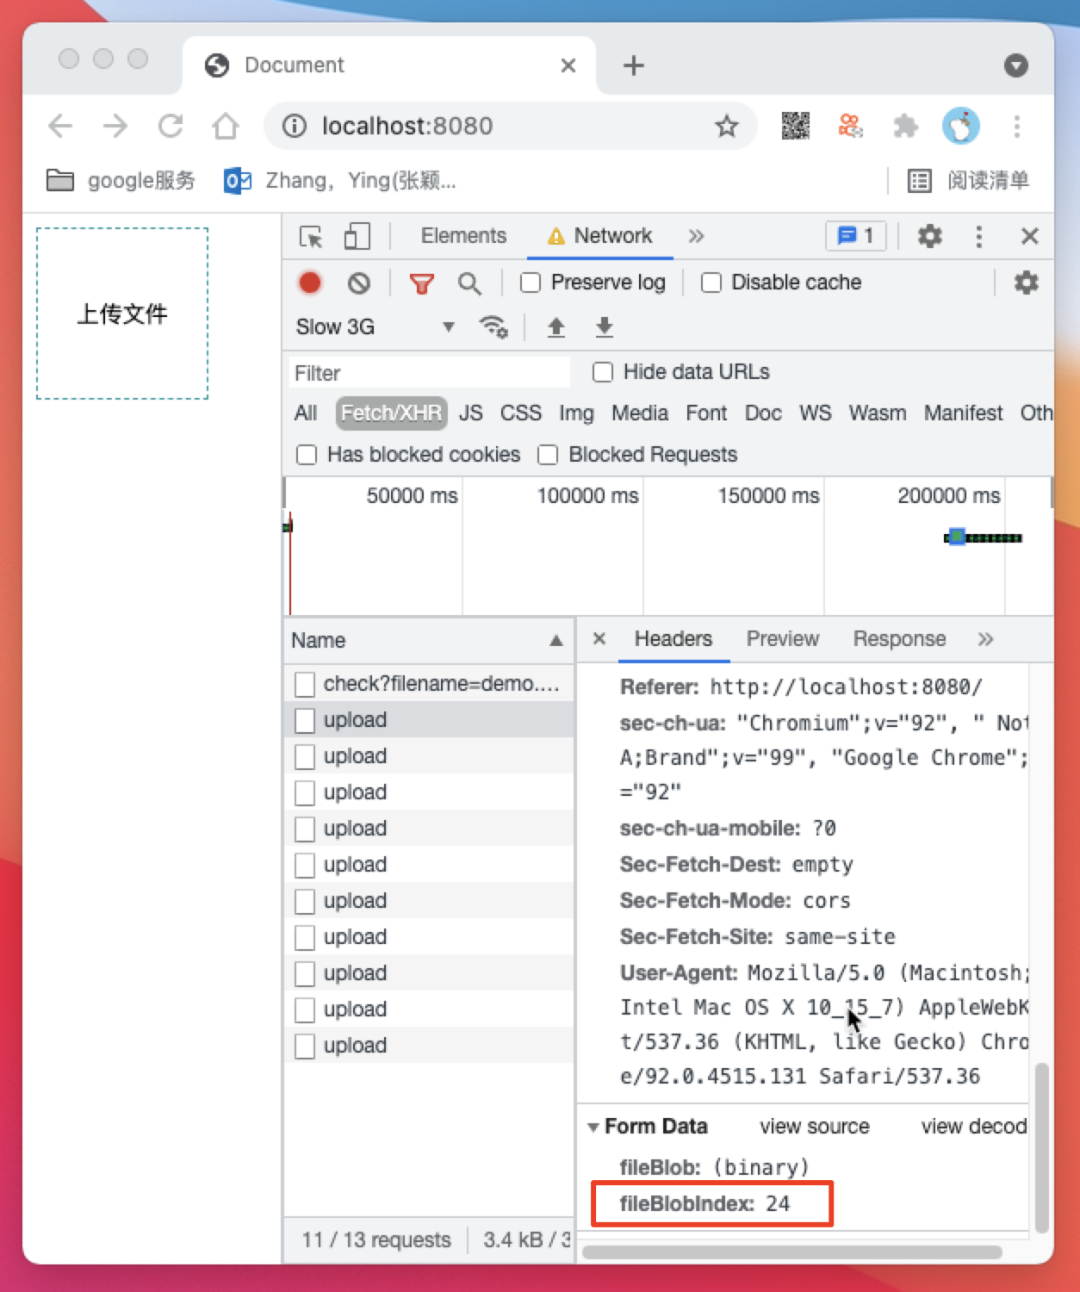
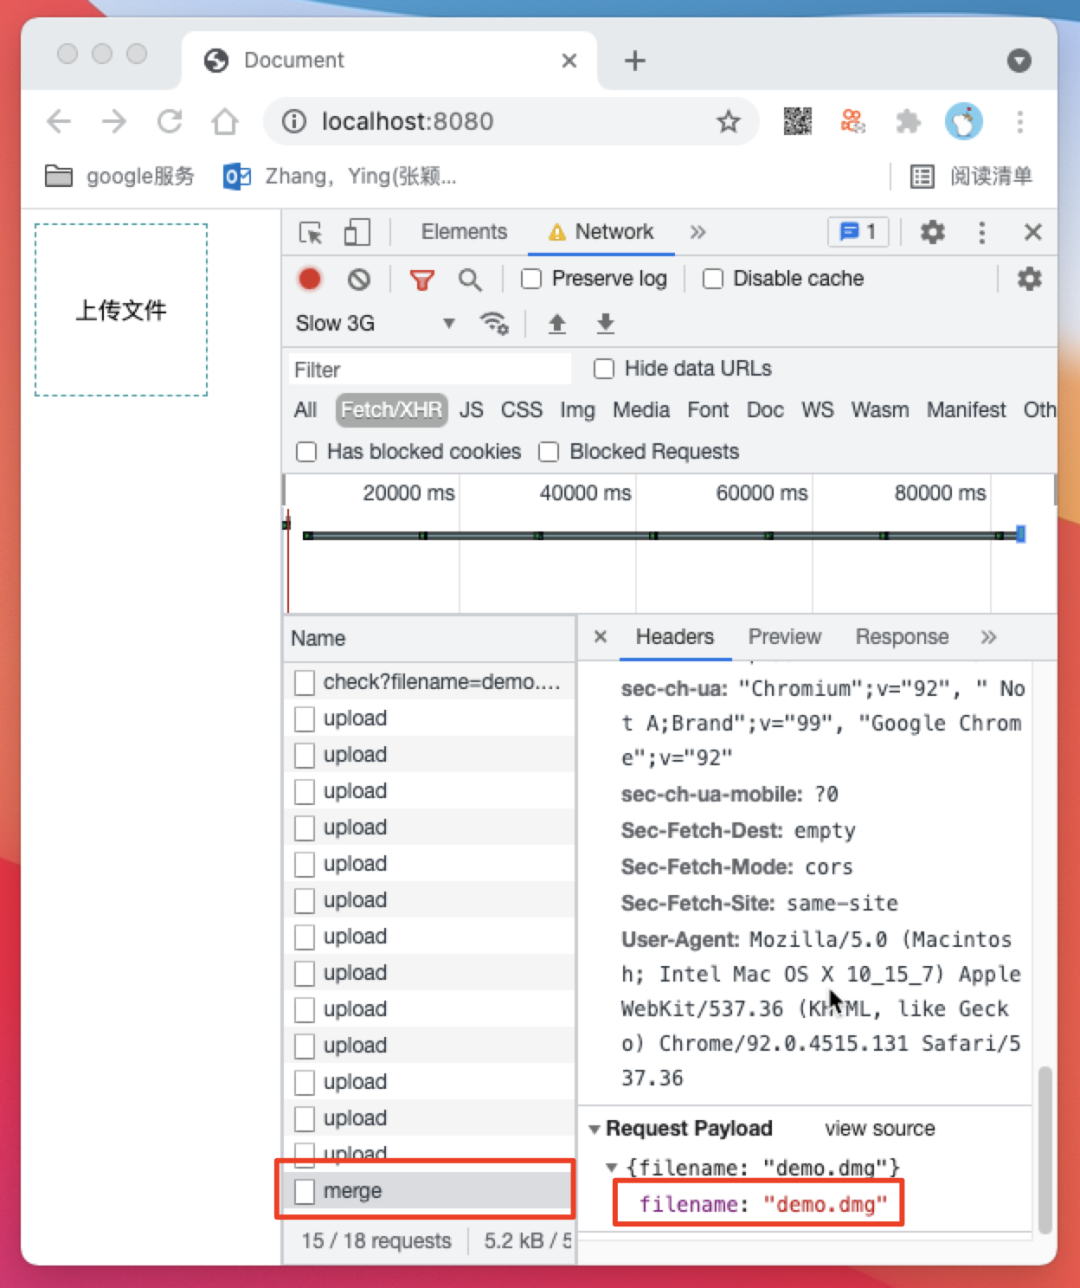
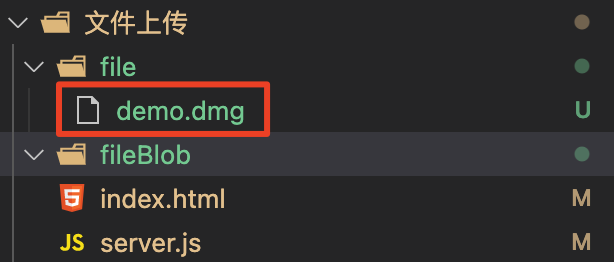
/api/merge 请求
index.html
<!DOCTYPE html>
<html lang="en">
<head>
  <meta charset="UTF-8">
  <meta http-equiv="X-UA-Compatible" content="IE=edge">
  <meta name="viewport" content="width=device-width, initial-scale=1.0">
  <title>Document</title>
  <style>
    .btn {
      width: 100px;
      height: 100px;
      border: none;
      border: 1px dashed rgb(31, 154, 158);
      background: #fff;
      cursor: pointer;
    }
  </style>
</head>
<body>
  <button id="btn" class="btn">上传文件</button>
  <input id="input" type="file" style="display: none;" />
  <script src="https://lib.baomitu.com/axios/0.21.1/axios.min.js"></script>
  <script>
    const axios = window.axios.create({ baseURL: 'http://localhost:3000' })

    const domBtn = document.querySelector('#btn')
    const domInput = document.querySelector('#input')
    domBtn.onclick = function () {
      domInput.click()
    }
    domInput.onchange = async function (ev) {
      const [ file ] = ev.target.files

      const params = { filename: file.name }
      const resCheck = await axios.get('/api/check', { params })
      if (resCheck.status === 200 && resCheck.data.code === 0) {
        upload(resCheck.data.data.index)
      }

      async function upload (blobIndex) {
        const chunkSize = 10 // 定义10字节为一个小块
        const startIndex = blobIndex * chunkSize // 定义本次上传的开始位置
        if (file.size < startIndex) { // 代表文件小块都上传完毕,停止上传
          const resMerge = await axios.post('/api/merge', { filename: file.name })
          console.log('resMerge: ', resMerge)
          return
        }

        const blob = file.slice(startIndex, startIndex + chunkSize) // 获取本次上传的Blob格式文件内容
        const fileBlob = new File([blob], file.name) // 将Blob转换成File
        const formData = new FormData()
        formData.append('fileBlob', fileBlob)
        formData.append('fileBlobIndex', blobIndex) // 标明本次上传的索引
        const resUpload = await axios.post('/api/upload', formData)
        if (resUpload.status === 200 && resUpload.data.code === 0) {
          upload(blobIndex + 1) // 如果上传成功则继续上传下一个文件小块
        }
      }

    }
  </script>
</body>
</html>
server.js
const http = require('http')
const fs = require('fs')
const path = require('path')
const { URL, URLSearchParams } = require('url')

const fileBlobPath = path.resolve(__dirname, './fileBlob') // 定义文件小块的保存位置
const filePath = path.resolve(__dirname, './file') // 定义文件的保存位置

const app = http.createServer((req, res) => {
  const { method } = req
  const url = new URL(req.url, 'http://localhost:3000')
  const { pathname } = url
  const urlSearchParams = new URLSearchParams(url.search)

  res.setHeader('Access-Control-Allow-Origin', 'http://localhost:8080') // 可通过预检请求的域名
  res.setHeader('Access-Control-Allow-Headers', 'Content-Type') // 可通过预检请求的Headers
  res.setHeader('Access-Control-Allow-Methods', 'POST') // 可通过预检请求的Method

  if (method === 'OPTIONS') {
    res.statusCode = 200
    res.end()
  }

  if (method === 'GET' && pathname === '/api/check') {
    const filename = urlSearchParams.get('filename')
    const isExistFile = fs.existsSync(path.resolve(filePath, filename)) // 判断是否已经上传过文件
    if (isExistFile) { // 如果已经上传过文件,直接返回成功
      res.statusCode = 200
      res.setHeader('Content-Type', 'application/json; charset=utf8')
      res.end(JSON.stringify({ code: 1, message: '文件已上传', url: `http://localhost:8080/file/${filename}` }))
      return
    }

    const isExistBlob = fs.existsSync(path.resolve(fileBlobPath, filename)) // 如果没上传过文件则判断是否上传过切块
    if (!isExistBlob) { // 如果没上传过切块则返回文件未上传过,并告诉客户端应该从第0个切块开始上传
      res.statusCode = 200
      res.setHeader('Content-Type', 'application/json; charset=utf8')
      res.end(JSON.stringify({ code: 0, message: '文件未上传过', data: { index: 0 } }))
      return
    }

    const readdir = fs.readdirSync(path.resolve(fileBlobPath, filename)).sort((a, b) => b - a) // 如果上传过切块则获取切块索引
    if (readdir.length === 0) { // 如果切块数量为0则返回文件未上传过,并告诉客户端应该从第0个切块开始上传
      res.statusCode = 200
      res.setHeader('Content-Type', 'application/json; charset=utf8')
      res.end(JSON.stringify({ code: 0, message: '文件未上传过', data: { index: 0 } }))
    }

    // 如果有切块被上传过,则告诉客户端应该从哪个切块开始断点续传
    res.statusCode = 200
    res.setHeader('Content-Type', 'application/json; charset=utf8')
    res.end(JSON.stringify({ code: 0, message: '触发断点续传', data: { index: Number(readdir[0]) + 1 } }))
  }

  if (method === 'POST' && pathname === '/api/upload') {
    const bufferList = []
    req.on('data', data => {
      bufferList.push(data)
    })
    req.on('end', () => {
      const body = Buffer.concat(bufferList)
      const boundary = `--${req.headers['content-type'].split('; ')[1].split('=')[1]}` // 获取分隔符

      function bufferSplit (buffer, separator) { // 根据分隔符分隔数据
        let result = []
        let index = buffer.indexOf(separator)
        while (index !== -1) {
          const buf = buffer.slice(0, index)
          result.push(buf)
          buffer = buffer.slice(index + separator.length)
          index = buffer.indexOf(separator)
        }
        result.push(buffer)
        return result
      }

      // 1. 用分隔符切分数据
      const bodyArray = bufferSplit(body, boundary)
      // console.log(bodyArray.map(item => item.toString()))

      // 2. 删除数组头尾数据
      bodyArray.shift() // 去掉头 ''
      bodyArray.pop() // 去掉尾 '--\r\n'

      // 3. 将每一项数据头尾的的\r\n删除
      const bodyArrayNew = bodyArray.map(buffer => buffer.slice(2, buffer.length - 2))
      // console.log(bodyArrayNew.map(item => item.toString()))

      // 4.获取fileBlobInfo
      const fileBlobInfo = {} // 定义文件小块信息对象
      bodyArrayNew.forEach(buffer => {
        const bufferInfo = bufferSplit(buffer, '\r\n\r\n') // 使用\r\n\r\n分割可得到包含参数信息和参数内容两项内容的数组

        const info = bufferInfo[0].toString() // info为字段信息,这是字符串类型数据,直接转换成字符串
        const data = bufferInfo[1] // data可能是普通数据也可能是文件内容
        const fieldName = info.split('; ')[1].split('=')[1].slice(1, -1)
        if (info.indexOf('\r\n') !== -1) {  // 若为文件内容,则数据中含有一个回车符\r\n,可以据此判断数据为文件还是为普通数据。
          const filename = info.split('; ')[2].split('\r\n')[0].split('=')[1].slice(1,-1)
          fileBlobInfo.filename = filename // 保存文件名到文件小块信息对象
          fileBlobInfo[fieldName] = data // 保存二进制数据到文件小块信息对象
        } else {
          fileBlobInfo[fieldName] = data.toString() // 保存其他字段到文件小块信息对象
        }
      })
      // console.log(fileBlobInfo) // 此时fileBlobInfo下应该有如下三个字段,filename/fileBlob/fileBlobIndex

      // 5.保存分片
      fs.mkdirSync(path.resolve(fileBlobPath, fileBlobInfo.filename), { recursive: true }) // 以文件名为key创建文件夹
      fs.writeFileSync(path.resolve(fileBlobPath, fileBlobInfo.filename, fileBlobInfo.fileBlobIndex), fileBlobInfo.fileBlob) // 将分片写入文件夹
      res.statusCode = 200
      res.setHeader('Content-Type', 'application/json; charset=utf-8')
      res.end(JSON.stringify({ code: 0, message: '切片上传成功' }))
    })
  }

  if (method === 'POST' && pathname === '/api/merge') {
    const arrayBuffer = []
    req.on('data', data => {
      arrayBuffer.push(data)
    })
    req.on('end', () => {
      const body = JSON.parse(Buffer.concat(arrayBuffer)) // 获取请求正文内容

      fs.mkdirSync(filePath, { recursive: true }) // 创建文件夹
      const filenameList = fs.readdirSync(path.resolve(fileBlobPath, body.filename)) // 获取切块文件的文件名列表
      filenameList.sort((a, b) => a - b).forEach(filename => {
        const file = fs.readFileSync(path.resolve(fileBlobPath, body.filename, filename)) // 分别获取切块文件
        fs.appendFileSync(path.resolve(filePath, body.filename), file) // 将切块文件数据添加到新的文件里
      })

      fs.rmSync(path.resolve(fileBlobPath, body.filename), { force: true, recursive: true })

      res.statusCode = 200
      res.setHeader('Content-Type', 'application/json; charset=utf-8')
      res.end(JSON.stringify({ code: 0, message: '合并成功', url: `http://localhost:8080/file/${body.filename}` }))
    })
  }

})

app.listen(3000, () => {
  console.log('listen 3000')
})
总结
本文介绍了一个相对完整的文件上传功能实现方式,其实我们在 /api/merge 的时候也可以通过md5的方式对文件做一次校验,这样能保证文件的完整性。
我们在设定切块大小时也要根据实际场景来进行设定,如果场景为至少1G的大文件,那么设定10字节为一个切块大小肯定是不合理的。
百度网盘的秒传功能其实也是基于这样的原理,在用户上传一个文件时,百度网盘计算出该文件的md5,然后去服务端查询有没有相同的md5文件,如果有则触发秒传。
