Web组件构建库-Lit
认识Lit
抽象与封装
在《你真的了解Web Component吗[1]》的分享中,我们在介绍web组件前,从理解框架和职责范围的出发点与角度,探究了框架存在和发展的意义及目标,了解到了框架可以使快速开发和基础性能之间达成平衡,进而让开发者的开发体验得到较大的提升。
而一个框架的组成,离不开优秀的设计思想,和对这些设计思想的最终实现。实现的整个过程,其实就是一个抽象与封装的过程。但是这个过程并非是框架独属的,我们可以回忆一下,日常的开发中,可以对某些频繁、重复使用的逻辑进行函数式封装;可以将某个到处使用的模版进行组件式封装;甚至我们会引用一些高质量的库去支持开发,而这些库,也是一个抽象与封装的结果。既然抽象与封装应用如此广泛,那么web component的创建与使用是不是也可以形成一个抽象与封装的产物呢?
Lit的介绍
Lit是一个轻量的库,用来快速构建web组件。其核心是LitElement基类,可以提供响应式状态、作用域样式以及高效灵活的模版系统。尽管它也是一个基于原生web组件而封装的库,但它依然保留了web组件的所有特性。不必依赖框架便可以实现组件化,并且它的使用不受框架的制约,甚至可以没有框架。
基本特点
- 类jsx/tsx语法。
- 模版语法类似模版字符串的写法。
- 只支持原生css,但预编译的样式,需借助打包器编译实现后,通过特定方式引入使用。
- 支持ts。
- 编程模型:OOP。
- 单向数据流,支持MVVM,但无双向绑定。
- 组件状态管理:使用内置的@state与@property实现。
- 职责范围小,单纯处理web组件的创建与使用。
- 跨平台跨框架。
- 库的体积较小,据官网说明,gzip压缩混淆后只有5k左右。
- Lit的html模版中,可以通过(.[属性])的方式,进行自定义回调的传递(官网未说明,属于hack方式)
Lit的应用及基本原理
Demo示例
暂时无法在文档外展示此内容
基本组成及应用
基类
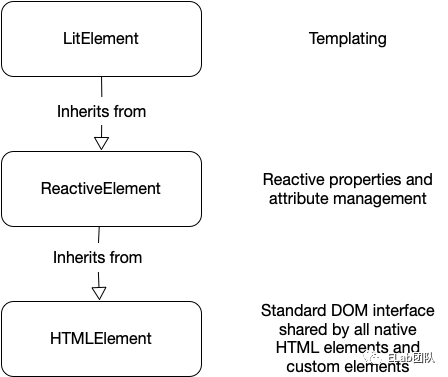
基类(LitElement)是lit最核心的组成,它继承了原生的HTMLElement类,并在此基础上进行了丰富的扩展。包括响应式状态、生命周期以及一些诸如控制器和混入等高级用法的提供。
装饰器
可以理解为一些语法糖,用于修改类、类方法及属性的特殊函数。
- @customElement('my-element'),注册自定义组件,相当于js中的
window.customElements.define('my-element')。
element')。<br></br>- @eventOptions({capture: true,passive:true,once:true}),事件监听配置,相当于js中的
dom.addEventListener(eventName,func,{capture: true,passive:true,once:true})。
- @property(options?) test:string= 'Somebody',公共属性状态的声明; 相当于js中的
  constructor() {

    super();

    this.test = 'Somebody';

  }


  static get properties() {

    return {

      test: {type: String},

    }

  }
options是一个配置对象,其中包含:
-
attribute:表示声明的property是否与组件中元素的attribute建立连接,false表示不建立,true表示建立,并且attribute的名字与property同名。为string时,表示建立并且attribute的名字为该字符串。(建立连接,表示该property与attribute相互映射。)
-
converter:表示处理property与attribute之间的转换规则。
-
默认时,attribute=》property,property为声明时类型,attribute为string;
-
为function时,处理attribute=》property;
-
为object时,fromAttribute处理attribute=》property;toAttribute处理property=》attribute。
-
noAccessor:表示是否监听该属性变化并自动更新,默认为false,表示监听并自动更新。为true时,表示不自动更新,需要开发者调用this.requestUpdate(propertyName, oldValue),来进行视图更新。
-
reflect:表示是否将property的变化同步到attribute,默认false。false时,不会同步,尽管你设置了converter;为true时,会同步,根据converter的设置转换。
-
type:表示类型声明。
-
hasChanged:是一个函数,参数为value 与oldValue,分别是属性的新值与旧值。如果返回false,表示属性相关的视图不需更新;返回true则相反。
-
@state(options) protected _active = false, 内部属性状态的声明,本质上也是一个property,同样会触发视图的更新机制;相当于js中的
constructor() {

    super();

    this._active = false;

  }


  static get properties() {

    return {

      _active: {state: true}

    }

  }
options是一个配置对象,其中包含:
- hasChanged:同上。
- @query('todo-list') todoList!: TodoList;获取单个dom元素,相当于js中的
document.querySelector('todo-list');
- @queryAll('todo-lists') todoLists!: TodoLists;获取批量dom元素,相当于js中的
document.querySelectorAll('todo-lists');
-
@queryAssignedNodes(slotName, flatten, selector),用来获取对应slot元素的。
-
slotName:slot的name,string类型。
-
flatten:是否平铺,boolean类型。
-
selector:是否过滤出当前选择器的slot。
-
@queryAsync('todo-list'),同@query一样,用来获取单个dom的,只是@query是同步获取,返回的是dom对象;@queryAsync是异步获取,执行时机在dom更新完成以后,执行updateComplete的promise后执行,返回的是一个promise对象。
html模版
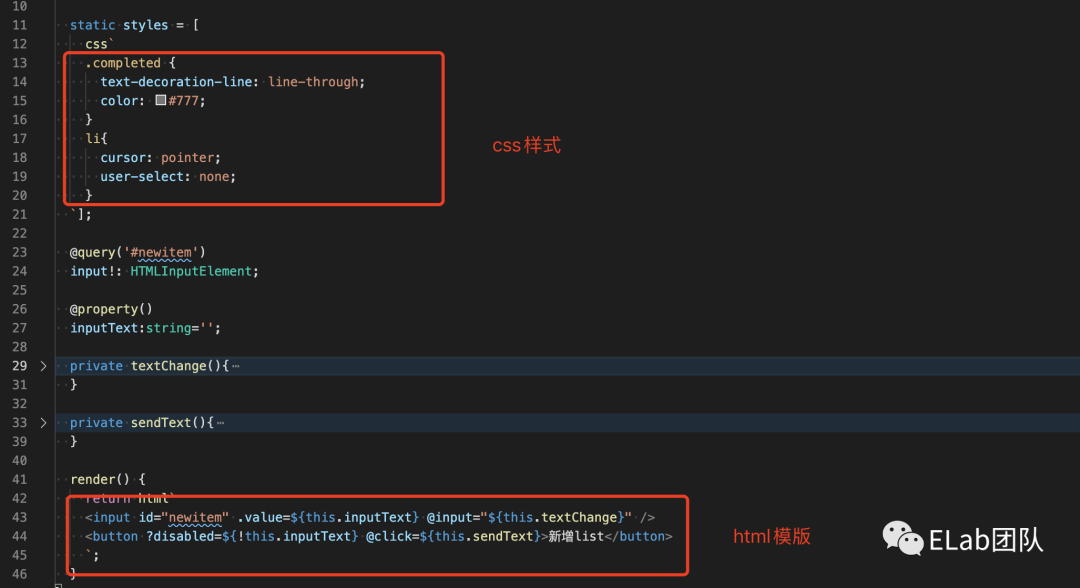
我们来看这样一段关于html模版的代码
。。。

  render() {

    if(this.listItems.filter(item => !item.completed).length === 0) {

      return html`<p>anything was done!</p>`;

    }

    return html`

      <ul>

        ${this.listItems.map((item) => html`

          <li

              class=${item.completed ? 'completed' : ''}

              @click=${() => this.toggleCompleted(item)}>

            ${item.text}

          </li>`,

  )}

      </ul>

    `;

  }

  。。。
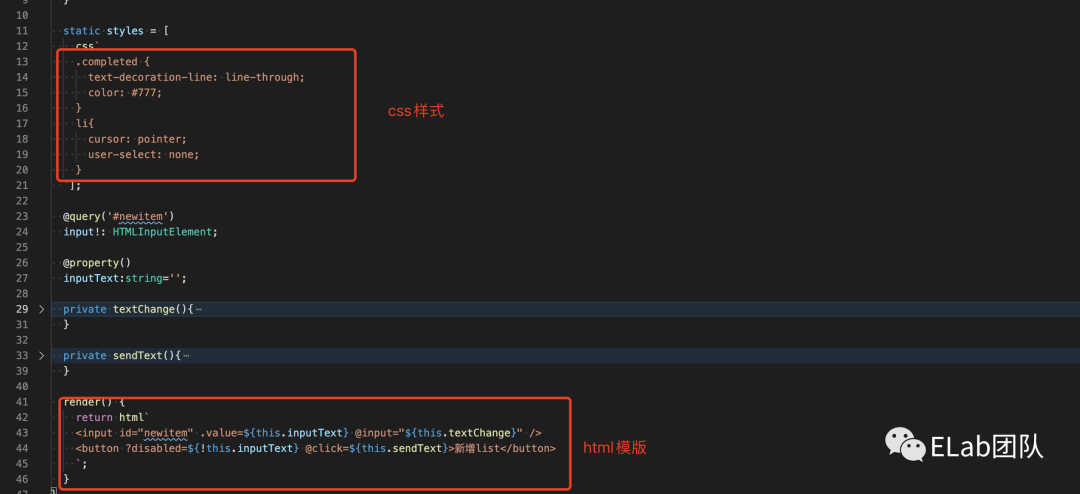
可以看到Lit的html渲染是在render函数中进行的。通过html方法和模版字符串的结合,实现渲染。并且语法类似jsx/tsx。可以直接在render函数和html模版中写js逻辑。非常的灵活与方便。
样式
- Lit本身只支持原生css,使用css方法添加样式,方式如下:
//只有一组style

import {customElement, css} from 'lit-element';

@customElement('my-element')

export class MyElement extends LitElement {

  static styles = css`

    p {

      color: green;

    }

  `;

  。。。

}


//多组style

import {css} from 'lit-element';

static styles = [

    css`h1 {

      color: green;

    } `,

    css`h2 {

      color: red;

    }`

];


//引入样式文件

import {css,unsafeCSS} from 'lit-element';

import style from './my-elements.less';//需要使用编译工具编译后倒入

  static styles = [

    css`:host {

    width:500px;

  }`,

    css`${unsafeCSS(style)}`

];- Lit允许在css中书写表达式
这就意味着你可以在某个ts文件中声明一组样式,然后引入到多个文件中使用:
//样式中使用表达式

static get styles() {

  const mainColor = 'red';

  return css`

    div { color: ${unsafeCSS(mainColor)} }

  `;

}- 动态样式
可以想vue或react中一样,动态的使用class和style。
import {customElement, property,LitElement, html, css} from 'lit-element';

import {classMap} from 'lit/directives/class-map.js';

import {styleMap} from 'lit/directives/style-map.js';


@customElement('my-element')

export class MyElement extends LitElement {

  @property()

  classes = { someclass: true, anotherclass: true };

  @property()

  styles = { color: 'lightgreen', fontFamily: 'Roboto' };

  protected render() {

    return html`

      <div class=${classMap(this.classes)} style=${styleMap(this.styles)}>

        content

      </div>

    `;

  }

}
slot插槽
- 概念
关于插槽的概念理解,其实可以直接类比vue中的slot插槽,因为lit本身是一个纯js库,所以lit的插槽完全是来源于原生web component技术所提供的规范,而vue的slot功能,参考来源正是原生的slot。
- 注意⚠️
- 默认情况下,如果一个自定义元素有存在shadow dom,那么它的子元素是不会渲染的。
  <my-element test-word="test-word" testWord="testWord">

    <div>我是子元素</div>

</my-element>- 预置slot中的内容,可以在对应子元素渲染前,起到兜底的作用。
- slot的使用
- 匿名slot,只需要预置一个slot,那么所有的子元素都可以被安排呈现。
  //html

    <my-element test-word="test-word" testWord="testWord">

    <div>我是子元素1</div>

    <div>我是子元素2</div>

    <div>我是子元素3</div>

  </my-element>

  //ts

  render() {

    return html`

      <slot></slot>

    `;

}- 具名slot,只根据对应的name呈现,其他的被忽略
  //html

  <my-element test-word="test-word" testWord="testWord">

    <div slot="child1">我是子元素1</div>

    <div>我是子元素2</div>

    <div>我是子元素3</div>

  </my-element>


  //ts

    render() {

    return html`

      <slot name="child1"></slot>

    `;

}- slot的生命周期
可以通过在slot元素上面绑定slotchange事件,来获取slot被插入或删除的时机,以及对应的事件对象。
  //html

  <my-element test-word="test-word" testWord="testWord">

    <div slot="child1">我是子元素1</div>

  </my-element>

  //ts


  handleSlotchange(e:Event) {

    console.log(e);

  }


  render() {

    return html`

      <slot name="child1"  @slotchange=${this.handleSlotchange}></slot>

    `;

  }

}
事件通信
在Lit中,也是内置了事件通信的逻辑。事件通信主要是两部分组成,注册监听和调度触发。
- 注册监听,采用@[事件名]的方式,在组件上注册事件;使用e.detail来回去通信内容。
。。。

  private addList(e: CustomEvent){

    this.listItems = [...this.listItems,{

      text:e.detail,

      completed: false,

    } as ToDoItem];

    this.todoList.requestUpdate();

  }

。。。

  render() {

    return html`

    。。。

      <controls-area @addList=${this.addList}></controls-area>

    。。。

    `;

  }

。。。- 调度触发,使用dispatchEvent进行调度,使用CustomEvent构造函数及固定的结构来实例化通信传输的事件对象。
...

  private sendText(){

    const options = {

      detail: this.inputText,

    };

    this.dispatchEvent(new CustomEvent('addList', options));

    this.inputText = '';

  }

...
生命周期及更新流程
Lit采用批量更新的方式来提高性能和效率。一次设置多个属性只会触发一次更新,然后在微任务定时异步中执行。
状态更新时,只渲染 DOM 中发生改变的部分。由于 Lit 只解析并创建一次静态 HTML ,并且后续只更新表达式中更改的值,所以更新非常高效。
-
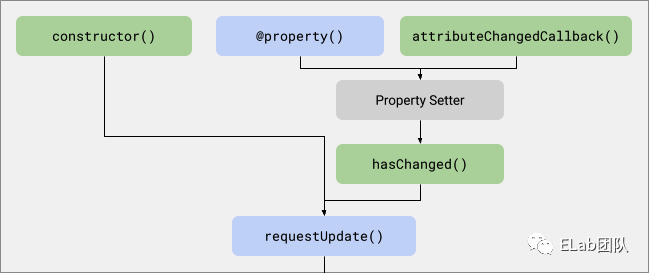
更新流程
-
当属性被set时,属性的setter被触发(属性的监听通过defineProperty完成)。
-
然后将触发组件的requestUpdate。
-
此时若该属性设置了hasChanged函数,那么等待该函数返回值来决定是否继续更新。若没有设置hasChanged函数,则直接对比新旧值。
-
新旧值不一致时,触发异步更新,调用组件的update方法。如果发现已经触发了一次更新,那么执行最后一个更新。
-
触发更新后,将更新的property再次映射到attribute中,并渲染html。
-
生命周期
lit中的生命周期分为两类,一类是原生组件化提供的生命周期,一般不需要开发者主动去使用。另一类是lit的状态更新提供的生命周期,如下:
- requestUpdate
执行了requestUpdateInternal方法,并返回了更新结果的promise。requestUpdateInternal方法中主要进行了两个操作,一个是将更新的属性存在一个map中,以备后续使用。另一个是进行一些比较判断,决定是否调用_enqueueUpdate方法。而_enqueueUpdate调用了performUpdate方法。
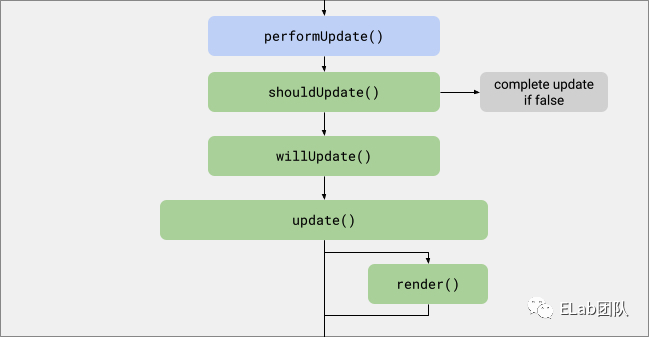
- performUpdate
performUpdate方法中执行了shouldUpdate,shouldUpdate返回false则中断,若返回true,则依次执行willUpdate、update、firstUpdated和updated。
- willUpdate
ts中不存在willUpdate,是js的polyfill-support 的覆盖点,源码中函数内容为空。
- Update
主要执行了_propertyToAttribute函数,将property向attribute映射,覆盖render渲染出来的html。
- Render
render函数只执行一次,用来解析并创建静态 HTML。
- firstUpdated
是一个覆盖点,源码中为空。元素首次更新完毕触发,只执行一次。此方法中设置属性,会在本次更新完毕后再次触发更新。
- updated
是一个覆盖点,源码中为空。元素每次更新完毕触发。此方法中设置属性,会在本次更新完毕后再次触发更新。
- updateComplete
是函数_getUpdateComplete的返回值,本质上是一个promise对象,表示当前更新全部完毕。
 protected _getUpdateComplete() {

    return this.getUpdateComplete();

  }

 protected getUpdateComplete() {

    return this._updatePromise;

 }
高阶应用
指令
如上面的动态样式一样,classMap和styleMap属于应用在html模版中的指令。开发者可以直接使用内置指令进行开发;也可以根据自己的需要,进行自定义指令的开发。
- 内置指令
- classMap - 将类列表设置为基于对象的元素
- styleMap - 将样式属性列表设置为基于对象的元素
- repeat - 将值从可迭代对象渲染到 DOM 中
- templageContent- 呈现
<template>元素的内容 - unsafeHTML - 将字符串呈现为 HTML
- unsafeSVG - 将字符串呈现为 SVG
- cache - 更改模板时缓存呈现的 DOM
- guard - 仅在其依赖项之一发生变化时重新更新模板
- ifDefined - 如果值已定义,则设置该属性,如果未定义,则删除该属性
- live - 采用严格的‘===’检查实时DOM值与表达式的值,不相等便触发更新。
- until - 呈现占位符内容,直到一个或多个Promise解决
- asyncAppend- 将
AsyncIterable的promise结果插入到 DOM 中 - asyncReplace- 将
AsyncIterable的promise结果替换到 DOM 中 - ref - 获取dom节点
- 自定义指令
自定义指令的功能很强大,尽管在使用中看起来只是调用了一个函数,但实际上,内部包含了自己的生命周期(constructor、render、update),不仅如此,指令还能获得与它关联的底层 DOM 的特殊访问。
这里我们实现一个简单的指令:
- 首先声明一个继承了Directive类的自定义指令类。
- 内部定义生命周期的钩子函数render,将传入的字符串修改后返回。
- 使用directive实例化,并向外暴露。
//自定义指令的文件

import {Directive, directive} from 'lit/directive.js';


class FormatStr extends Directive {

  render(test:string) {

    return `${test}!!!`;

  }

}

export const formatStr = directive(FormatStr);
//使用自定义指令的文件
import {formatStr} from '../directives/formatStr';
import {html} from 'lit';
。。。
render(){
html`<div>${formatStr('hellow')}</div>`
}
。。。混和
混合本身的作用,是为了在类之间共享代码。而类混合,本质上是属于原生类的一种行为,由于Lit是一个原生的js库,所以它可以拿来直接使用。目的也很简单,为了封装抽象。在Lit中使用类混合,我们可以在复用代码的同时,做一些定制化的扩展。下面我们实现一个混合。
这里我们声明一个混合类的方法,使得调用这个函数后生成的类,拥有公共的方法,就是在组件连接主文档后进行一次打印,打印的结果,是当前组件自己的name属性。
/* eslint-disable no-unused-vars */

import {LitElement} from 'lit';


type Constructor<T = {}> = new (...args: any[]) => T;


export const TestMixin = <S extends Constructor<LitElement>>(superClass: S) => {

  class MyMixinClass extends superClass {

    constructor(...args: any[]) {

      super();

      this.name = 'TestMixin';

    }

    name:string;

    connectedCallback() {

      super.connectedCallback();

      setTimeout(()=>{

        console.log(this.name);

      },3000)

    }

  }

  return MyMixinClass as S;

}
这里是使用的文件:
//TodoList.ts

export class TodoList extends TestMixin(LitElement) {

  constructor() {

    super();

    this.name = 'TodoList';

  }

  name:string;

  }


 //ControlsArea.ts

 export class ControlsArea extends TestMixin(LitElement) {

  constructor() {

    super();

    this.name = 'ControlsArea';

  }

  name:string;

  }
这里是打印结果,分别会在连接到主文档3s后打印各自的name。
控制器
控制器是Lit中,又一个封装抽象的概念,它区别于组件和混合。它没有视图,也不封装视图;它拥有同宿主绑定的生命周期,但是不存在状态更新的机制。相对于混合的代码共用,它更像是实现功能共用。
与宿主交互的相关方法:
- addController:同宿主绑定。
- removeController:同宿主解除绑定。
- requestUpdate:更新宿主视图。
- updateComplete:获取宿主更新完毕的promise。
有四个可以与宿主绑定的生命周期:
- hostConnected:宿主连接主文档时执行。
- hostUpdate:宿主将property向attribute映射完毕(update)后,render之前执行。
- hostUpdated:在组件每次更新完毕(updated)后执行。
- hostDisconnected:宿主与主文档断开连接时执行。
实现一个简单的控制器:
//声明控制器

import {ReactiveControllerHost} from 'lit';


export class MouseController {

  private host: ReactiveControllerHost;

  pos = {x: 0, y: 0};


  _onMouseMove = ({clientX, clientY}: MouseEvent) => {

    this.pos = {x: clientX, y: clientY};

    this.host.requestUpdate();

  };


  constructor(host: ReactiveControllerHost) {

    this.host = host;

    host.addController(this);

  }


  hostConnected() {

    window.addEventListener('mousemove', this._onMouseMove);

  }


  hostDisconnected() {

    window.removeEventListener('mousemove', this._onMouseMove);

  }

}


//使用控制器

import {MouseController} from '../controller/mouseController';

export class ControlsArea extends TestMixin(LitElement) {

  constructor() {

    super();

  }


  private mouse = new MouseController(this);


  render() {

    return html`

    <pre>

        x: ${this.mouse.pos.x as number}

        y: ${this.mouse.pos.y as number}

      </pre>

    `;

  }

}
生态相关
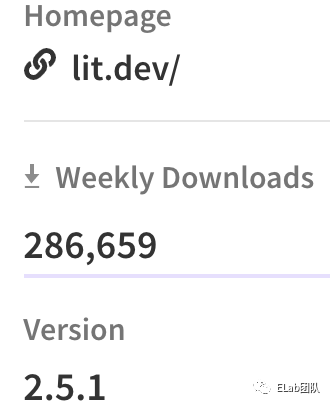
| Github star | issue数量(未解决/总数) | npm下载量 | 被依赖数量 | 维护团队 | 开源协议 | 文档 | 年龄 | 背书公司 |
|---|---|---|---|---|---|---|---|---|
| 8.7k |  171/2084 171/2084 |
 |
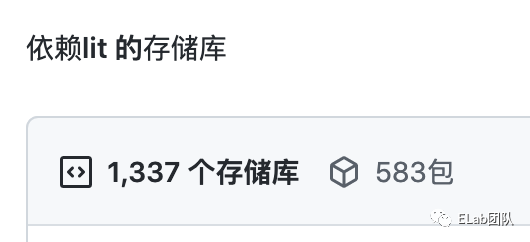 |
lit团队 | BSD-3-Clause |
https://lit.dev/ | 4 | 无 |
路由
Lit官方并未提供路由,但是社区提供了:
lit-element-router传送门:https://www.npmjs.com/package/lit-element-router
共享状态管理
Lit官方并未提供共享状态管理,但是社区提供了:
lit-element-state传送门:https://www.npmjs.com/package/lit-element-state
开发插件(vscode)
语法高亮(lit-plugin)
高亮前 高亮后
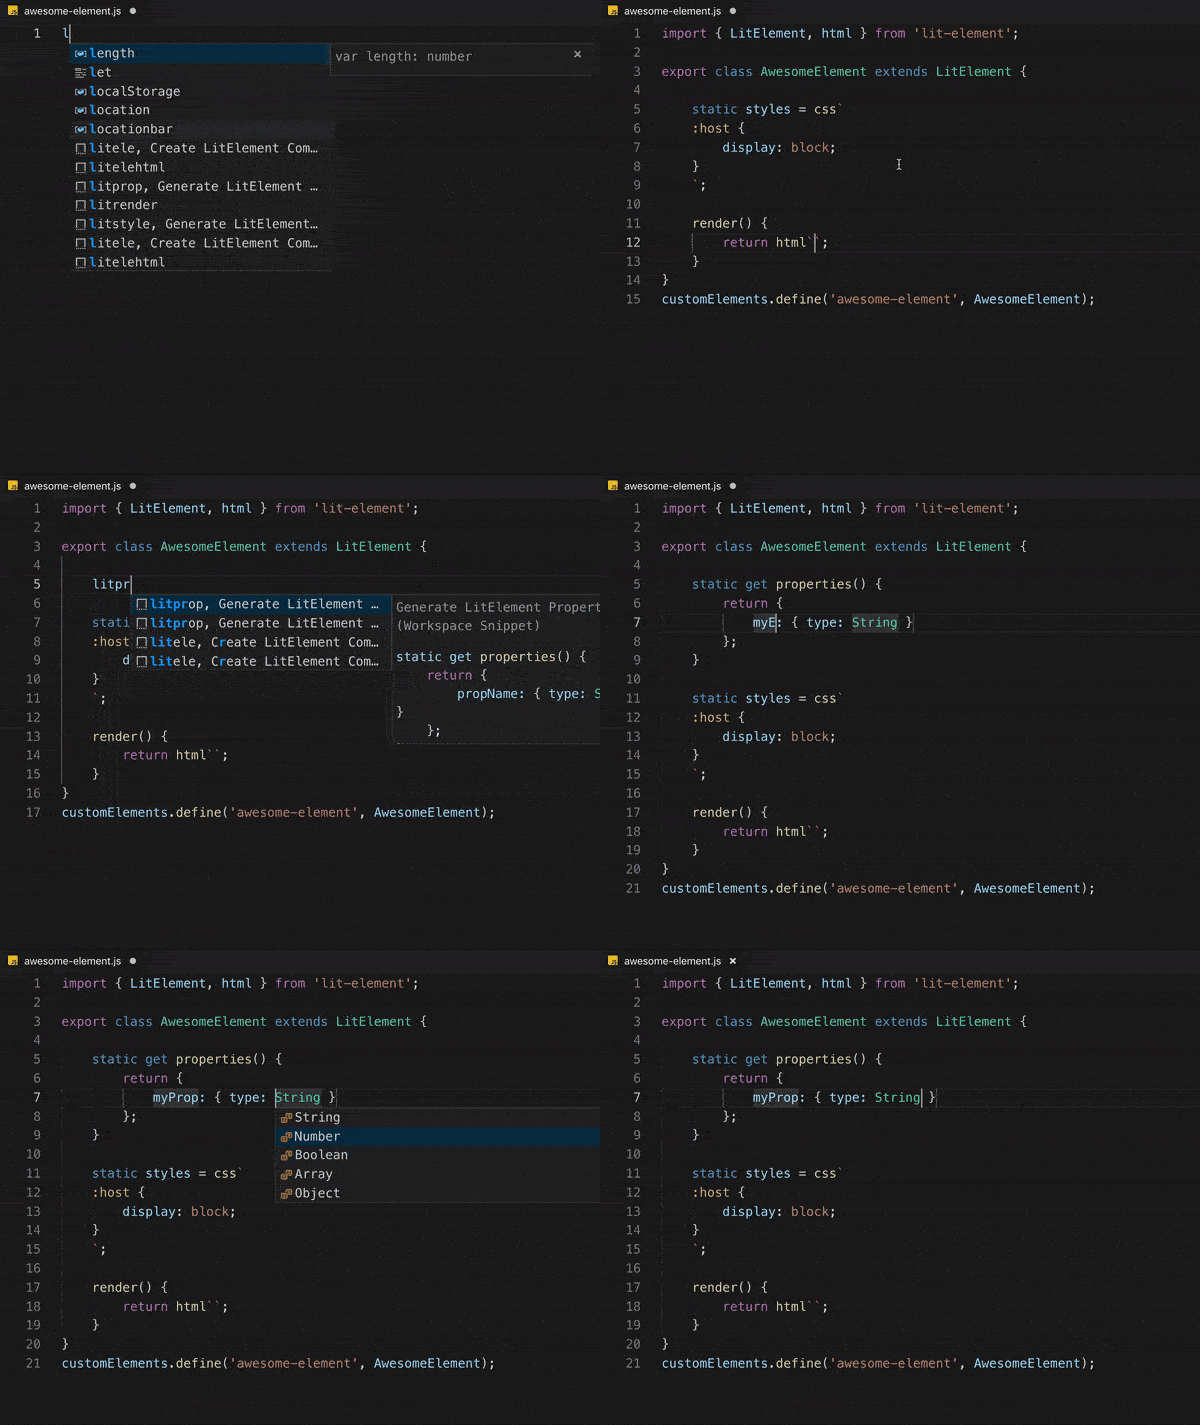
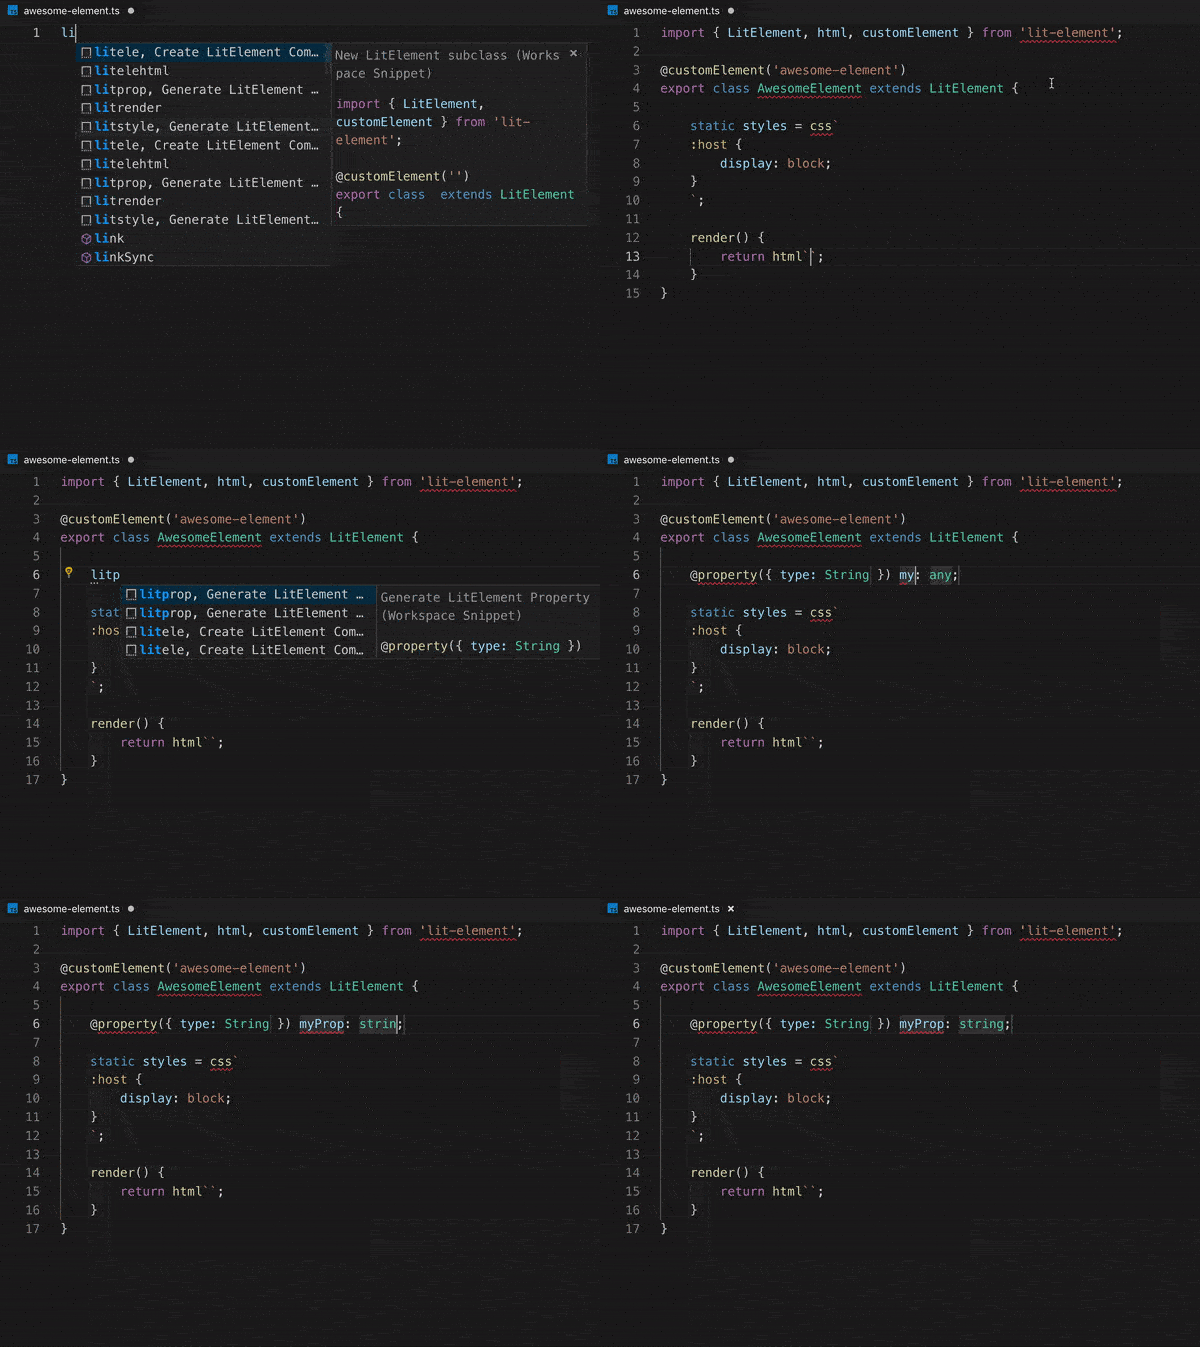
代码片段(LitElement Snippet)
js下代码片段提示 ts下代码片段提示
SSR
支持ssr,并且官方提供了对应的工具包:
@lit-labs/ssr :https://www.npmjs.com/package/@lit-labs/ssr
github地址
https://github.com/lit/lit/
测试工具
lit是标准的js工具库,可以使用任何js测试工具。
https://lit.dev/docs/tools/testing/
依赖Lit的组织及项目
同类框架/库比较

依赖Lit的开源组件库
| 名称 | 官网 | github | 开源协议 | 背书公司 |
|---|---|---|---|---|
| Spectrum Web Components | https://opensource.adobe.com/spectrum-web-components/ | https://github.com/adobe/spectrum-web-components | Apache License | adobe |
| Momentum UI Web Components | https://momentum-design.github.io/momentum-ui/?path=/story/components-accordion--accordion | https://github.com/momentum-design/momentum-ui/tree/master/web-components | MIT | cisco |
| material-components | https://github.com/material-components/material-components-web#readme | https://github.com/material-components/material-web | Apache License 2.0 | |
| frontend ui | https://github.com/home-assistant/frontend/blob/dev/README.md | https://github.com/home-assistant/frontend | Apache License | home-assistant |
| carbon-web-components | https://web-components.carbondesignsystem.com/ | https://github.com/carbon-design-system/carbon-web-components | Apache License 2.0 | IBM |
| Lion Web Components | https://lion-web.netlify.app/ | https://github.com/ing-bank/lion | MIT License | ING |
| PWA Starter | https://github.com/pwa-builder/pwa-starter/blob/main/README.md | https://github.com/pwa-builder/pwa-starter | MIT License | microsoft |
其他相关参考
lit项目所有者:https://github.com/orgs/lit/people =》https://github.com/e111077
lit项目被依赖关系:https://github.com/lit/lit/network/dependents
Lit-element npm包地址:https://www.npmjs.com/package/lit-element
框架对比网站:https://www.npmtrends.com/lit-element-vs-svelte-vs-@stencil/core
参考资料
[1] 你真的了解Web Component吗: https://juejin.cn/post/7010580819895844878
