【Android】BLE 蓝牙开发流程篇

携手创作,共同成长!这是我参与「掘金日新计划 · 8 月更文挑战」的第 4 天,点击查看活动详情
前言
本文旨在梳理 BLE 蓝牙开发的主要流程,其中涉及到其他的知识,将会单独成文梳理。如有任何疑问,可评论区留言讨论。
功能
Android 官方文档
- 扫描其他蓝牙设备
- 连接其他设备(通过服务发现连接到其他设备)
- 与其他设备进行双向数据传输
- 管理多个连接
- ......(查询本地蓝牙适配器的配对蓝牙设备,建立 RFCOMM 通道)
开发流程
1.申请权限
在 Android 日益注重安全性,隐私化的趋势下,我们当然需要先做权限声明 (这里不讲如何动态申请权限,如果你想轻装上阵,声明权限后,自己手动去授权即可)
- BLUETOOTH
- BLUETOOTH_ADMIN
- ACCESS_FINE_LOCATION (目标设备版本是 Android9 及其以上的系统上,需要申请的是 ACCESS_COARSE_LOCATION )
2.判断是否支持蓝牙功能
先检测设备是否支持蓝牙功能,在这里用到的是 BluetoothAdapter 这个类,其非常核心,因为它是本地设备蓝牙适配器的代表。
//定义:本地设备蓝牙设配器的代表
Represents the local device Bluetooth adapter.
//1.启动设备发现initiate device discovery.
//2.查询连接过或者配对过的设备query a list of bonded (paired) devices.
//3.通过MAC地址获取设备instantiate a BluetoothDevice using a known MAC address.
//4.创建连接监听create a BluetoothServerSocket to listen for connection requests from other devices.//5.开始扫描蓝牙设备start a scan for Bluetooth LE devices.

复制代码
我们可以通过 getDefaultAdapter 来获取该实例。
private val bleAdapter = BluetoothAdapter.getDefaultAdapter()复制代码
假如 bleAdapter 为 null 就意味着设备不支持蓝牙。
3.打开蓝牙
//通过isEnable() 判断蓝牙是否打开if (!bluetoothAdapter.isEnabled()) {    //如果没有打开,我们可以通过 Intent 达到不离开app就可以打开蓝牙的效果。
    Intent enableBtIntent = new Intent(BluetoothAdapter.ACTION_REQUEST_ENABLE);  startActivityForResult(enableBtIntent, REQUEST_ENABLE_BT);
}复制代码
在上面的内容都准备好了,那就可以开始进入核心流程了。
4.开始扫描
这里直接调用 BluetoothAdapter 的 startScan() 方法
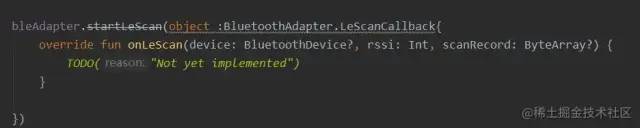
但是,我们发现这个方法已经被弃用了。我们直接看看这个方法的注释,一般会提示我们用什么替换了这个方法。
//就是说,有一个BluetoothLeScanner的类,提供了一个新的扫描方法。既然有新的,那么我们就用新的吧* @deprecated use {@link BluetoothLeScanner#startScan(List, ScanSettings, ScanCallback)} instead.复制代码
那我们就看看新的用法是如果实现扫描的吧。
private val bleScanner = bleAdapter.bluetoothLeScanner

bleScanner.startScan(object : ScanCallback() {    override fun onScanResult(callbackType: Int, result: ScanResult?) {        super.onScanResult(callbackType, result)        //简单过滤掉名字为空的设备
        if (result?.device?.name == null) return
        Log.i(TAG, "onScanResult: " + result.device.name)
    }    override fun onBatchScanResults(results: MutableList<ScanResult>?) {        super.onBatchScanResults(results)
    }    override fun onScanFailed(errorCode: Int) {        super.onScanFailed(errorCode)
    }
})复制代码
此时,运行一下项目,跑起来~
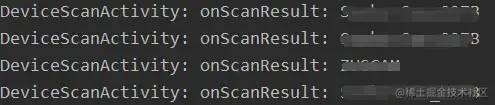
很好,成功扫描到此设备附近的设备,并打印其名称。
5.连接目标设备
扫描到设备后,找到目标设备就可以开始连接了。这里是使用的是 connectGatt(Conext,autoConnect,gattCallback) 方法进行连接。
/*connectGatt 参数说明
* false 是否自动重连
*/private var bluetoothGatt: BluetoothGatt? = nullbluetoothGatt = device?.connectGatt(this, false, object : BluetoothGattCallback() {    override fun onConnectionStateChange(gatt: BluetoothGatt?, status: Int, newState: Int) {        super.onConnectionStateChange(gatt, status, newState)
    }    override fun onServicesDiscovered(gatt: BluetoothGatt?, status: Int) {        super.onServicesDiscovered(gatt, status)
})复制代码
那执行完这个之后,发生了什么呢?
我们把 BluetoothGattCallback 所有的方法都重写一遍,并加上打印日志。

我们主动打印的日志,有一个 onConnectionStateChange : 2 。这里的 2 又代表是什么呢?
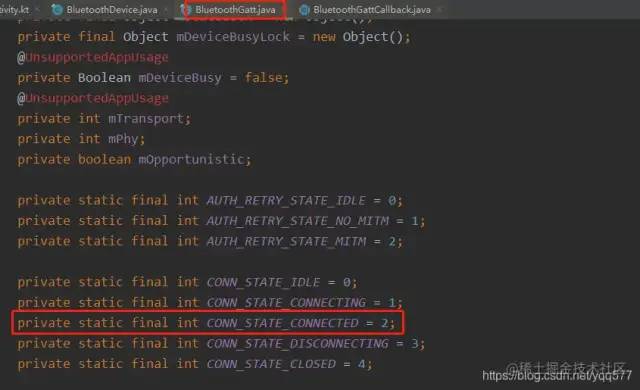
在 BluetoothGatt 中找到了答案,那就是成功了~
我们很自然会想到下一步就应该是【发送信息】了。但,到真正能通信,还有一段路呢。
6.搜索服务
至于为什么需要搜索服务,后面会更文说明。
那么。我们调用 bluetoothGatt.discoverServices() 就可以执行发现服务的动作。bluetoothGatt 哪里来的?看看【连接】部分的内容,我们发现了,在连接成功后返回的值,赋给了 bluetoothGatt
那么 bluetoothGatt 又是什么呢?
//简单的来说,就是与其他设备沟通交流This class provides Bluetooth GATT functionality to enable communicationwith Bluetooth Smart or Smart Ready devices.复制代码
好了,现在我们看看执行完 bluetoothGatt.discoverServices() 又发生了什么变化吧。
override fun onConnectionStateChange(gatt: BluetoothGatt?, status: Int, newState: Int) {    super.onConnectionStateChange(gatt, status, newState)
    Log.e(TAG, "onConnectionStateChange: $newState")    if (newState == 2) {
        bluetoothGatt?.discoverServices()
        Log.i(TAG, "onConnectionStateChange:发现服务ing ")
    }
}复制代码
看日志

这个 0 是发现服务的一个结束信号。结束后,我们可以通过 getServices() 拿到已经发现的服务。具体用哪个服务,需要跟硬件端确认。
7.打开通知通道
假设已经跟硬件端确认好了所需信息(通知通道 uuid,通知通道的描述符 uuid )
这时,确实可以开始写入消息。但是,我们得不到回应。因为我们没有打开通知通道。所以,接下来我们需要打开通知通道
private fun openNotifyChannel(){    //step1:获取到该服务的【通知通道】的特征值
    val notificationCharacteristic = bluetoothGatt!!.services[3].characteristics[2]    //step2:通过setCharacteristicNotification的方法打开通道
    bluetoothGatt?.setCharacteristicNotification(notificationCharacteristic, true)    //为了达到去敏,uuid 非真实存在
    //step3:获取描述符,并且为描述符设置对应的属性
    val descriptor = notificationCharacteristic.getDescriptor(UUID.fromString("00001234-0000-1000-8000-0080asdfghjk"))
    descriptor.value = BluetoothGattDescriptor.ENABLE_NOTIFICATION_VALUE    //setp4:向设备写入上述的描述符
    bluetoothGatt?.writeDescriptor(descriptor)
}复制代码
8.写入数据
终于来到最后一步了~
//step1:获取到写通道的特征值val gattCharacteristic =bluetoothGatt?.getService(UUID.fromString(SERVIC_EUUID))?.getCharacteristic(UUID.fromString(WRITER_UUID))//step2:把我们要发送的信息存在上述特征值中gattCharacteristic?.value="QCoder,U are so handsome.".toByteArray()//step3:向设备写入上面的特征值bluetoothGatt?.writeCharacteristic(gattCharacteristic)复制代码
这样,对方就收到我们的消息了。
如果你发的消息,对方想回复(提前协商好的指令)。
那么我们将会在下面这个方法中收到
override fun onCharacteristicChanged(gatt: BluetoothGatt?, characteristic: BluetoothGattCharacteristic?) {    super.onCharacteristicChanged(gatt, characteristic)
    Log.e(TAG, "onCharacteristicChanged: ${characteristic?.value}")    //处理数据的函数
    dealDataCenter(characteristic!!)
}复制代码
通过 characteristic?.value 可以获取到,一个字节数组的内容。
后续的数据如何处理,就自己根据业务自己处理即可。
结语
以上的内容,总体上感知一下 BLE 蓝牙开发的流程。
最后,记录处理蓝牙设备返回的数据是 json 格式的数据的处理函数。
fun dealDataCenter(characteristic: BluetoothGattCharacteristic){        //拿到传回来的原始数据 byte数组
        val content = characteristic.value        //转成 string类型
        var response = ByteUtils.toHexString(content)
        Log.i(TAG, "dealFuncData: response --- $response")        //去除逗号
        response = response.replace(",".toRegex(), "")        //去除空格
        response = response.replace(" ".toRegex(), "")        //去除第一个和最后一个字符,即去除最外层的 [ ]
        response = response.substring(1, response.length - 1)        /***********************数据拼包-开始**************************/
        //数据头
        counter = 0
        val prefixNum = countStr(response, PREFIX)
        counter = 0
        val suffixNum = countStr(response, SUFFIX)
        prefixCount += prefixNum - suffixNum
        packData += response
        Log.i(TAG, "dealFuncData: packData --- $packData")
        Log.i(TAG, "dealFuncData: prefixCount---$prefixCount")        if (prefixCount != 0) {            return
        }        /***********************数据拼包-结束**************************/

        val result = ByteUtil.fromHexString(packData)
    }    // 计算str2 在 str1 的个数
    private fun countStr(str1: String, str2: String): Int {        if (str1.indexOf(str2) == -1) {            return 0
        } else if (str1.indexOf(str2) != -1) {
            counter++
            countStr(
                    str1.substring(
                            str1.indexOf(str2) +
                                    str2.length
                    ), str2
            )            return counter
        }        return 0
    }复制代码