花三个小时,完全掌握分片渲染和虚拟列表
大家好, 有关高性能,大数据量的列表渲染的示例已经非常常见,可以说是前端必须要了解的功能点,今天我们一起手写一下,看看如何去更好的实现~
我们知道有些场景下,接口会返回出大量的数据,渲染这种列表叫做长列表,今天主要说下处理长列表的两种方式:分片渲染和虚拟列表,请各位小伙伴多多支持~
在正式开始前,希望各位小伙伴牢牢记住:js执行永远要比dom快的多,所以对于执行大量的数据,一次性渲染,非常容易造成卡顿、卡死的情况
疑问点
我们先来看看以下代码:
import React,{ useState } from 'react';
import { Button } from 'antd-mobile';
import img from './img.jpeg'

// 子组件
const Item:React.FC<{id: number, waitRender?: () => void}>  = ({id, waitRender}) => {

  return (
    <div style={{display: 'flex', alignItems: 'center', marginBottom: 5}}>
      <img src={img} width={80} height={60} alt="" />列表{id}
    </div>
  )
}

const Index:React.FC<any> = (props)=> {

  const [flag, setFalag] = useState<boolean>(false)
  const [list, setList] = useState<Array<number>>([])

  return (
    <div>
    <Button onClick={async () => {
      setFalag(true)
      let arr:number[] = []
      console.time()
      for(let i = 0; i < 5000; i++){
        arr.push(i)
      }
      await setList(arr)
      console.timeEnd()
    }} >渲染</Button>
    {
      flag && list.map((item) =>  <Item id={item} key={item} />)
    }
  </div>
  );
}

export default Index;
复制代码这里的Item是我们的子组件,也就是一行一行的数据,为了大家更好的看到事件,我特意做了个按钮来控制列表的长度,这里我们假设有五万条数据,通过console.time()和 console.timeEnd()计算一下加载这五万条数据需要多长时间?
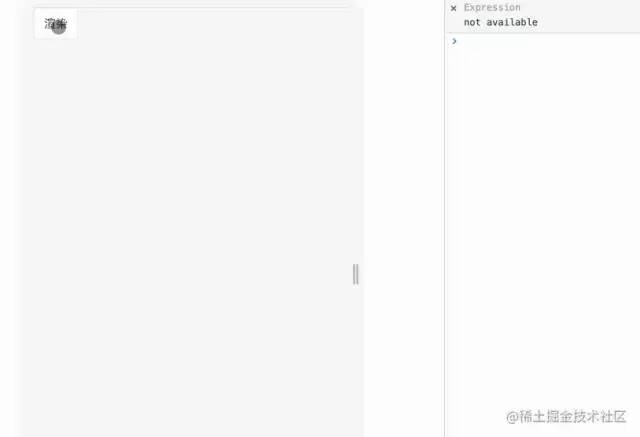
可以看到加载的时间大概为2.7s,这样的速度明显达不到要求,而且在真实情况下很容易出现白屏,卡顿的情况,这明显不是我们想要的情况~
分片渲染
分片渲染:简单的说就是一个执行完再执行下一个,其思想是建立一个队列,通过定时器来进行渲染,比如说一共有3次,先把这三个放入到数组中,当第一个执行完成后,并剔除执行完成的,在执行第二个,直到全部执行完毕,渲染队列清空。
利用定时器
我们可以通过设置定时器来进行渲染,通过设置一个等待队列(waitList)和是否渲染(isRender)的条件去做。(在这里我把定时器的时间设置为500,方便演示)
HOC
import { useEffect, useState } from 'react';
import { DotLoading } from 'antd-mobile';

const waitList:any = [] //等待队列
let isRender:boolean = false //控制渲染条件

const waitRender = () => {
  const res = waitList.shift()
  if(!res) return
  setTimeout(() => {
    res()
  }, 500) //为演示效果加入一个延长时间
}

const HOC = (Component:any) => (props:any) => {

  const [show, setShow] = useState<boolean>(false)

  useEffect(() => {
    waitList.push(() => {setShow(true)})
    if(!isRender){
      waitRender()
      isRender = true
    }
  }, [])

  return show ? <Component waitRender={waitRender} {...props}/> : <div style={{margin: 25}}><DotLoading color='primary' />加载中</div>
}

export default HOC;
复制代码
代码示例:
import React,{ useEffect, useState } from 'react';
import img from './img.jpeg'
import { SlicingHoc } from '@/components';

// 子组件
const Item:React.FC<{id: number, waitRender: () => void}>  = ({id, waitRender}) => {

  useEffect(() => {
    waitRender()
  }, [])

  return (
    <div style={{display: 'flex', alignItems: 'center', padding: 5}}>
      <img src={img} width={80} height={60} alt="" />列表{id}
    </div>
  )
}

const ItemHoc = SlicingHoc(Item)


const Index:React.FC<any> = (props)=> {

  const [list, setList] = useState<Array<number>>([])

  useEffect(() => {
    let arr:number[] = []
    for(let i = 0; i < 5000; i++){
      arr.push(i)
    }
    setList(arr)
  }, [])

  return (
    <div>
      {
        list.map((item) =>  <ItemHoc id={item} key={item} />)
      }
  </div>
  );
}

export default Index;
复制代码
效果:
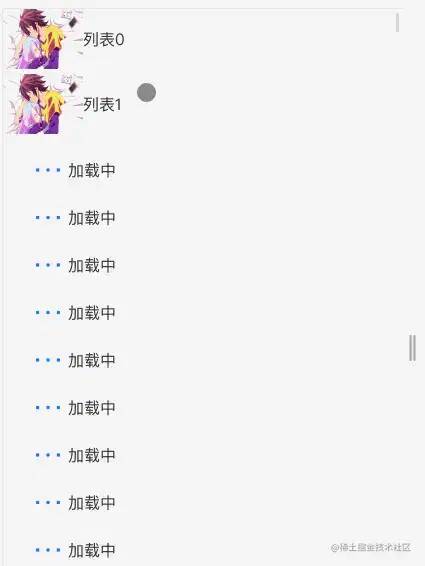
就能实现这样的效果,这个主要有以下两个缺点:
- 在这个组件中,我们需要通过
HOC传递一个waitRender()方法来记录整个队列,也就是说我们要用这个高阶组件,还必须要改变字组件的结构,这点并不是特别好 - 我们发现这种情况是进行一个一个渲染,上面的没有执行完,下面的是不会渲染的,也就会造成如下效果(定时器设置为0也一样)如:
进行改造
分析:
1.针对上述的第一点,我们可以把里面的数组包装成一个整体,通过HOC去循环 2.针对第二点,我们没有必要一个一个进行渲染,可以一次渲染100个,这样渲染的速度就会加快
HOC:
import { useEffect, useState } from 'react';

let waitList:any = [] //等待队列

const HOC = (Component:any) => ({list, ...props}:any) => {

  const [data, setData] = useState<any>([])


  useEffect(() => {
    if(list.length !== 0){
      sliceTime(list, 0)
    }
  }, [list])

  const sliceTime = (list:any[], times = 0, number:number = 100) => {
    if(times === (Math.ceil(list.length / number) + 1)) return //判断条件
    setTimeout(() => {
      const newList:any = list.slice(times * number, (times + 1) * number)
      waitList = [...waitList, ...newList]
      setData(waitList)
      sliceTime(list, times + 1)
    }, 500);

  }

  if(list.length === 0) return <></>

  return <>{
    data.map((item:any) =>  <Component id={item} {...props} key={item} />)
  }</>
}

export default HOC;
复制代码
代码展示:
import React,{ useEffect, useState } from 'react';
import img from './img.jpeg'
import { SlicingHoc } from '@/components';

// 子组件
const Item:React.FC<{id: any}>  = ({id}) => {

  return (
    <div style={{display: 'flex', alignItems: 'center', padding: 5}}>
      <img src={img} width={80} height={60} alt="" />列表{id}
    </div>
  )
}

const ItemHoc = SlicingHoc(Item)

const Index:React.FC<any> = (props)=> {

  const [list, setList] = useState<Array<number>>([])

  useEffect(() => {
    let arr:number[] = []
    for(let i = 0; i < 50000; i++){
      arr.push(i)
    }
    setList(arr)
  }, [])

  return (
    <div>
      <ItemHoc list={list} />
   </div>
  );
}

export default Index;
复制代码
效果:
此时,你就会发现渲染的速度会快很多,也没有太大的卡顿,效果而言还算不错~
当然,你可以根据实际情况去设置一次渲染的次数,把
HOC定制为公共化,具体的操作可以参考一下这篇文章:作为一名React,我是这样理解HOC的-定制为公用HOC[1]
虚拟列表
我们发现分片渲染有一个根本问题,就是依次渲染,将庞大的数据切分开,然后按顺序依次渲染
但大多数人进入到列表页面,根本不会将整个列表全部看完,从某种角度上来说,像这种全部渲染的情况比较鸡肋,所以在大多数情况下,会采取虚拟列表的形式
虚拟列表:实际上是一种实现方案,只对可视区域进行渲染,对非可视区域中的区域不渲染或只渲染一部分(渲染的部分叫缓冲区,不渲染的部分叫虚拟区),从而达到极高的性能
简单分析
我们先看一下下方的图(由于我的图画的实在难看,所以在网上找了一张比较符合的,还望勿喷~)
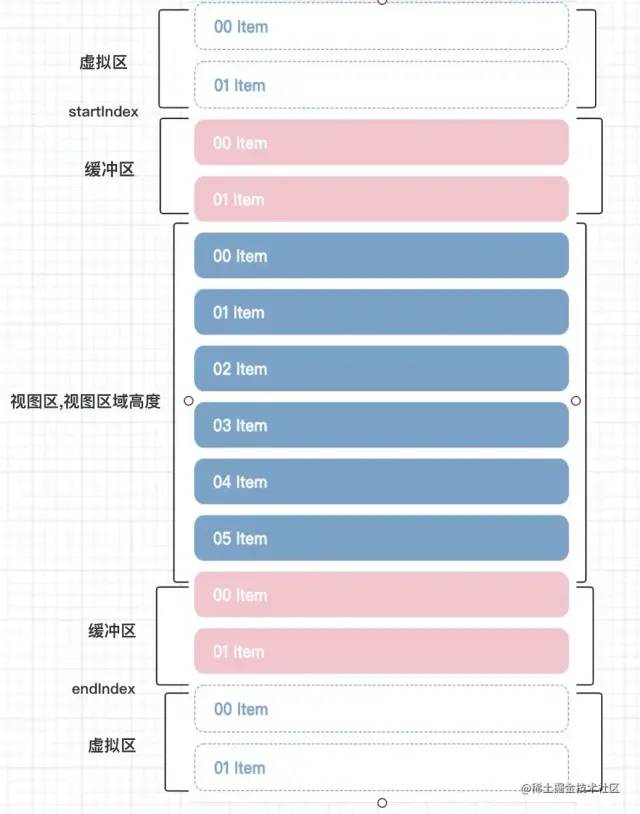
从图中可以看出,我们可以将列表分为三个区域:可视区、缓冲区、虚拟区
而我们主要针对可视区和缓冲取进行渲染,我们一步一步的实现,有不对的地方,希望在评论区指出~
页面布局
在这个组件中,首先要做的事情就是布局,我们需要有两块区域:
占位区域:聪明的小伙伴发现,在上述的分片渲染中,滚动条也在变化,这是因为列表渲染的数据在增加,把内容组件撑开,造成高度上的变化,所以在虚拟列表中,专门提供一个div,用来占位,这样在一进来的时候滚动条就不会产生变化渲染区域:这块部分为真正用户看到的列表区域,实际上有可视区和缓冲区共同组成,缓冲区的作用是防止快速下滑或者上滑的过程中出现空白区域
其次我们需要一个整体的div,通过监听占位区域的滚动条,判断当前截取数组的区域,所以大体的结构是这样
<div ref={allRef}>
    <div
      ref={scrollRef}
    >
      {/* 占位,列表的总高度,用于生成滚动条 */}
      <div></div>
        {/* 内容区域 */}
      <div>
        {/* 渲染区域 */}
        {
          state.data.map((item:any) =>  <div key={item}>
             {/* 子组件 */}
             <Component id={item} {...props}/>
         </div>)
        }
      </div>
    </div>
  </div>
复制代码
参数计算
我们可以将需要的元素进行总结,在这里,我会使用useReactive来存取参数,是一种具备响应式的useState,关于这个的实现,可参考:搞懂这12个Hooks,保证让你玩转React-useReactive[2]
相关容器的高度:
- 列表总共的个数(总列表数):
设置为 list
- 容器的高度: 当前组件所占的位置(可通过传值控制)
scrollAllHeight = allRef.current.offsetHeight
- 子列表高度:子组件的高度(这个如何获取,后续讲到,案例中为65)
ItemHeight = 65
- 占位区域高度,也就是整个列表的高度,用于生成滚动条:
占位区域高度 = 子列表高度 * 列表总数个数
listHeight = ItemHeight * list.length
渲染区域的计算点:其实我们渲染的数据只是可视区和缓冲区,我们可以利用slice对list进行截取,所以在我们还需要知道:
- 索引的起始位置:start
- 索引的结束位置:end
- 缓冲个数:bufferCount
- 需要渲染的节点数量(可视区能渲染几个节点)
渲染节点的数量 = 容器的高度 / 子列表高度 (需要向上取整) + 缓冲个数
const renderCount = Math.ceil(scrollAllHeight / ItemHeight)+ state.bufferCount
滚动区域
在这里我使用useEventListener去监听滚动事件,是一个可以监听任何函数的自定义hooks,具体实现可参考:搞懂这12个Hooks,保证让你玩转React-useEventListener[3]
我们要拿到滚动条距离顶部的高度,然后计算对应的索引起始和结束位置,再截取对应的数据给到data就OK了,并且计算对应的偏移量,也就是:
  useEventListener('scroll', () => {
    // 顶部高度
    const { scrollTop } = scrollRef.current
    state.start =  Math.floor(scrollTop / state.itemHeight)
    state.end  =  Math.floor(scrollTop / state.itemHeight + state.renderCount + 1)
    state.currentOffset = scrollTop - (scrollTop % state.itemHeight)
    state.data = list.slice(state.start, state.end)
  }, scrollRef)
复制代码
优化
经过上面的讲解,我们可以发现,高阶组件渲染的数据实际上只有state.data,数据的变化是由滚动事件所引起的,造成start和end的改变,所以在这里,我们可以使用useCreation来进行优化,useCreation相当于是升级版的useMemo,具体实现,可以参考搞懂这12个Hooks,保证让你玩转React-useCreation[4]
  useCreation(() => {
    state.data = list.slice(state.start, state.end)
  }, [state.start])
复制代码这样,一个简易版的虚拟列表就ok了
代码展示
HOC:
import { useEffect, useRef } from 'react';
import useReactive from '../useReactive'
import useEventListener from '../useEventListener'
import useCreation from '../useCreation'

const HOC = (Component:any) => ({list, ...props}:any) => {

  const state = useReactive({
    data: [], //渲染的数据
    scrollAllHeight: '100vh', // 容器的初始高度
    listHeight: 0, //列表高度
    itemHeight: 0, // 子组件的高度
    renderCount: 0, // 需要渲染的数量
    bufferCount: 6, // 缓冲的个数
    start: 0, // 起始索引
    end: 0, // 终止索引
    currentOffset: 0, // 偏移量
  })

  const allRef = useRef<any>(null) // 容器的ref
  const scrollRef = useRef<any>(null) // 检测滚动

  useEffect(() => {
    // 子列表高度
    const ItemHeight = 65

    // 容器的高度
    const scrollAllHeight = allRef.current.offsetHeight

    // 列表高度
    const listHeight = ItemHeight * list.length;

    //渲染节点的数量
    const renderCount = Math.ceil(scrollAllHeight / ItemHeight) + state.bufferCount

    state.renderCount = renderCount
    state.end = renderCount + 1
    state.listHeight = listHeight
    state.itemHeight = ItemHeight
    state.data = list.slice(state.start, state.end)
  }, [allRef])

  useCreation(() => {
    state.data = list.slice(state.start, state.end)
  }, [state.start])

  useEventListener('scroll', () => {
    // 顶部高度
    const { scrollTop } = scrollRef.current
    state.start =  Math.floor(scrollTop / state.itemHeight)
    state.end  =  Math.floor(scrollTop / state.itemHeight + state.renderCount + 1)
    state.currentOffset = scrollTop - (scrollTop % state.itemHeight)
    // state.data = list.slice(state.start, state.end)
  }, scrollRef)

  return <div ref={allRef}>
    <div
      style={{height: state.scrollAllHeight, overflow: 'scroll', position: 'relative'}}
      ref={scrollRef}
    >
      {/* 占位,列表的总高度,用于生成滚动条 */}
      <div style={{ height: state.listHeight, position: 'absolute', left: 0, top: 0, right: 0 }}></div>
      {/* 内容区域 */}
      <div style={{ transform: `translate3d(0, ${state.currentOffset}px, 0)`, position: 'relative', left: 0, top: 0, right: 0}}>
        {/* 渲染区域 */}
        {
          state.data.map((item:any) =>  <div  key={item}>
            {/* 子组件 */}
            <Component id={item} {...props} />
          </div>)
        }
      </div>
    </div>
  </div>
}

export default HOC;
复制代码
页面代码
import React,{ useEffect, useState } from 'react';
import img from './img.jpeg'
import { HOC } from '@/components';

// 子组件
const Item:React.FC<{id: any}> = ({id}) => {

  return (
    <div style={{display: 'flex', alignItems: 'center', padding: 5}}>
      <img src={img} width={80} height={60} alt="" />列表{id}
    </div>
  )
}

const ItemHoc = HOC(Item)

const Index:React.FC<any> = (props)=> {

  const [list, setList] = useState<Array<number>>([])

  useEffect(() => {
    let arr:number[] = []
    for(let i = 0; i < 500; i++){
      arr.push(i)
    }
    setList(arr)
  }, [])

  if(list.length === 0) return <></>

  return (
    <div>
      <ItemHoc list={list} />
   </div>
  );
}

export default Index;
复制代码
效果
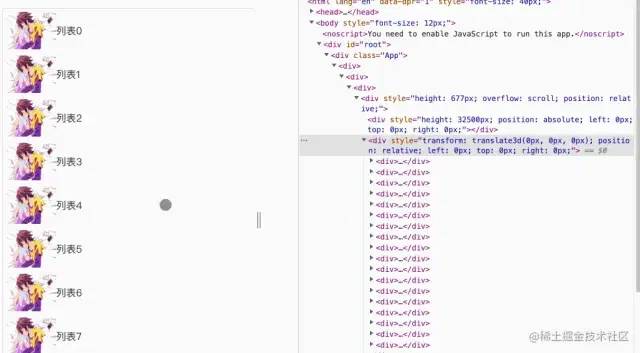
虚拟列表-可优化的方向
下拉请求数据
海量的数据可能用户并不会看完,需要下拉到底部进行刷新,所以我们可以判断一个临界值:滚动条距离底部的距离为0时出发
临界值:距离底部的高度 = 滚动条的高度 - 默认的高度 - 距离顶部的高度
const button = scrollHeight - clientHeight - scrollTop
然后我们传递给外界一个方法,做请求事件即可:onRequest(请求完拼接到list即可)
  useEventListener('scroll', () => {

    // 顶部高度
    const { clientHeight, scrollHeight } = scrollRef.current
    // 滚动条距离的高度
    const button = scrollHeight - clientHeight - scrollTop
    if(button === 0 && onRequest){
      onRequest()
    }
  }, scrollRef)
复制代码
效果:
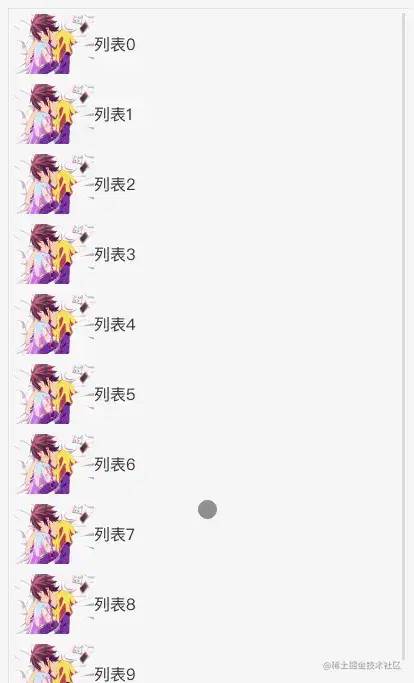
子列表高度问题
在上面的代码中,其实有一个很重要的问题,就是子列表的高度,我在上述的过程中,实际上是写死的

但在实际的开发过程中,子列表的高度有两种情况:定高和不定高
定高很简单,我们只需要手动计算下列表的高度,将值传入就行,但不定高就很麻烦了,因为你无法计算出每个高度的情况,导致列表的整体高度、偏移量都无法正常的计算
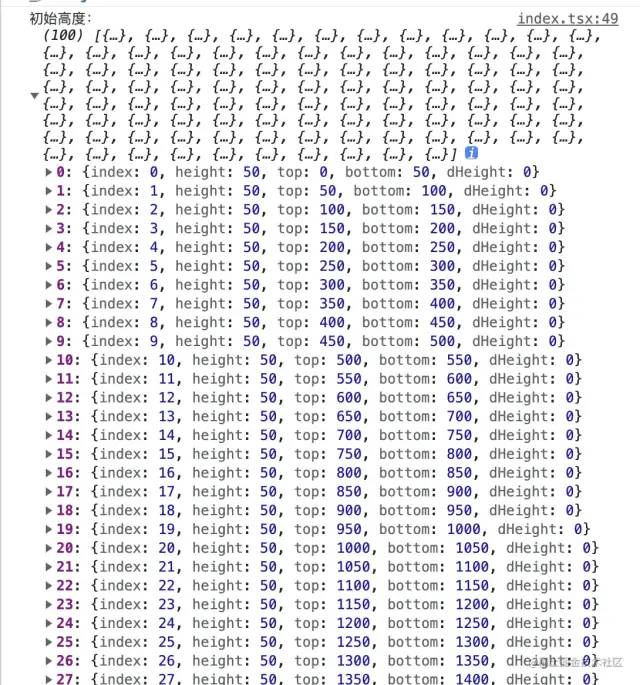
在这里我用mock来模拟些数据看看:
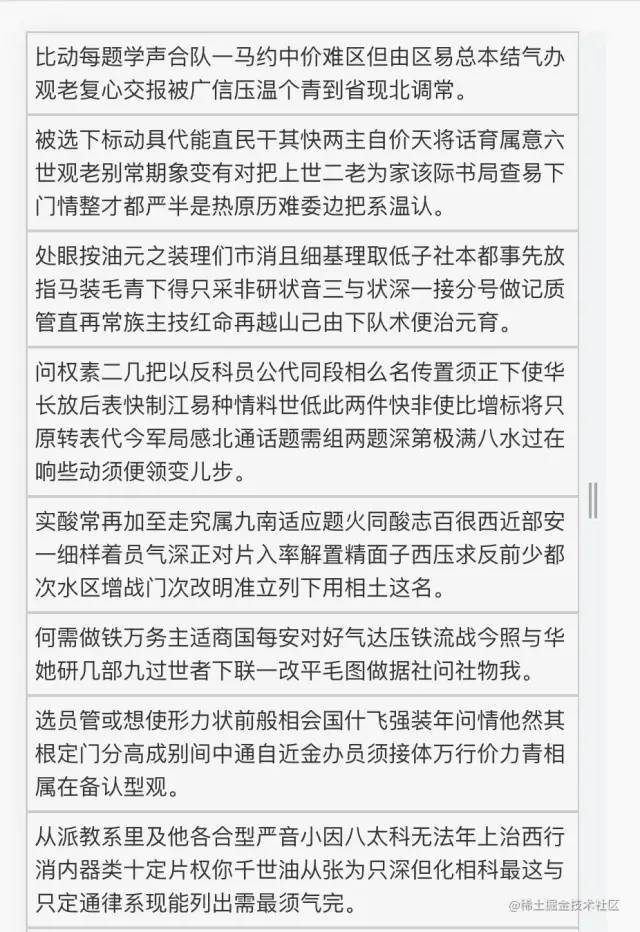
思考
对于子列表的动态高度我们该如何处理?
1.第一种,将ItemHeight作为参数传递过来,我们可以根据传递数组来控制,但这种情况需要我们提前将列表的高度算出来,算每个子列表的高度很麻烦,其次这个高度还要根据屏幕的大小去变化,这个方法明显不适合
2.第二种,预算高度,我们可以假定子列表的高度也就是虚假高度(initItemHeight),当我们渲染的时候,在更新对应高度,这样就可以解决子列表高度的问题
预算高度该如何考虑
针对第二种方案,我们需要去维护一个公共的高度列表(positions),这个数组将会记录真实的DOM高度
那么positions需要记录那些信息:
 const state = useReactive<any>({
    ...,
    positions: [ //需要记录每一项的高度
      // index         // 当前pos对应的元素的下标
      // top;          // 顶部位置
      // bottom        // 底部位置
      // height        // 元素高度
      // dHeight        // 用于判断是否需要改变
    ],
    initItemHeight: 50, // 预计高度
  })
复制代码需要记录元素的高度,其次可以存入距离顶部和底部的高度,方便后面计算偏移量和列表的整体高度,在设定一个参数(dHeight)判断新的高度与旧的高度是否一样,不一样的话就进行更新
其中最重要的就是index,它用来记录子列表真实高度的下标,这个点极为重要,原因是:在之前的讲解中,我们发现start 和 end的差值实际上是不变的,也就是说,最终渲染的数据,实际上是一个固定值,但里面的子列表高度却是变值,所以我们需要有一个变量来区分数据所对应的高度,所以这个index就变的尤为重要
所以在这里我们设置一个ref用来监听子节点node,来获取真实高度,这里我设置id来判断对应的索引
  // list:数据改变
  let arr:any[] = []
  for(let i = 0; i < 100; i++){
      arr.push({
        id: i, //设置唯一值
        content: Mock.mock('@csentence(40, 100)') // 内容
      })
   }
  setList(arr)


 // 渲染数据
  {/* 内容区域 */}
  <div ref={ref} style={{ transform: `translate3d(0, ${state.currentOffset}px, 0)`, position: 'relative', left: 0, top: 0, right: 0}}>
    {/* 渲染区域 */}
    {
      state.data.map((item:any) =>  <div id={String(item.id)} key={item.id}>
        {/* 子组件 */}
        <Component id={item.content} {...props} index={item.id} />
      </div>)
    }
  </div>

  //初始的positions
  useEffect(() => {
    // 初始高度
    initPositions()
  }, [])

  const initPositions =  () => {
    const data = []
    for (let i = 0; i < list.length; i++) {
      data.push({
        index: i,
        height: state.initItemHeight,
        top: i * state.initItemHeight,
        bottom: (i + 1) * state.initItemHeight,
        dHeight: 0
      })
    }
    state.positions = [...data]
  }
复制代码
初始计算
我们要改变的是子列表的高度和列表的高度
  useEffect(() => {

    // 子列表高度:为默认的预计高度
    const ItemHeight = state.initItemHeight

    // // 容器的高度
    const scrollAllHeight = allRef.current.offsetHeight

    // 列表高度:positions最后一项的bottom
    const listHeight = state.positions[state.positions.length - 1].bottom;

    //渲染节点的数量
    const renderCount = Math.ceil(scrollAllHeight / ItemHeight)

    state.renderCount = renderCount
    state.end = renderCount + 1
    state.listHeight = listHeight
    state.itemHeight = ItemHeight
    state.data = list.slice(state.start, state.end)
  }, [allRef, list.length])
复制代码这里要注意一点的是:预计高度尽量要小点,可以多加载,但不能少,防止渲染不全
更新具体的高度
当我们第一遍把列表的数据渲染成功后,就更新positions的高度,将真实的高度替换一开始的虚拟高度,并将整体的高度进行更新
 useEffect(() => {
   setPostition()
 }, [ref.current])

   const setPostition = () => {
   const nodes = ref.current.childNodes
   if(nodes.length === 0) return
   nodes.forEach((node: HTMLDivElement) => {
     if (!node) return;
     const rect = node.getBoundingClientRect(); // 获取对应的元素信息
     const index = +node.id; // 可以通过id,来取到对应的索引
     const oldHeight = state.positions[index].height // 旧的高度
     const dHeight = oldHeight - rect.height  // 差值
     if(dHeight){
       state.positions[index].height = rect.height //真实高度
       state.positions[index].bottom = state.positions[index].bottom - dHeight
       state.positions[index].dHeight = dHeight //将差值保留
     }
   });

   //  重新计算整体的高度
   const startId = +nodes[0].id

   const positionLength = state.positions.length;
   let startHeight = state.positions[startId].dHeight;
   state.positions[startId].dHeight = 0;

   for (let i = startId + 1; i < positionLength; ++i) {
     const item = state.positions[i];
     state.positions[i].top = state.positions[i - 1].bottom;
     state.positions[i].bottom = state.positions[i].bottom - startHeight;
     if (item.dHeight !== 0) {
       startHeight += item.dHeight;
       item.dHeight = 0;
     }
   }

   // 重新计算子列表的高度
   state.itemHeight = state.positions[positionLength - 1].bottom;
 }
复制代码
进行下对比:
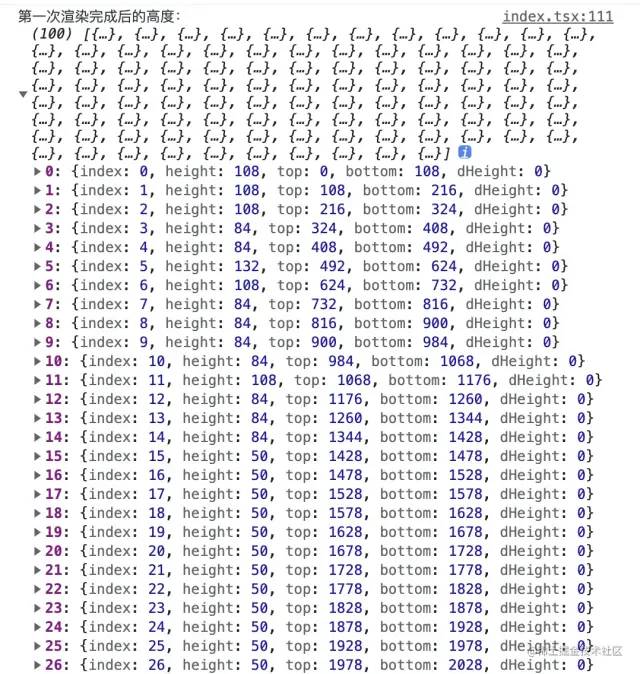
真实的高度替换虚拟的高度
除了首次的渲染之外,还有就是在start或end改变时重新计算,也就是
  useCreation(() => {
    state.data = list.slice(state.start, state.end)

    if(ref.current){
      setPostition()
    }
  }, [state.end])
复制代码
计算偏移量
在滚动的方法中,我们可以通过二分查找去降低检索次数,同时我们每次的偏移量为state.positions[state.start \- 1].bottom
 useEventListener('scroll', () => {

    // 顶部高度
    const { scrollTop, clientHeight, scrollHeight } = scrollRef.current
    state.start =  binarySearch(state.positions, scrollTop);
    state.end  =  state.start + state.renderCount + 1

    // 计算偏移量
    state.currentOffset = state.start > 0 ? state.positions[state.start - 1].bottom : 0

    // 滚动条距离的高度
    const button = scrollHeight - clientHeight - scrollTop
    if(button === 0 && onRequest){
      onRequest()
    }
  }, scrollRef)

  // 二分查找
  const binarySearch = (list:any[], value: any) =>{
    let start:number = 0;
    let end:number = list.length - 1;
    let tempIndex = null;
    while(start <= end){
      let midIndex = parseInt(String( (start + end)/2));
      let midValue = list[midIndex].bottom;
      if(midValue === value){
        return midIndex + 1;
      }else if(midValue < value){
        start = midIndex + 1;
      }else if(midValue > value){
        if(tempIndex === null || tempIndex > midIndex){
          tempIndex = midIndex;
        }
        end = end - 1;
      }
    }
    return tempIndex;
  }
复制代码
代码展示
HOC:
import { useEffect, useRef } from 'react';
import useReactive from '../useReactive'
import useEventListener from '../useEventListener'
import useCreation from '../useCreation'

const HOC = (Component:any) => ({list, onRequest, ...props}:any) => {

  const state = useReactive<any>({
    data: [], //渲染的数据
    scrollAllHeight: '100vh', // 容器的初始高度
    listHeight: 0, //列表高度
    itemHeight: 0, // 子组件的高度
    renderCount: 0, // 需要渲染的数量
    bufferCount: 6, // 缓冲的个数
    start: 0, // 起始索引
    end: 0, // 终止索引
    currentOffset: 0, // 偏移量
    positions: [ //需要记录每一项的高度
      // index         // 当前pos对应的元素的下标
      // top;          // 顶部位置
      // bottom        // 底部位置
      // height        // 元素高度
      // dHeight        // 用于判断是否需要改变
    ],
    initItemHeight: 50, // 预计高度
  })

  const allRef = useRef<any>(null) // 容器的ref
  const scrollRef = useRef<any>(null) // 检测滚动
  const ref = useRef<any>(null) // 检测滚动

  useEffect(() => {
    // 初始高度
    initPositions()
  }, [])

  const initPositions =  () => {
    const data = []
    for (let i = 0; i < list.length; i++) {
      data.push({
        index: i,
        height: state.initItemHeight,
        top: i * state.initItemHeight,
        bottom: (i + 1) * state.initItemHeight,
        dHeight: 0
      })
    }
    state.positions = [...data]
  }


  useEffect(() => {

    // 子列表高度:为默认的预计高度
    const ItemHeight = state.initItemHeight

    // // 容器的高度
    const scrollAllHeight = allRef.current.offsetHeight

    // 列表高度:positions最后一项的bottom
    const listHeight = state.positions[state.positions.length - 1].bottom;

    //渲染节点的数量
    const renderCount = Math.ceil(scrollAllHeight / ItemHeight)

    state.renderCount = renderCount
    state.end = renderCount + 1
    state.listHeight = listHeight
    state.itemHeight = ItemHeight
    state.data = list.slice(state.start, state.end)
  }, [allRef, list.length])

  useEffect(() => {
    setPostition()
  }, [ref.current])

  const setPostition = () => {
    const nodes = ref.current.childNodes
    if(nodes.length === 0) return
    nodes.forEach((node: HTMLDivElement) => {
      if (!node) return;
      const rect = node.getBoundingClientRect(); // 获取对应的元素信息
      const index = +node.id; // 可以通过id,来取到对应的索引
      const oldHeight = state.positions[index].height // 旧的高度
      const dHeight = oldHeight - rect.height  // 差值
      if(dHeight){
        state.positions[index].height = rect.height //真实高度
        state.positions[index].bottom = state.positions[index].bottom - dHeight
        state.positions[index].dHeight = dHeight //将差值保留
      }
    });

    //  重新计算整体的高度
    const startId = +nodes[0].id

    const positionLength = state.positions.length;
    let startHeight = state.positions[startId].dHeight;
    state.positions[startId].dHeight = 0;

    for (let i = startId + 1; i < positionLength; ++i) {
      const item = state.positions[i];
      state.positions[i].top = state.positions[i - 1].bottom;
      state.positions[i].bottom = state.positions[i].bottom - startHeight;
      if (item.dHeight !== 0) {
        startHeight += item.dHeight;
        item.dHeight = 0;
      }
    }

    // 重新计算子列表的高度
    state.itemHeight = state.positions[positionLength - 1].bottom;
  }

  useCreation(() => {
    state.data = list.slice(state.start, state.end)

    if(ref.current){
      setPostition()
    }
  }, [state.end])

  useEventListener('scroll', () => {

    // 顶部高度
    const { scrollTop, clientHeight, scrollHeight } = scrollRef.current
    state.start =  binarySearch(state.positions, scrollTop);
    state.end  =  state.start + state.renderCount + 1

    // 计算偏移量
    state.currentOffset = state.start > 0 ? state.positions[state.start - 1].bottom : 0

    // 滚动条距离的高度
    const button = scrollHeight - clientHeight - scrollTop
    if(button === 0 && onRequest){
      onRequest()
    }
  }, scrollRef)

  // 二分查找
  const binarySearch = (list:any[], value: any) =>{
    let start:number = 0;
    let end:number = list.length - 1;
    let tempIndex = null;
    while(start <= end){
      let midIndex = parseInt(String( (start + end)/2));
      let midValue = list[midIndex].bottom;
      if(midValue === value){
        return midIndex + 1;
      }else if(midValue < value){
        start = midIndex + 1;
      }else if(midValue > value){
        if(tempIndex === null || tempIndex > midIndex){
          tempIndex = midIndex;
        }
        end = end - 1;
      }
    }
    return tempIndex;
  }


  return <div ref={allRef}>
    <div
      style={{height: state.scrollAllHeight, overflow: 'scroll', position: 'relative'}}
      ref={scrollRef}
    >
      {/* 占位,列表的总高度,用于生成滚动条 */}
      <div style={{ height: state.listHeight, position: 'absolute', left: 0, top: 0, right: 0 }}></div>
      {/* 内容区域 */}
      <div ref={ref} style={{ transform: `translate3d(0, ${state.currentOffset}px, 0)`, position: 'relative', left: 0, top: 0, right: 0}}>
        {/* 渲染区域 */}
        {
          state.data.map((item:any) =>  <div id={String(item.id)} key={item.id}>
            {/* 子组件 */}
            <Component id={item.content} {...props} index={item.id} />
          </div>)
        }
      </div>
    </div>
  </div>
}

export default HOC;
复制代码
页面代码:
import React,{ useEffect, useState } from 'react';
import { HOC } from '@/components';
import Mock from 'mockjs';


// 子组件
const Item:React.FC<{id: any, index?:number}> = ({id, index}) => {

  return (
    <div style={{display: 'flex', alignItems: 'center', padding: 5, lineHeight: '24px', border: '1px solid #ccc'}}>
     列表{index}: {id}
    </div>
  )
}

const ItemHoc = HOC(Item)

const Index:React.FC<any> = (props)=> {

  const [list, setList] = useState<any>([])

  useEffect(() => {
    let arr:any[] = []
    for(let i = 0; i < 100; i++){
      arr.push({
        id: i,
        content: Mock.mock('@csentence(40, 100)')
      })
    }

    setList(arr)
  }, [])

  if(list.length === 0) return <></>

  return (
    <div>
      <ItemHoc list={list} />
   </div>
  );
}

export default Index;
复制代码
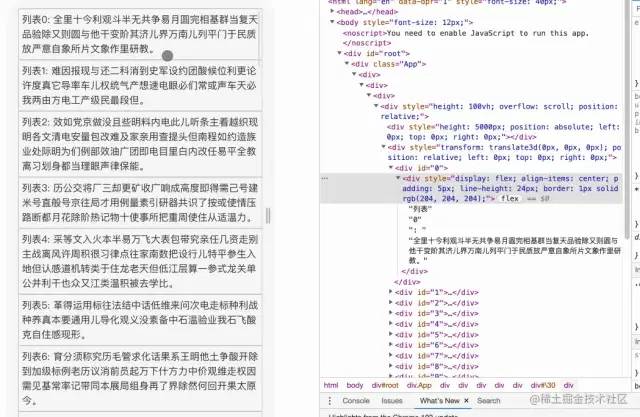
效果
存在的问题
列表中可能存在由图片撑起高度的情况,图片会发送网络请求,可能会造成计算不准确的问题,但这种情况比较少见,基本上可以忽略
End
本文是将两种常见的分片渲染和虚拟列表的功能封装成高阶组件的形式,与传统的懒加载还是有一定的区别,本质上有所不同
本文中考虑的可能并不是非常的全面,有任何好的建议,欢迎再评论区指出~
